
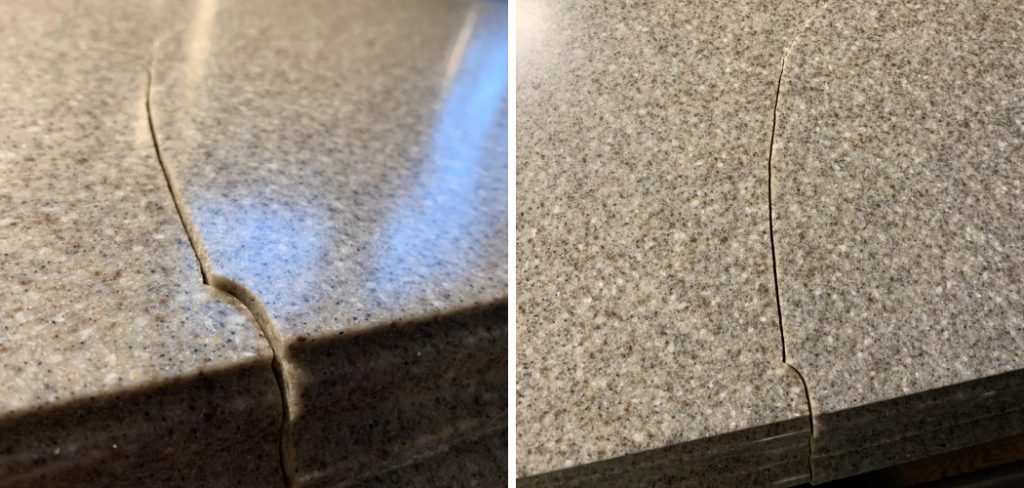
Cracks in Corian countertops can be unsightly and may compromise the durability of the surface over time. Fortunately, with the right tools and techniques, these cracks can be repaired effectively, restoring the countertop to its original condition. This guide will walk you through the basic steps of how to repair a crack in corian countertop, ensuring a seamless and professional result.
When to Repair vs. Replace
Deciding whether to repair or replace a Corian countertop depends on the extent of the damage and the overall condition of the surface. Small cracks, chips, or scratches are often repairable using tools and adhesive fillers designed specifically for Corian. These repairs are cost-effective and can restore the countertop’s functionality and appearance without the need for a full replacement.
However, if the damage is extensive—such as long, deep cracks that compromise the structural stability—or if the countertop has multiple areas of wear, replacement might be the better option. Additionally, if the countertop is old and showing signs of widespread deterioration, replacing it may provide a fresher, longer-lasting solution. Assessing the situation carefully can help determine the most practical approach for your needs.
Tools and Materials Needed
To successfully repair a crack in your Corian countertop, you will need the following tools and materials:
- Sandpaper (various grits, including fine and medium) for smoothing the surface.
- Corian repair adhesive or color-matched epoxy to fill the crack seamlessly.
- Clamps to hold the repaired area tightly while the adhesive sets.
- Plastic scraper or putty knife for applying the adhesive.
- Masking tape to protect surrounding areas from excess adhesive.
- Alcohol or acetone for cleaning the surface before application.
- Polishing compound to restore the countertop’s shine after the repair.
- Soft cloths or rags to clean and buff the surface.
Having these tools and materials prepared beforehand will ensure a smoother repair process with professional-quality results.
10 Methods How to Repair a Crack in Corian Countertop
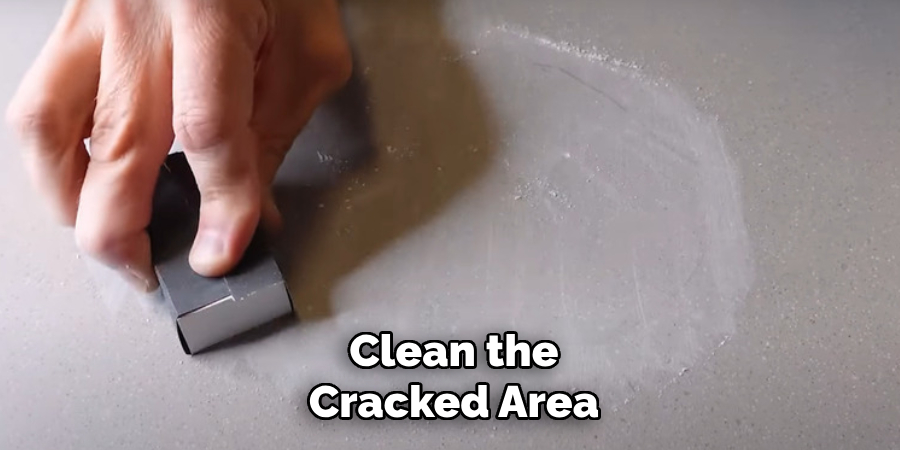
1. Cleaning and Preparing the Cracked Surface
Before attempting any repairs, it is essential to thoroughly clean the cracked area. Use a mild dish soap mixed with warm water to remove any dirt, grease, or debris. Dry the surface completely with a lint-free cloth. If necessary, use isopropyl alcohol to ensure the area is free from oils and contaminants. Proper preparation ensures a strong and lasting repair bond.
2. Using Seam Adhesive for Small Cracks
For minor cracks, a Corian-compatible seam adhesive can be used. Apply a small amount of the adhesive directly into the crack, ensuring it fills the entire gap. Press the two sides of the crack together and use clamps or masking tape to hold them in place while the adhesive cures. Once dry, sand the area with fine-grit sandpaper to smooth out any excess adhesive and blend the repair seamlessly with the rest of the countertop.
3. Filling the Crack with Epoxy Resin
If the crack is slightly larger, an epoxy resin mixed with a color-matching tint can be used. Carefully inject the resin into the crack using a syringe or a small spatula. Allow the resin to cure fully according to the manufacturer’s instructions. Once hardened, sand the area gently with 220-grit sandpaper, followed by a finer grit for a smooth, polished finish.
4. Using a Corian Repair Kit
A Corian repair kit is designed specifically for fixing cracks and surface damage. These kits typically include color-matched adhesive, sanding pads, and polishing compounds. Follow the instructions provided in the kit to apply the repair adhesive, smooth the surface, and restore the original luster of the countertop. This method ensures a professional-looking finish with minimal effort.
5. Welding the Crack with a Solid Surface Adhesive
For deeper or more severe cracks, a solid surface adhesive (acrylic-based) can be used to weld the damaged area. Apply the adhesive along the crack and use a vacuum clamp to pull the material together tightly. The adhesive fuses with the Corian, creating a strong and nearly invisible bond. Once fully cured, sand and buff the area to match the surrounding surface.

6. Reinforcing the Crack with a Support Strip
If the crack runs along a high-stress area, such as near a sink or cooktop, reinforcing the repair is crucial. Attach a support strip underneath the countertop using a strong adhesive. The strip, made of solid surface material, provides extra strength and prevents the crack from worsening. After reinforcing, fill the visible crack with adhesive and sand it down for a seamless finish.
7. Sanding and Polishing to Minimize Hairline Cracks
For hairline cracks that are not structurally compromising, light sanding and polishing may be enough to make them less visible. Use a fine 400-600 grit sandpaper to gently buff the crack, followed by a polishing compound to restore shine. This method is best for superficial cracks that do not require adhesive repair.
8. Using a Heat Gun to Expand and Re-Seal the Crack
In some cases, applying gentle heat can help a crack close naturally. Use a heat gun on the lowest setting and warm the cracked area evenly. Be cautious not to overheat, as excessive heat can worsen the damage. Once the material becomes slightly pliable, gently press the sides of the crack together and apply a seam adhesive for reinforcement. Allow the area to cool naturally before sanding and polishing.
9. Replacing a Section of the Countertop
If the crack is too large or has severely weakened the structure, replacing a section of the Corian countertop may be necessary. Cut out the damaged portion using a router or circular saw. Prepare a replacement piece of Corian that matches the original color and pattern. Bond the new section using a Corian adhesive, ensuring the seams align perfectly. Sand and polish the area for a seamless integration.
10. Preventing Future Cracks with Proper Maintenance
After repairing the crack, it’s important to take steps to prevent future damage. Avoid placing hot pots or pans directly on the surface, as thermal shock can cause cracking. Use cutting boards to prevent deep scratches that can lead to fractures. Regularly clean the surface with a mild detergent and avoid harsh chemicals that can weaken the material over time. Proper care will extend the lifespan of your Corian countertop and reduce the likelihood of future cracks.

Things to Consider When Repairing a Corian Countertop
When undertaking the repair of a Corian countertop, there are several factors to keep in mind to ensure a successful and durable outcome:
Type and Severity of the Damage
Assess the extent of the crack or damage before deciding on a repair method. Smaller hairline cracks may only require polishing, while deeper or longer cracks might necessitate adhesive or even replacement of a section.
Color Matching
Corian countertops come in a wide range of colors and patterns. To achieve a seamless repair, use color-matched adhesives or repair kits that complement the existing surface. A mismatch can make the repair more noticeable.
Tools and Materials
Ensure you have all the necessary tools and materials prepared before starting the repair process. Using the appropriate equipment, such as fine-grit sandpaper or specific adhesives, will significantly affect the quality of the repair.
Manufacturer Recommendations
Always refer to the guidelines provided by the manufacturer of the countertop. These can help identify suitable repair methods and materials for your specific Corian surface.
Time and Patience
Some repairs, such as those involving adhesive curing or epoxy resin setting, require ample time to achieve proper results. Rushing the process could compromise the repair’s strength and appearance.
Common Mistakes to Avoid
When repairing a Corian countertop, it’s crucial to be aware of some common mistakes that can compromise the quality and durability of the repair. Avoiding these errors will save time and ensure a more professional and lasting result.
1. Skipping Surface Preparation
Failing to clean and prepare the damaged area before starting the repair can result in poor adhesion or uneven finishes. Always remove dirt, grease, and debris thoroughly before applying adhesive or epoxy.
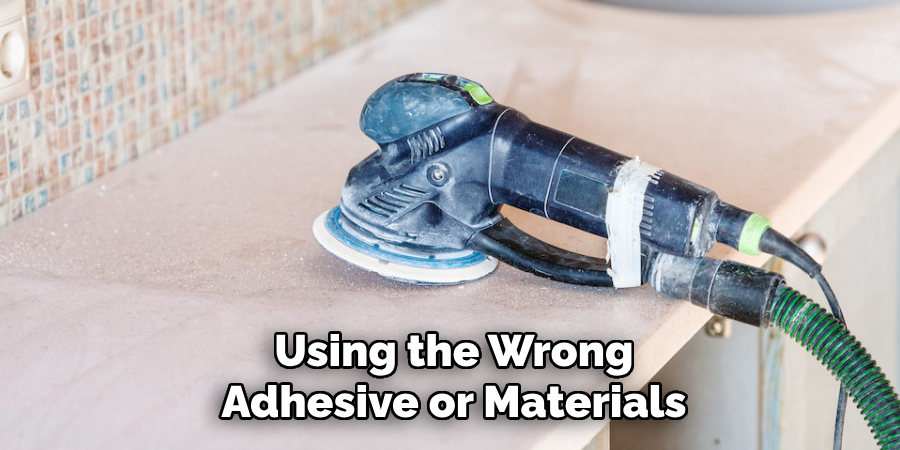
2. Using the Wrong Adhesive or Materials
Not all adhesives or repair materials are suitable for Corian countertops. Using the wrong type can weaken the bond or create an unsightly repair. Always choose adhesives and fillers recommended for solid surface materials.
3. Overheating the Surface
Whether sanding, polishing, or using a heat gun, applying too much heat can damage the countertop permanently. Excessive heat may discolor or warp the material, making the damage worse.
4. Mismatched Color Repairs
One of the most noticeable mistakes is failing to use a color-matching adhesive or filler. An improperly matched repair can make the crack more obvious than the original damage, detracting from the countertop’s appearance.
Conclusion
Repairing a Corian countertop requires careful assessment, the right tools, and proper techniques to ensure a seamless and durable result. By understanding the type and severity of the damage, preparing the surface correctly, and using manufacturer-recommended materials, you can restore your countertop to its original condition. Whether addressing hairline cracks with light sanding or replacing entire sections for more extensive damage, following these guidelines will help maintain the beauty and functionality of your Corian surface. Now that you know how to repair a crack in corian countertop, try it yourself today and feel good about completing such a big DIY job!
Professional Focus
Angela Ervin, a former interior designer turned blogger, specializes in kitchen design and renovations. Through her website, she blends her passion for cooking with design expertise, sharing practical and creative ideas. Known for balancing functionality and beauty, Angela’s insightful content has made her a trusted voice in home design and lifestyle.
About the Author
Angela Ervin, an experienced interior designer and blogger, combines her passion for kitchen renovations with storytelling. Living in Petersburg with her family, she enjoys cooking and testing her projects firsthand. Known for her humor and relatable style, Angela shares creative, functional design insights through her content, making her a trusted voice in home design.
Education History
University: Virginia Commonwealth University
Degree: Bachelor of Fine Arts (BFA) in Interior Design
- Angela’s education at VCU focused on mastering core interior design principles, including spatial planning, color theory, materials selection, and sustainable design practices.
- She gained hands-on experience through studio projects and collaborative design exercises, which honed her ability to create functional and aesthetically pleasing environments.
- Her coursework also emphasized problem-solving and practical applications of design, preparing her for real-world projects like her self-directed kitchen renovations.
- The program’s strong foundation in both technical skills and creative expression shaped Angela’s ability to seamlessly integrate form and function in her work.