
Cleaning the water reservoir of your coffee maker is an essential task to ensure the quality and taste of your coffee, as well as to maintain the longevity of the machine. Over time, mineral deposits, oils, and bacteria can build up inside the reservoir, potentially affecting performance and hygiene. With a few simple steps, you can keep your coffee maker in excellent condition and enjoy fresh, great-tasting coffee every day.
This guide on how to clean a coffee maker water reservoir will walk you through the process of properly cleaning the water reservoir.
Why is It Important to Clean Your Coffee Maker Water Reservoir?
Your coffee maker’s water reservoir is where you add the water that will be used to brew your coffee. If the reservoir is not cleaned regularly, it can become a breeding ground for bacteria and mold. This can lead to a funky taste in your coffee and, even worse, potential health hazards.
Moreover, mineral deposits from hard water can accumulate inside the reservoir and clog the machine’s inner workings. This can affect the flow of water and result in weaker or slower brewing.
Cleaning your coffee maker’s water reservoir should be done every few weeks, depending on how frequently you use it. If you notice any strange odors coming from your coffee maker or your coffee tastes off, it’s a sign that the reservoir needs a thorough cleaning.
Needed Materials
Before diving into the cleaning process, make sure you have the following materials on hand:
Distilled White Vinegar:
This is a natural cleaning agent that can effectively remove mineral deposits and kill bacteria.
Water:
You will need water to rinse out the vinegar after cleaning.
Clean Cloth or Sponge:
This is to wipe down the exterior of the coffee maker and remove any residue inside the reservoir.
Dish Soap:
Optional, but it can be used for an extra thorough clean. Make sure to rinse thoroughly afterward.

8 Step-by-step Guides on How to Clean a Coffee Maker Water Reservoir
Step 1: Prepare
Start by unplugging your coffee maker to ensure safety during the cleaning process. Then, remove the water reservoir if it is detachable. Empty any remaining water from the reservoir and set the coffee maker on a stable, flat surface.
Gather all the needed materials, such as distilled white vinegar, water, a clean cloth or sponge, and dish soap if desired. Having everything ready will make the cleaning process smooth and efficient.
Step 2: Vinegar Solution
Mix a solution of equal parts distilled white vinegar and water. This mixture is highly effective at breaking down mineral deposits and eliminating bacteria or mold inside the reservoir.
If your coffee maker’s water reservoir is particularly dirty or has a strong odor, you can use a slightly higher ratio of vinegar to water for a stronger cleaning solution. Gently pour the vinegar solution into the water reservoir, filling it to its maximum capacity.

Step 3: Soak
Allow the vinegar solution to sit in the reservoir for about 15 to 30 minutes. This soaking time will give the solution an opportunity to break down stubborn mineral deposits, eliminate bacteria, and loosen any buildup inside the reservoir. Avoid turning on the coffee maker during this step, as the goal is to focus on thoroughly cleaning the reservoir before running the machine.
If the buildup is particularly tough, you can gently swish the solution around inside the reservoir to help dislodge any debris.
Step 4: Scrub
After the vinegar solution has soaked, use a clean cloth, sponge, or soft-bristled brush to scrub the inside of the water reservoir. Pay extra attention to corners, edges, and any areas where mineral buildup or residue is visible. Be gentle while scrubbing to avoid scratching the surface of the reservoir.
For stubborn spots, dip your scrubbing tool into the vinegar solution and apply a bit of extra pressure to remove the residue. If your reservoir has a narrow opening, consider using a bottle brush to ensure you can thoroughly clean all areas. Once the scrubbing is complete, pour out the vinegar solution and inspect the reservoir to ensure all buildup has been removed.
Step 5: Rinse
Once the scrubbing is complete, thoroughly rinse the water reservoir with clean, warm water. Make sure to rinse multiple times to remove all traces of the vinegar solution. Any leftover vinegar could impact the flavor of your coffee, so take care to ensure the reservoir is completely clean. If your reservoir is detachable, you can hold it under running water, tipping and rotating it to rinse every corner.
For non-detachable reservoirs, use a clean sponge or cloth soaked in warm water to wipe away any remaining solution. After rinsing, inspect the reservoir to confirm it is free of vinegar or debris before proceeding to the next step.
Step 6: Optional Dish Soap Clean
If you prefer an extra thorough clean, you can use a small amount of dish soap to wash the reservoir after the vinegar rinse. Add a drop or two of mild dish soap to a clean sponge or cloth, then gently scrub the inside of the reservoir. Be sure to reach all corners and edges to remove any lingering residue or buildup.
Once you’ve finished cleaning with dish soap, rinse the reservoir thoroughly with warm water. It’s crucial to remove all soap residue, as even a small amount can affect the taste of your coffee. To ensure the reservoir is completely clean, rinse multiple times and check for any remaining soapy bubbles before moving to the next step.
Step 7: Exterior Wipe-Down
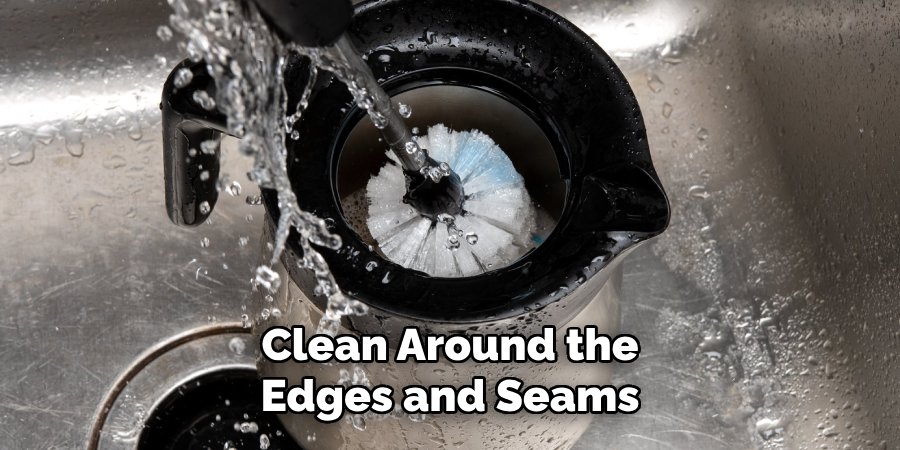
While the inside of the reservoir is drying, take a moment to clean the exterior of your coffee maker and the water reservoir. Use a clean, damp cloth or sponge to wipe down the outer surfaces, removing any stains, dust, or coffee splashes. For any tough spots or sticky residue, you can dampen the cloth slightly with a mild dish soap solution.
Be sure to clean around the edges and seams where dirt might accumulate. Avoid using abrasive scrubbers or harsh cleaning agents to prevent scratching or damaging the finish. Once the exterior is clean, use a dry cloth to gently wipe it down, leaving the surfaces spotless and ready for use. This step helps maintain the overall appearance and hygiene of your coffee maker.
Step 8: Final Rinse
Once the reservoir is fully dry and the exterior is wiped down, you’re ready for a final rinse. Fill the water reservoir with clean, fresh water and run your coffee maker without any coffee grounds or filter. This final rinse will ensure all remaining residue or soap is removed, leaving your coffee maker clean and ready to brew delicious cups of coffee again!
Following these simple steps on how to clean a coffee maker water reservoir will help keep your coffee maker’s water reservoir clean and free of any buildup, ensuring you can continue to enjoy great-tasting coffee every day. Regularly cleaning the water reservoir is an essential part of maintaining your coffee maker and prolonging its lifespan. Make it a weekly or monthly habit, and you’ll not only have a clean reservoir but also a well-functioning and long-lasting coffee maker.
Additional Tips and Maintenance
- As mentioned, it is important to regularly clean your coffee maker’s water reservoir every one to two months, depending on how often you use it. This will help prevent any buildup or bacteria growth and ensure your coffee always tastes fresh.
- In addition to cleaning the reservoir, it is also essential to regularly clean other parts of your coffee maker, such as the filter basket and carafe. These areas can also collect residue and affect the quality of your coffee if not cleaned regularly.
- If you notice a strong odor in your water reservoir even after cleaning, try adding a few drops of lemon juice or baking soda to the vinegar solution. These ingredients can help neutralize any lingering odors.
- For stubborn mineral deposits, you may need to repeat the cleaning process multiple times. You can also try using a descaling solution specifically designed for coffee makers.
- In between deep cleanings, make sure to empty and rinse out the reservoir after each use. This will help prevent any buildup from occurring and keep your coffee maker running smoothly.
- If you have hard water, consider using filtered or bottled water in your coffee maker to reduce mineral buildup over time.
- Finally, always refer to the manufacturer’s instructions for specific cleaning recommendations for your particular model of coffee maker. By taking care of your coffee maker’s water reservoir, you can ensure it continues making delicious cups of coffee for years to come. Happy brewing!
With these steps on how to clean a coffee maker water reservoir, you can keep your coffee maker running smoothly and enjoy fresh, delicious coffee whenever you want. Remember to follow these steps regularly for a clean and hygienic reservoir and refer to the additional tips for further maintenance. Cheers!

Conclusion
Maintaining a clean coffee maker water reservoir is essential for ensuring the longevity of your machine and the quality of your coffee. By incorporating regular cleaning into your routine, you can prevent buildup, eliminate odors, and keep your coffee tasting fresh and delicious.
Following the outlined steps and additional tips on how to clean a coffee maker water reservoir will help you efficiently care for your coffee maker, promoting both hygiene and optimal performance. A little effort goes a long way in preserving the life of your coffee maker and ensuring that every cup you brew is as enjoyable as the first. Happy brewing!
Professional Focus
Angela Ervin, a former interior designer turned blogger, specializes in kitchen design and renovations. Through her website, she blends her passion for cooking with design expertise, sharing practical and creative ideas. Known for balancing functionality and beauty, Angela’s insightful content has made her a trusted voice in home design and lifestyle.
About the Author
Angela Ervin, an experienced interior designer and blogger, combines her passion for kitchen renovations with storytelling. Living in Petersburg with her family, she enjoys cooking and testing her projects firsthand. Known for her humor and relatable style, Angela shares creative, functional design insights through her content, making her a trusted voice in home design.
Education History
University: Virginia Commonwealth University
Degree: Bachelor of Fine Arts (BFA) in Interior Design
- Angela’s education at VCU focused on mastering core interior design principles, including spatial planning, color theory, materials selection, and sustainable design practices.
- She gained hands-on experience through studio projects and collaborative design exercises, which honed her ability to create functional and aesthetically pleasing environments.
- Her coursework also emphasized problem-solving and practical applications of design, preparing her for real-world projects like her self-directed kitchen renovations.
- The program’s strong foundation in both technical skills and creative expression shaped Angela’s ability to seamlessly integrate form and function in her work.