
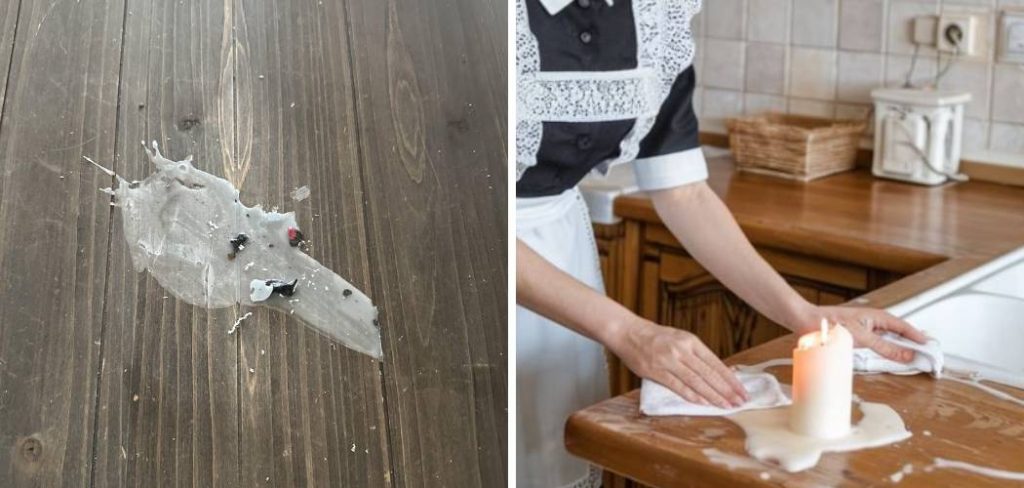
Wax spills on countertops are a common household annoyance, often resulting from candles, waxing products, or melted crayons. These spills can be both unsightly and challenging to address. One of the key reasons why wax is difficult to remove is its ability to harden quickly upon cooling, making it stick stubbornly to surfaces. If not handled correctly, wax can leave behind residue or even cause stains, further complicating the cleanup process.
Different countertop materials, such as granite, laminate, or marble, may also require specific care methods to avoid damage during wax removal.
This article aims to provide effective, step-by-step solutions for addressing these spills, ensuring your countertop remains clean and undamaged. Whether it’s an accidental drop of wax or a major spill, learning how to get wax off a countertop can save time and keep your surfaces looking their best.
Understanding Countertop Materials Before Removing Wax
Why the Material Matters
Different surfaces require different cleaning methods to avoid causing unintended damage during wax removal. Choosing the right approach depends on your countertop type, as each material comes with its own sensitivities and properties.
Common Countertop Types and Their Sensitivities
- Granite & Marble: These natural stone surfaces are porous, meaning they can easily absorb liquids and wax, leading to stains. They are also sensitive to heat and certain harsh chemicals, which can cause etching or discoloration. When tackling wax spills, use gentle methods that do not compromise their integrity.
- Laminate: While laminate surfaces are non-porous and relatively low maintenance, they can be scratched or discolored by abrasive cleaners. Careful attention is required to avoid damaging the finish while removing wax residue.
- Wood & Butcher Block: These organic surfaces are prone to absorbing stains and are highly sensitive to moisture, which can warp or damage the material. Gentle, dry, or minimally damp methods are ideal for these surfaces to prevent harm.
- Quartz & Solid Surface (Corian): These non-porous materials are resistant to stains but can still be heat-sensitive. Using mild, non-abrasive cleaning techniques ensures the surface remains intact without suffering from heat damage or scratches.
Understanding your countertop’s material is crucial to prevent unintended consequences during wax removal and ensure a clean, well-maintained surface.
How to Get Wax Off a Countertop: Scraping Off Hardened Wax
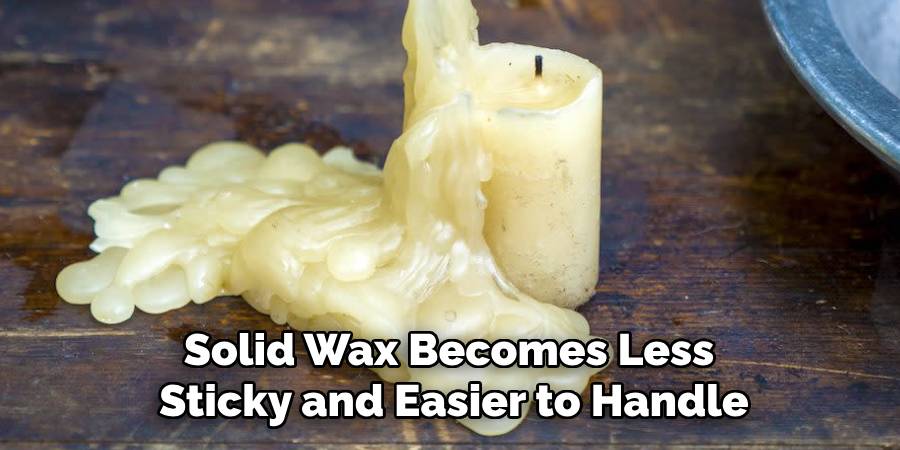
Step 1: Let the Wax Harden
Allowing the wax to harden fully is crucial for easier and safer removal. When solid wax becomes less sticky and easier to handle, minimizing the risk of smearing or spreading it further across the countertop. To speed up the hardening process, you can place an ice pack or a bag of frozen vegetables over the wax for a few minutes. This will solidify the wax completely, ensuring it is ready for removal.
Step 2: Using a Plastic Scraper or Credit Card
Once the wax has hardened, gently use a plastic scraper or the edge of an old credit card to lift it. Start by working the scraper’s edge under the wax, applying light, careful pressure to avoid scratching the surface beneath it. Avoid using metal tools, as these are more likely to leave marks or damage sensitive countertop materials. Be patient during this step; slow and steady movements will help prevent any accidental dents or scratches to the surface.
Step 3: Wiping Away Residual Wax
After the bulk of the wax is removed, use a dry microfiber cloth to pick up any remaining wax bits or residue. The soft texture of the cloth ensures your countertop remains protected while effectively collecting leftover fragments. For stubborn streaks, you may dampen the cloth slightly with a gentle, non-abrasive cleaner suitable for your countertop’s material. If necessary, ensure the surface is fully wiped clean before moving to further cleaning methods.
How to Get Wax Off a Countertop: Removing Wax with Heat
If scraping or wiping doesn’t fully clear the wax, heat can help soften and remove it. This method is beneficial for hardened or stubborn wax stains.
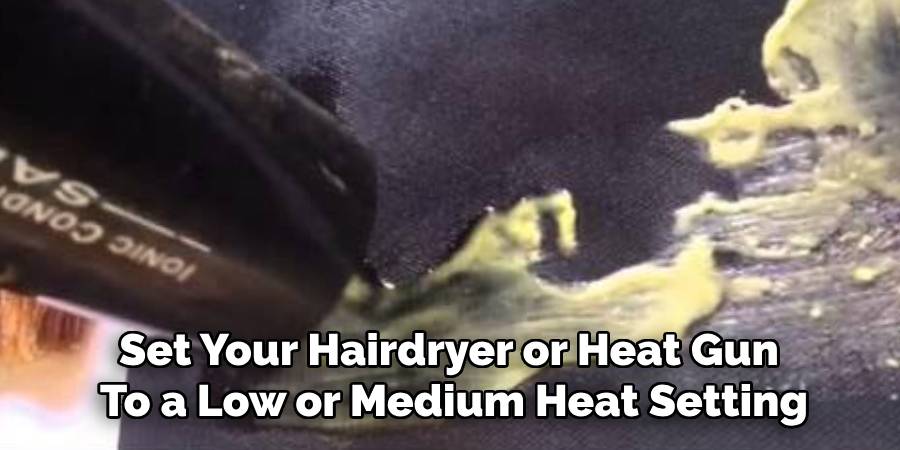
Step 1: Using a Hairdryer or Heat Gun
Set your hairdryer or heat gun to a low or medium heat setting. Hold the device a few inches above the wax and move it in circular motions. Gradually, the warmth will soften the wax, making it easier to remove. Be cautious not to overheat the area, as prolonged exposure to high temperatures can damage certain countertop materials.
Step 2: Blotting the Melted Wax
Once the wax has softened, immediately place a clean paper towel or cloth over the area. Gently press down to absorb the melted wax. Repeat the process with fresh portions of the towel or cloth until all the wax is removed. Avoid scrubbing to prevent spreading the wax further across the surface.
Step 3: Cleaning Up Residue
After the majority of the wax has been absorbed, clean the area with warm, soapy water or a gentle countertop cleaner. Use a soft sponge or cloth to avoid scratching the surface. Rinse thoroughly and dry with a microfiber cloth to ensure no residue remains.
Precaution: Avoiding Excessive Heat on Sensitive Countertops
When using heat, take care to protect sensitive surfaces like wood, laminate, or quartz. Excessive heat can cause discoloration, warping, or permanent damage. Always use the lowest heat setting and maintain consistent movement to avoid overheating any one spot. Test a small area first, and proceed cautiously for the best results.
Freezing the Wax for Easy Removal
When dealing with wax spills on countertops, freezing the wax can be an effective and straightforward solution. This method solidifies the wax, making it easier to break apart and remove without causing damage to the countertop surface. Follow the steps below to implement this technique:
Step 1: Applying Ice or a Frozen Pack
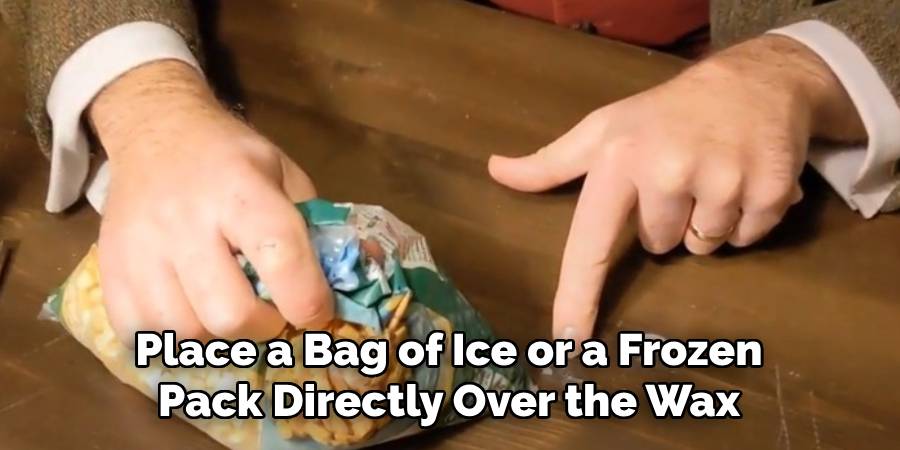
First, place a bag of ice or a frozen pack directly over the wax spill. Leave it on the wax for 5–10 minutes to ensure the wax becomes completely hardened. This step is crucial because cold temperatures make the wax brittle, simplifying its removal.
Step 2: Breaking the Wax Apart
Once the wax is frozen, gently tap it with a blunt object or use a plastic scraper to break it apart. Be cautious during this step to avoid scratching or damaging the countertop surface. Work slowly to lift the pieces of wax until most of the residue has been removed.
Step 3: Cleaning Any Residual Wax or Stains
After most of the wax is gone, use a damp cloth and mild dish soap to clean the area thoroughly. This will remove any remaining wax residue or stains left by the spill, leaving your countertop spotless.
Best Countertop Types for This Method
This freezing technique is particularly effective on stone, laminate, and solid surface countertops. These materials are generally resilient to temperature changes and can withstand the freezing process without risk of damage. For delicate surfaces, always proceed with caution and test on a small, inconspicuous area first.
Removing Stubborn Wax Residue and Stains
If stubborn wax residue or stains remain after trying other methods, alternative cleaning solutions can provide effective results.
Using Rubbing Alcohol or Vinegar
For targeted cleaning, dab a small amount of rubbing alcohol or white vinegar onto a cloth, and gently wipe the affected area. These solutions help break down wax and dissolve stains without leaving marks. Always test on a small, inconspicuous area before applying to ensure compatibility with your countertop surface.
Baking Soda and Water Paste
Create a paste using baking soda and water for a more natural approach. Apply it to the stain and gently scrub using a non-abrasive cloth or sponge. This method works well to lift stubborn residue without scratching the countertop. Once cleaned, wipe the area with a damp cloth to remove any remaining paste.
Using a Magic Eraser for Light Stains
A magic eraser can be highly effective for lighter stains and residues, especially on non-porous surfaces like laminate or solid surface countertops. Lightly dampen the eraser and gently rub the area in circular motions. Avoid excessive scrubbing to prevent dulling the surface.
By using these methods, most stubborn wax spills and stains can be effectively addressed, leaving your countertop clean and preserved.
Preventing Future Wax Spills
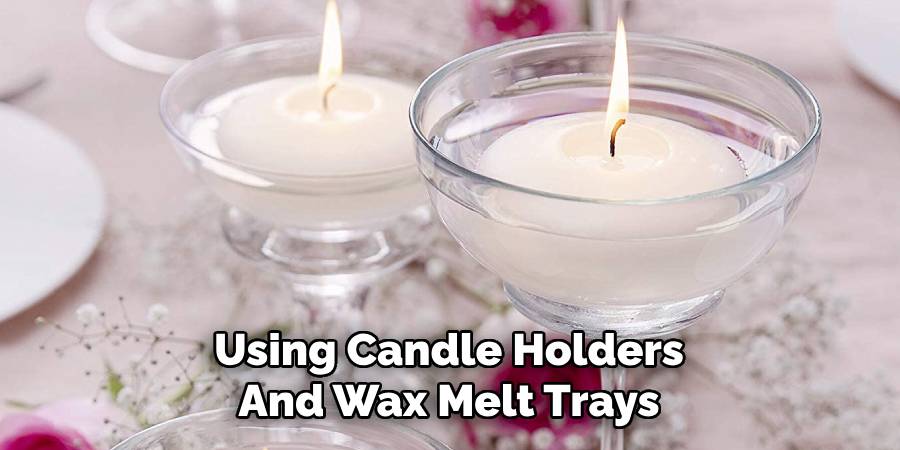
Using Candle Holders and Wax Melt Trays
One of the easiest ways to prevent wax from dripping onto countertops is by using proper tools like candle holders and wax melt trays. When selecting candle holders, opt for designs that catch and contain any melted wax, especially for tapered or pillar candles. Wax melt trays are another excellent choice, particularly if you enjoy fragrance waxes, as they secure the wax in a contained space, preventing accidental drips. These tools protect your surfaces and add a decorative element to your space.
Protecting Surfaces with Heat-Resistant Mats
Heat-resistant mats are a practical option for safeguarding countertops from potential wax spills and heat damage. Made from durable materials like silicone or cork, these mats create a barrier between hot wax and your surfaces. Place them under candles, wax warmers, or other heat-producing items to reduce the risk of stains, burns, or scratches. Look for options that complement your home’s decor while providing protection.
Cleaning Up Small Spills Immediately
If wax spills onto your countertop, cleaning it right away can prevent it from hardening and creating a more stubborn stain. Use a paper towel or cloth to blot the molten wax carefully, then follow up with one of the earlier cleaning methods. Prompt action ensures your countertops remain clean and damage-free.
Conclusion
Understanding how to get wax off a countertop is crucial for maintaining its cleanliness and longevity. Techniques like scraping hardened wax, applying heat to melt and remove it, or freezing it to make it brittle, are all effective methods depending on the situation. Following up with proper cleaning to remove any residue ensures no damage or stains remain.
The choice of method should always be based on your countertop material to avoid scratches or discoloration. By using protective measures like heat-resistant mats and practicing caution, you can prevent future spills and keep your countertops looking their best.
Professional Focus
Angela Ervin, a former interior designer turned blogger, specializes in kitchen design and renovations. Through her website, she blends her passion for cooking with design expertise, sharing practical and creative ideas. Known for balancing functionality and beauty, Angela’s insightful content has made her a trusted voice in home design and lifestyle.
About the Author
Angela Ervin, an experienced interior designer and blogger, combines her passion for kitchen renovations with storytelling. Living in Petersburg with her family, she enjoys cooking and testing her projects firsthand. Known for her humor and relatable style, Angela shares creative, functional design insights through her content, making her a trusted voice in home design.
Education History
University: Virginia Commonwealth University
Degree: Bachelor of Fine Arts (BFA) in Interior Design
- Angela’s education at VCU focused on mastering core interior design principles, including spatial planning, color theory, materials selection, and sustainable design practices.
- She gained hands-on experience through studio projects and collaborative design exercises, which honed her ability to create functional and aesthetically pleasing environments.
- Her coursework also emphasized problem-solving and practical applications of design, preparing her for real-world projects like her self-directed kitchen renovations.
- The program’s strong foundation in both technical skills and creative expression shaped Angela’s ability to seamlessly integrate form and function in her work.