
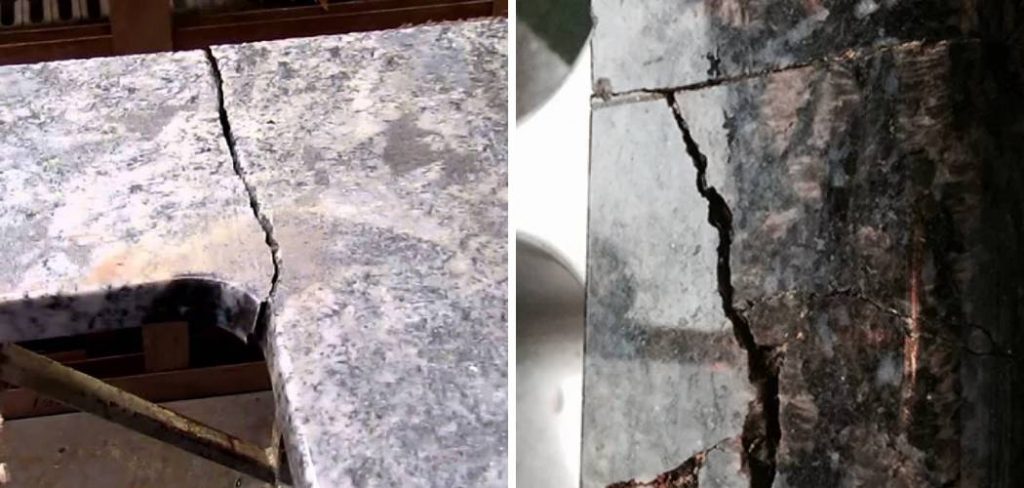
Granite countertops are a popular choice for kitchens and bathrooms due to their exceptional durability, natural beauty, and ability to withstand the demands of daily use. However, no material is entirely immune to damage, and even granite can develop cracks, chips, or breaks over time. When a countertop becomes damaged, addressing the issue promptly is crucial to prevent the problem from worsening and maintain the surface’s structural integrity.
This article aims to provide a clear and detailed step-by-step guide on how to fix a broken granite countertop effectively and safely. Whether it’s a minor crack or a more substantial break, following these instructions will help restore your countertop’s original strength and appearance while saving you the cost of a full replacement.
Common Causes of Granite Countertop Damage
Granite countertops, while durable and elegant, are not immune to damage. Understanding the common causes can help prevent issues and prolong the life of your countertop.
Physical Impact
Physical impact is one of the most frequent causes of damage to granite countertops. Heavy objects accidentally dropped or forceful impacts can result in chips, cracks, or even significant breaks. Everyday activities, such as bumping into the edges with hard objects, can also compromise the countertop’s structural integrity over time.
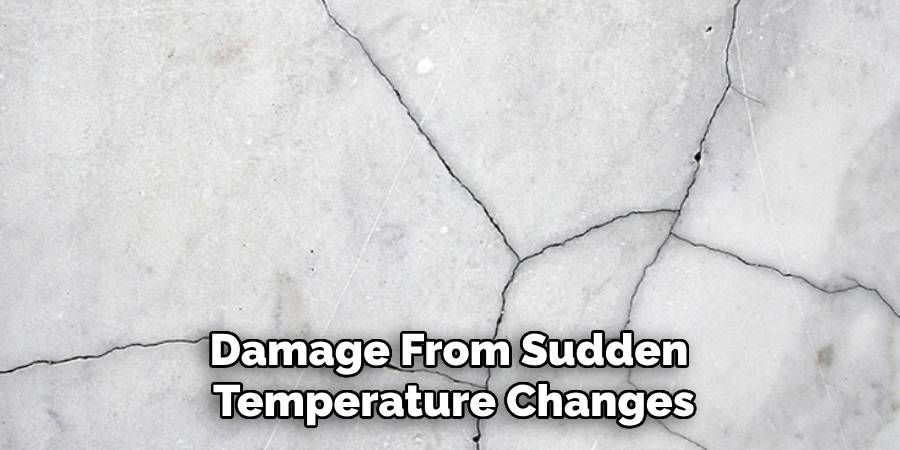
Temperature Extremes
Granite is prone to damage from sudden temperature changes. Placing hot cookware directly on the surface can cause thermal shock, leading to cracks. Extreme cold can also negatively affect the stone, especially if it is already weakened by pre-existing damage or stress.
Improper Cleaning or Maintenance
Using harsh chemical cleaners or abrasive cleaning tools can erode the polished surface of the granite, causing dullness or subtle scratches. Over time, these practices can weaken the stone, making it more susceptible to other forms of damage.
Normal Wear and Tear
Regular use and the passage of time can lead to gradual deterioration in granite countertops. Minor chips, small cracks, and natural fading are common with long-term use, emphasizing the need for proper care and routine maintenance.
Assessing the Damage
Identifying the Type of Damage
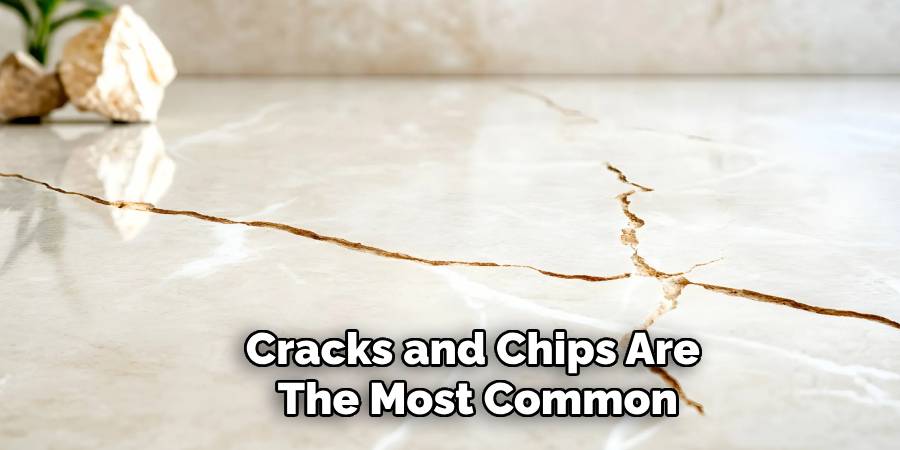
When assessing granite countertop damage, it is crucial to identify the specific type of issue present. Cracks and chips are the most common but differ in severity and required treatment. Cracks may run deep and pose structural concerns, while chips are often surface-level and less invasive. Determining whether the damage is a visible crack or small chip is critical for deciding the appropriate repair method. Additionally, some cracks might not be immediately noticeable to the naked eye but can be identified through careful inspection or the use of specialized tools like magnifying lenses.
Measuring the Damage
Precise measurement is key to understanding the extent of the damage. Tools such as a caliper or a ruler can help accurately measure the depth and width of any cracks or chips. This data is essential in determining if the damage is minimal enough for a DIY repair or if professional intervention will be necessary. It is often advisable to consult a granite repair specialist for larger or deeper damages to avoid worsening the issue.
Surface Inspection
A thorough surface inspection is equally important for spotting underlying structural issues that may affect the repair process. Look for signs of loose granite pieces, weakened adhesive, or support problems beneath the surface, as these can complicate any repair efforts. An in-depth inspection ensures that all contributing factors are addressed, leading to a more effective and long-lasting solution.
Gathering the Right Materials and Tools
Proper preparation is essential for achieving a successful granite repair. Having the right materials and tools on hand ensures that the process is safe, efficient, and results in a polished, seamless finish. Below are the key materials and tools required for repairing cracks, chips, or imperfections in granite surfaces.
Materials for Repair
- Epoxy Resin Or Granite Repair Kits: These are specially designed to fill and bond cracks or chips effectively.
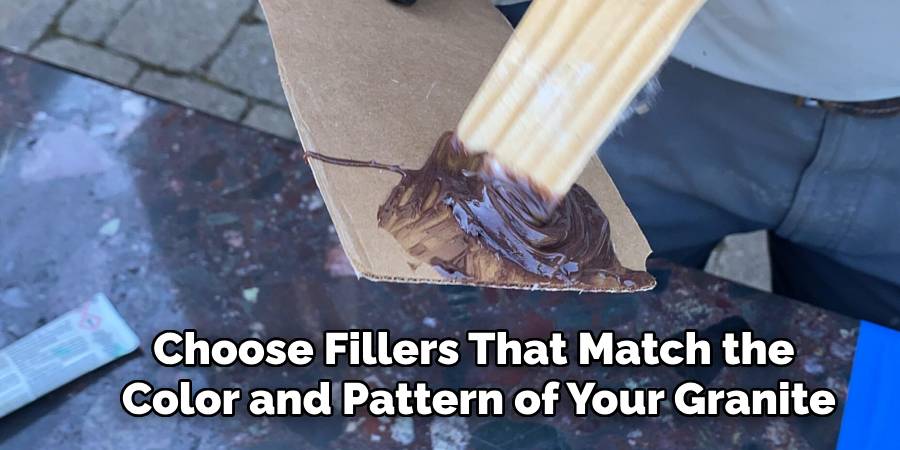
- Color-Matching Fillers: Choose fillers that match the color and pattern of your granite to create a seamless finish.
- Clean Cloths, Masking Tape, And Gloves: These are vital for preparation, application, and ensuring safety throughout the repair process.
Tools You’ll Need
- Razor Blade And Utility Knife: Useful for smoothing out surfaces and precisely removing excess filler.
- Mixing Tools: These are needed for combining epoxy resin and fillers to perfectly match your granite surface.
- Soft Cloth For Polishing: A polishing cloth helps give the repaired area its natural shine, blending it with the rest of the surface.
- Safety Equipment: Gloves and goggles are essential to protect your hands and eyes from chemicals and sharp tools.
Granite-Specific Supplies
When selecting materials, ensure you choose fillers that match your granite’s unique color and pattern. This step is critical for maintaining the surface’s visual appeal and achieving a professional-looking repair. Observing these guidelines will prepare you for a successful and lasting granite restoration.
How to Fix a Broken Granite Countertop: Step-by-Step Guide
Step 1: Cleaning the Area
Clean the damaged area thoroughly to remove any dirt, oils, and debris. Use a mild cleaner specifically designed for granite, and wipe the surface gently with a soft, non-abrasive cloth. Avoid harsh chemicals or rough scrubbing pads, as they can worsen the damage or leave scratches. Ensuring the area is clean and free from contaminants will help the repair materials adhere properly.
Step 2: Preparing the Crack or Chip
Carefully inspect the damaged area, and use a utility knife to remove any loose debris within the crack or chip. Take care not to enlarge the damaged area during this step. Once the debris is cleared, apply painter’s tape around the edges of the repair area. This will protect the surrounding granite and create clean, sharp lines when applying the filler or epoxy.
Step 3: Applying the Epoxy or Filler
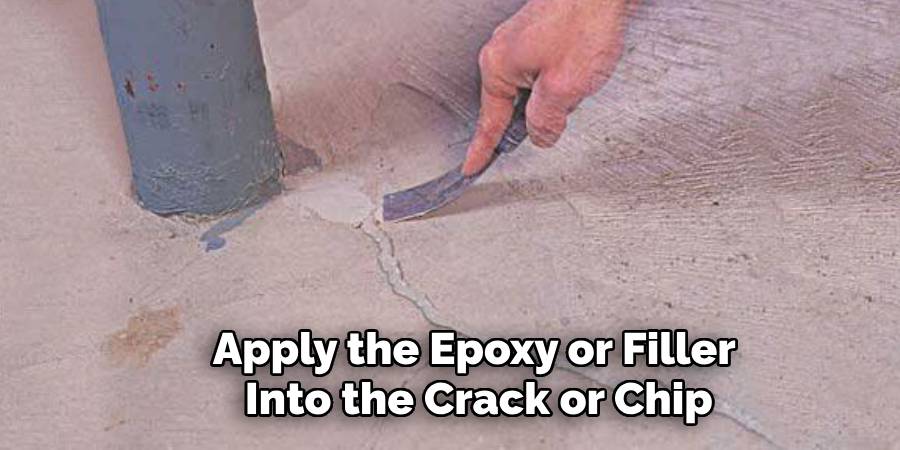
Refer to the instructions provided with your epoxy resin or granite filler to mix the product properly. Once ready, carefully apply the epoxy or filler into the crack or chip, ensuring it completely fills the damaged area. Use a small applicator or a toothpick for precision. Smooth out the surface to make the filler level with the surrounding granite, which will help create an even repair.
Step 4: Smoothing and Polishing
Once the filler has started to cure, use a razor blade to scrape away any excess material and level the surface carefully. Afterward, polish the repaired area using a granite polishing compound and a soft cloth. This step restores the granite’s natural shine and helps blend the repaired area with the rest of the surface, making the repair less noticeable.
Step 5: Curing Time and Final Touches
Allow the filled crack or chip to fully cure based on the time recommended in the product instructions. This is a crucial step to ensure the repair lasts. After curing, inspect the area to confirm the repair is seamless. Remove any remaining painter’s tape, and clean the surface to reveal the restored granite. Your granite countertop or surface should now look as good as new and be ready for regular use.
Repairing Larger Cracks and Structural Damage
Assessing Larger Cracks
Larger cracks in granite surfaces often require a more detailed assessment to determine the best repair course. Look for deep, wide, or wide cracks across a significant portion of the granite. If the structural integrity of the countertop or surface is compromised—such as noticeable sagging or unevenness—this could indicate that more extensive repairs, or even professional attention, may be required.
Using a Granite Epoxy Injection
For deeper cracks, using a granite epoxy injection is an effective solution. Start by cleaning the crack thoroughly to remove any debris or dirt hindering adhesion. Mix the granite epoxy according to the manufacturer’s instructions and apply it carefully into the crack with a syringe or applicator tool, ensuring that the entire depth of the crack is filled. Use a straight-edge tool to smooth out the surface and remove excess epoxy for an even finish. Allow the epoxy to cure completely as specified by the product to ensure structural stability.
Reinforcing the Repair
For significantly larger cracks, additional reinforcement may be necessary. Consider using clamps or braces to provide extra support during the curing process. Once the epoxy has hardened, test the repaired area by gently applying pressure to ensure it holds firmly and shows no signs of weakening or reopening. This step is critical for maintaining the durability of the repair.
When to Call a Professional
Some repairs are beyond the scope of DIY techniques. If the crack worsens despite attempts at repair, or if the granite shows signs of extensive damage that cannot be stabilized, it’s time to call a granite specialist. Professional expertise ensures that complex issues are handled appropriately, preserving the beauty and functionality of your granite surface.
Preventing Future Damage
Sealing the Countertop
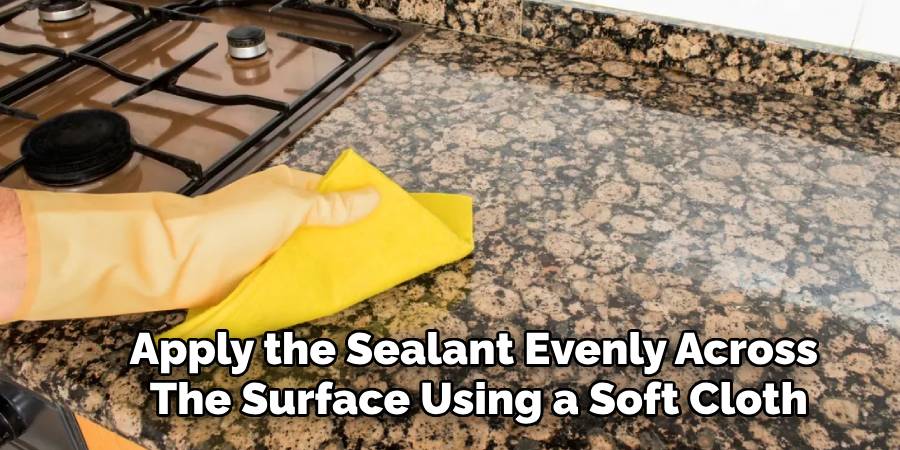
Applying a proper granite sealant is essential to protect your granite countertop from further damage. Start by thoroughly cleaning the countertop and letting it dry completely. Once dry, apply the sealant evenly across the surface using a soft cloth or applicator pad. Allow the sealant to penetrate for the recommended time as specified by the product instructions, and then wipe away any excess. Re-sealing every 6 to 12 months will maintain the surface’s resistance to stains and moisture.
Proper Maintenance Practices
Routine care is vital for preserving your granite’s appearance and durability. Use gentle, pH-balanced cleaners and soft cloths to avoid scratches or chemical damage. Steer clear of harsh chemicals and abrasive cleaning tools. Additionally, always use trivets under hot pots and pans, and avoid cutting directly on the granite by using a cutting board. These habits prevent unnecessary stress on the stone.
Regular Inspections
It’s wise to periodically inspect your countertop for early signs of cracks, chips, or other damages. Addressing minor issues promptly can prevent them from escalating, saving time and costly repairs in the future. Make it a habit to check your countertop during routine cleaning sessions to ensure its longevity and beauty.
Common Mistakes to Avoid
Using the Wrong Repair Products
Selecting inappropriate fillers or adhesives can fail to fix the damage and make it worse. Non-granite-specific repair products often do not bond properly with the stone, potentially leading to further cracks or discoloration. Always choose materials recommended for granite repair to ensure effective and safe results.
Not Properly Preparing the Area
Skipping essential cleaning or prep steps before repairing your granite countertop can lead to ineffective results. Dirt, debris, or leftover residue can interfere with the adhesive or filler, causing it to perform poorly. To ensure a solid bond, take the time to thoroughly clean and dry the damaged site before beginning the repair process.
Rushing the Repair Process
Repairing granite requires patience, especially when allowing fillers, adhesives, or epoxy to cure properly. Rushing the process or using the countertop before the materials have fully set can compromise the durability of the repair. Always follow the recommended curing times to achieve the best possible outcome.
Conclusion
Addressing granite countertop damage promptly and properly is essential to maintaining your surface’s beauty and durability. By following the outlined steps carefully, you can achieve effective results and avoid further issues caused by improper repair techniques. Always remember that preparation, patience, and using the right materials are key factors in the success of any repair. For those wondering “how to fix a broken granite countertop,” it’s crucial to consider the extent of the damage. For significant cracks or breaks, seeking professional assistance may be the best solution to restore your countertop to its original condition fully.
Professional Focus
Angela Ervin, a former interior designer turned blogger, specializes in kitchen design and renovations. Through her website, she blends her passion for cooking with design expertise, sharing practical and creative ideas. Known for balancing functionality and beauty, Angela’s insightful content has made her a trusted voice in home design and lifestyle.
About the Author
Angela Ervin, an experienced interior designer and blogger, combines her passion for kitchen renovations with storytelling. Living in Petersburg with her family, she enjoys cooking and testing her projects firsthand. Known for her humor and relatable style, Angela shares creative, functional design insights through her content, making her a trusted voice in home design.
Education History
University: Virginia Commonwealth University
Degree: Bachelor of Fine Arts (BFA) in Interior Design
- Angela’s education at VCU focused on mastering core interior design principles, including spatial planning, color theory, materials selection, and sustainable design practices.
- She gained hands-on experience through studio projects and collaborative design exercises, which honed her ability to create functional and aesthetically pleasing environments.
- Her coursework also emphasized problem-solving and practical applications of design, preparing her for real-world projects like her self-directed kitchen renovations.
- The program’s strong foundation in both technical skills and creative expression shaped Angela’s ability to seamlessly integrate form and function in her work.