
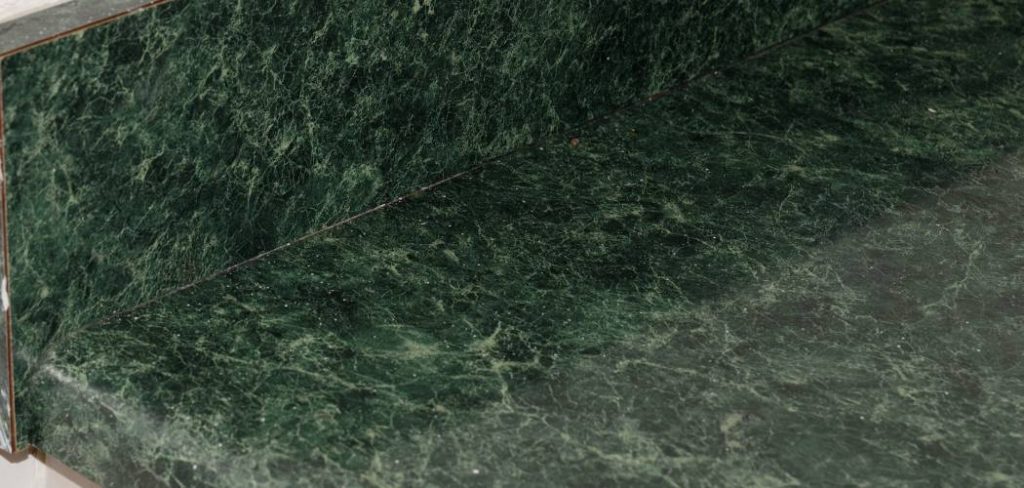
Formica countertops are a popular and budget-friendly laminate surface commonly found in kitchens and bathrooms. Known for their durability and affordability, they have been a home staple for decades. However, over time, the designs of Formica countertops can become outdated, or the surface might develop scratches and stains.
Covering Formica countertops is an excellent solution for homeowners looking to refresh their space without the cost and effort of a full replacement. Whether the goal is to modernize a room, hide imperfections, or achieve the look of a high-end countertop, various methods are available.
This guide will explore different strategies for how to cover Formica countertops, including painting, applying contact paper, using epoxy resin, or installing new surfaces such as wood or tile. These options provide a cost-effective way to transform your countertop and breathe new life into your space.
Assessing Your Formica Countertops
Before transforming your Formica countertops, evaluating their current condition and determining the most suitable covering method based on your needs and budget is crucial.
Checking the Condition of the Surface
Start by carefully inspecting the Formica surface for any signs of damage, such as cracks, peeling, or warping. Minor imperfections can often be repaired or concealed easily, but significant structural issues may require more extensive repairs or surface replacement. Ensure the countertop is clean, stable, and free of debris, as this will provide a proper foundation for any chosen covering material.
Choosing the Best Covering Method
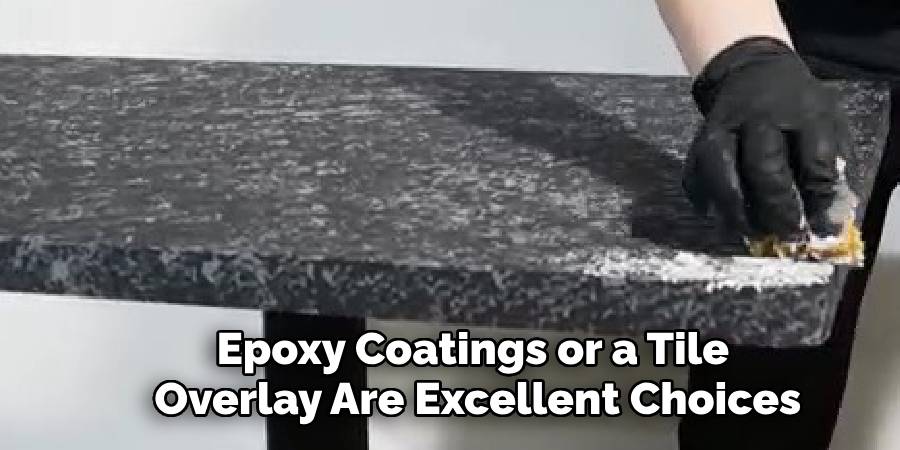
Selecting the right method to cover your countertops depends on your goals and limitations. For a quick, budget-friendly update, consider using contact paper or painting the surface, as both options are relatively affordable and simple to apply. If you aim for increased durability, epoxy coatings or a tile overlay are excellent choices, as they offer enhanced resistance to wear and tear. For a high-end, premium look, butcher block or stone veneer provides an elegant and long-lasting upgrade. Each method has unique attributes, so take the time to weigh your priorities, style preferences, and budget before deciding.
How to Cover Formica Countertops: Covering with Contact Paper
Step 1: Choosing the Right Contact Paper
When selecting contact paper for your countertop project, prioritize waterproof and heat-resistant options, especially for kitchen applications where durability is essential. Designs that mimic natural materials like granite, marble, or wood can elevate the appearance of your countertops without the high cost of real stone or hardwood. Consider your kitchen’s color scheme and overall aesthetic to ensure a cohesive design.
Step 2: Preparing the Surface
Proper preparation is crucial for achieving a smooth and lasting finish. Start by thoroughly cleaning the countertop using a degreaser to remove any dirt, grease, or residue. Allow the surface to dry completely before moving to the next step. For better adhesion, lightly sand the countertop with a fine-grit sandpaper to create a slightly rough surface.
Step 3: Applying Contact Paper
The application process requires patience and precision. Begin at one edge of the countertop, peeling the backing away from the contact paper slowly as you work across the surface. Use a squeegee or a flat edge to press the contact paper down and smooth out any air bubbles. This step will ensure a more professional and seamless appearance. Trim any excess material with a utility knife for clean edges.
Step 4: Sealing the Edges for Durability
To enhance the longevity of the contact paper, seal the edges where water or heat exposure is most likely. Apply a thin line of clear caulk along the seams and edges, or use a strong adhesive to secure the contact paper firmly. This extra step helps to prevent peeling and extends the life of your updated countertop.

How to Cover Formica Countertops: Painting Formica Countertops
Painting is an excellent option if you’re looking for a cost-effective and creative way to revamp your Formica countertops. This method allows for a custom look and can be completed with basic tools and materials. Follow these steps for a durable and professional finish:
Step 1: Choosing the Right Paint
Select a high-quality primer and durable countertop paint to achieve a lasting result. Epoxy-based paints are highly recommended for their strength and water resistance, while acrylic paints can also perform well if appropriately sealed. Choose a color and finish that match your desired aesthetic.
Step 2: Prepping the Surface
Preparation is critical for ensuring the paint adheres properly to the Formica surface. Start by thoroughly cleaning the countertops to remove grease, dirt, and stains. Then, sand the surface evenly with fine-grit sandpaper to eliminate the glossy finish that prevents paint from adhering. Finally, a bonding primer should be applied explicitly for smooth surfaces, allowing it to dry completely before painting.
Step 3: Painting Process
Use a foam roller to apply the paint for a smooth and even finish. Begin with thin, even coats, working systematically to cover the countertop surface. Allow each coat to dry according to the paint manufacturer’s instructions before applying the next one. Multiple thin layers will ensure better durability and a more polished appearance.
Step 4: Sealing the Paint
Once the paint is dry and you are satisfied with the coverage, seal the surface to protect it from water, heat, and everyday wear. Apply a polyurethane sealant or epoxy resin for a long-lasting, water-resistant finish. This step extends the life of your painted countertops and provides a glossy, professional look.
Epoxy Resin Coating
Step 1: Why Choose Epoxy?
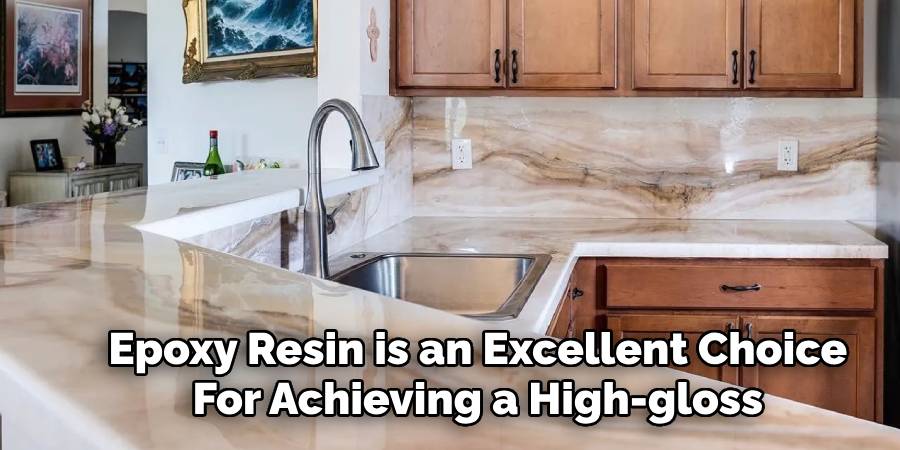
Epoxy resin is an excellent choice for achieving a high-gloss, durable, and seamless surface on your countertops. This coating is known for its resistance to heat, stains, and scratches, making it ideal for areas subjected to heavy use. It enhances the aesthetics of your countertops with its glossy finish and provides long-lasting protection, ensuring your surfaces remain beautiful and functional for years to come.
Step 2: Applying Epoxy Resin
When applying epoxy resin, start by mixing the resin and hardener as per the manufacturer’s instructions, ensuring a thorough combination for optimal results. Pour the mixture onto the surface in layers, spreading it evenly using a trowel or a similar tool. Be sure to work methodically to cover the entire area without leaving gaps or uneven sections. To achieve a flawless finish, use a torch or heat gun to gently remove air bubbles from the resin before it begins to set. This step is crucial for creating a smooth, glass-like surface.
Step 3: Curing and Finishing
Allow at least 24 to 48 hours for the epoxy resin to cure fully. During this time, avoid disturbing the surface to prevent imperfections. Once cured, your countertops will boast a stunning, durable, and visually striking, protective coating. For added longevity, follow any recommended care instructions provided by the epoxy manufacturer.
Installing Butcher Block, Tile, or Stone Veneer
Step 1: Choosing the Material
Selecting the right material for your countertops sets the foundation for your kitchen’s overall aesthetic and functionality. Opt for a butcher block if you desire a warm, rustic look that brings natural beauty into your space. For a durable and highly customizable option, consider tile, which offers many patterns, colors, and finishes. If you’re aiming for a high-end, luxurious appearance, stone veneer is an excellent choice, providing the rich texture of natural stone without the weight or high cost.
Step 2: Preparing the Existing Countertop
Proper preparation of the existing countertop is critical for successfully installing your new surface. Lightly sand the surface to ensure better adhesion for all materials. Alternatively, you may apply a strong adhesive layer designed for the specific material you are installing. This step creates the ideal base for the new countertop surface to bond securely.
Step 3: Installing the New Surface
The installation process varies depending on the material selected. For butcher block, apply construction adhesive to the prepared surface and align the block carefully before securing it. When using tiles, spread mortar evenly and press the tiles into place, allowing them to set before grouting the gaps. For stone veneer panels, apply a top-quality adhesive to the back of each panel and press them onto the surface firmly, ensuring consistent alignment.
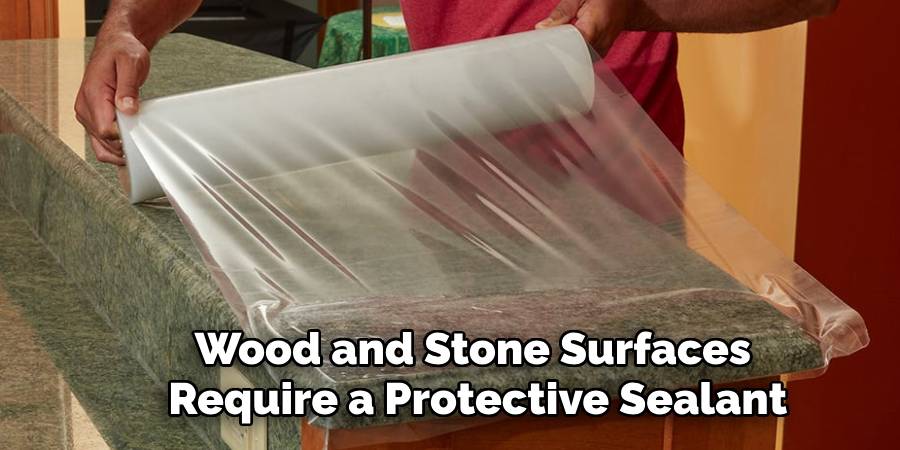
Step 4: Sealing and Maintenance
Sealing is essential to maximize the longevity and maintain the new countertop’s beauty. Wood and stone surfaces require a protective sealant to shield against moisture, stains, and daily wear and tear. Follow the manufacturer’s recommendations for reapplication to keep your countertops looking pristine for years to come. Proper care and maintenance will enhance both durability and aesthetics.
Maintaining Your Covered Countertop
Proper care and maintenance of your newly covered countertop will ensure its functionality and aesthetic appeal for the long term. Each covering type requires specific cleaning methods suited to its material.
For contact paper-covered surfaces, simply wipe with a damp cloth and avoid exposing the surface to excessive heat to prevent peeling or discoloration. Painted countertops should be cleaned with mild soap and water, steering clear of abrasive cleaners that could scratch or chip the paint. Epoxy-coated surfaces demand a gentle touch—clean them using a non-abrasive sponge to avoid dulling the finish. Regular sealing is crucial for butcher block and tile countertops to protect against moisture and stains, alongside gentle cleaning with a soft cloth and non-harsh cleaning products.
To further protect your countertop against everyday wear and tear, adopt habits that minimize potential damage. Always use cutting boards to prevent knife scratches and trivets under hot pans or dishes to shield the surface from heat damage. These small, preventative measures will go a long way in maintaining the durability and beauty of your countertop, regardless of its covering type. Consistent cleaning and protection are essential to enjoying a countertop that looks and functions like new for years to come.
Conclusion
When considering how to cover Formica countertops, there are numerous options to fit various budgets and preferences. Affordable DIY solutions like contact paper and paint provide quick and stylish upgrades, while durable choices like epoxy coatings and stone veneer offer long-lasting elegance. The best method depends on your cost, durability, and aesthetics priorities. Refreshing outdated countertops with a simple covering method allows you to transform your space without the expense or effort of a full replacement. With so many versatile options, it’s easy to breathe new life into your countertops and achieve a look you’ll love for years.
Professional Focus
Angela Ervin, a former interior designer turned blogger, specializes in kitchen design and renovations. Through her website, she blends her passion for cooking with design expertise, sharing practical and creative ideas. Known for balancing functionality and beauty, Angela’s insightful content has made her a trusted voice in home design and lifestyle.
About the Author
Angela Ervin, an experienced interior designer and blogger, combines her passion for kitchen renovations with storytelling. Living in Petersburg with her family, she enjoys cooking and testing her projects firsthand. Known for her humor and relatable style, Angela shares creative, functional design insights through her content, making her a trusted voice in home design.
Education History
University: Virginia Commonwealth University
Degree: Bachelor of Fine Arts (BFA) in Interior Design
- Angela’s education at VCU focused on mastering core interior design principles, including spatial planning, color theory, materials selection, and sustainable design practices.
- She gained hands-on experience through studio projects and collaborative design exercises, which honed her ability to create functional and aesthetically pleasing environments.
- Her coursework also emphasized problem-solving and practical applications of design, preparing her for real-world projects like her self-directed kitchen renovations.
- The program’s strong foundation in both technical skills and creative expression shaped Angela’s ability to seamlessly integrate form and function in her work.