
Installing a Whirlpool dishwasher can seem like a daunting task, but with the right tools and guidance, you can complete the process efficiently and safely.
This guide on how to hook up whirlpool dishwasher will walk you through the steps to connect your new dishwasher, ensuring it operates correctly and integrates seamlessly into your kitchen. Whether you’re replacing an old unit or setting up a brand-new appliance, following these instructions will help you achieve a hassle-free installation.
Why Choose a Whirlpool Dishwasher?
Whirlpool dishwashers are known for their reliability, performance, and energy efficiency. With various models and styles to choose from, you can find the perfect fit for your kitchen space and budget. Plus, Whirlpool offers advanced features like soil sensors, adjustable racks, and quiet operation to make your dishwashing experience even more convenient.
It’s essential to choose a dishwasher that meets your needs and preferences, and Whirlpool offers a wide range of options to cater to different households. Additionally, their dishwashers come with a warranty for added peace of mind.
Tools Needed
Before starting the installation process, make sure you have all the necessary tools handy. Here is a list of tools you will need:
Flathead Screwdriver
You will need a flathead screwdriver to loosen and tighten screws during the installation process.
Adjustable Wrench
An adjustable wrench is necessary to attach the water supply line to the dishwasher.
Pliers
Pliers may come in handy when adjusting or securing the drain hose.
Drill
If you need to create holes for mounting the dishwasher, you will need a drill.
Level
A level will help ensure that your dishwasher is installed evenly and securely.
8 Step-by-step Guidelines on How to Hook Up Whirlpool Dishwasher
Step 1: Prepare the Space
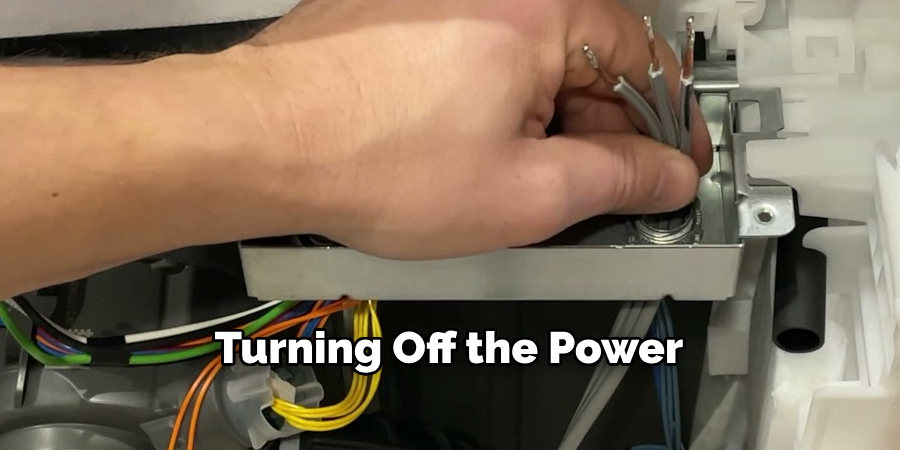
Before installing your Whirlpool dishwasher, ensure that the area where it will be placed is ready. Start by turning off the power supply to the dishwasher’s designated electrical circuit at the breaker box. Next, shut off the water supply to the existing dishwasher or the dishwasher connection point. Clear the installation area by removing any old dishwasher (if applicable), and thoroughly clean the space to ensure there is no debris or obstruction.
Measure the designated area to confirm it matches the dimensions of your Whirlpool dishwasher, leaving enough clearance for the door to open fully and for proper ventilation. Having a clean and precise space will make the installation process much smoother.
Step 2: Attach the Mounting Brackets
To secure your Whirlpool dishwasher in place, begin by attaching the mounting brackets. Locate the brackets provided with your dishwasher; these brackets are designed to anchor the appliance to your countertop or cabinetry. Carefully follow the instructions in your dishwasher’s manual to position the brackets correctly, ensuring they align with the mounting points on the dishwasher.
Using a screwdriver or drill, fasten the brackets onto the top or sides of the dishwasher as indicated in the manual. Make sure the brackets are firmly attached and properly aligned to prevent movement or instability during operation. This step is crucial for maintaining a secure and even fit for your dishwasher within the designated space.
Step 3: Connect the Water Supply
When connecting your Whirlpool dishwasher to the water supply, you have two options: a direct water line connection or a flexible water supply hose. If you are using a direct water line connection, make sure to turn off the main water valve before attaching the line to your dishwasher’s inlet valve. Use an adjustable wrench to secure the connection tightly.
If you are using a flexible water supply hose, carefully follow the manufacturer’s instructions for attaching it to both ends – one end connects to your household’s hot water supply and the other end attaches to your dishwasher. Ensure that all connections are tight and leak-free before proceeding.
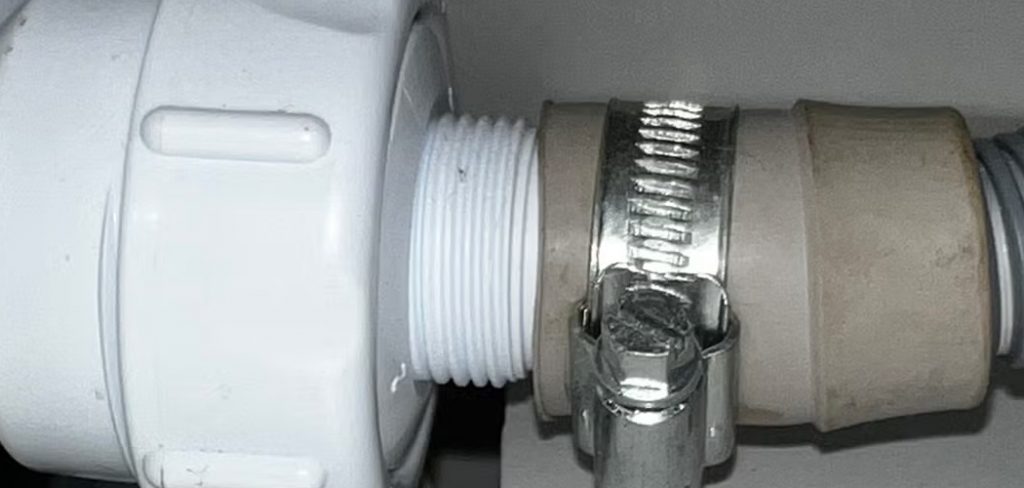
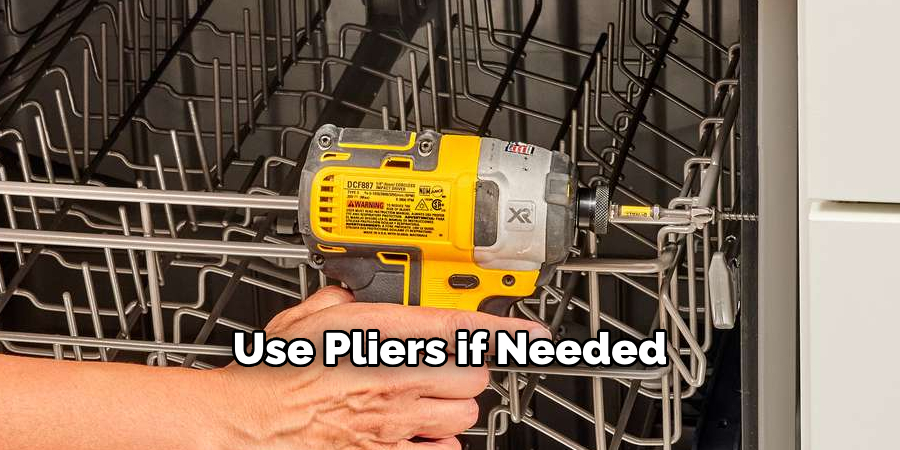
Step 4: Install the Drain Line
The drain line is necessary for removing wastewater from your dishwasher during operation. It can be connected in one of two ways: directly to a household drain or through an air gap. To connect it directly, attach the drain hose provided with your dishwasher to the designated outlet on your sink’s plumbing system. Use pliers if needed, and make sure the connection is secure.
If you are using an air gap, which is recommended as a safety measure to prevent backups and contamination, you will need to install it onto your countertop or sink cabinet before connecting it to the dishwasher’s drain hose. Follow the manufacturer’s instructions for proper installation.
Step 5: Secure Your Power Supply
If you are replacing an old dishwasher, the power supply should already be in place. However, if you are setting up a new appliance or have recently renovated your kitchen, you may need to install an electrical outlet specifically for the dishwasher. Consult a certified electrician and follow all safety protocols when performing this task.
Once your power supply is established, connect the dishwasher’s power cord to the designated outlet. Make sure the connection is secure and that there are no exposed wires.
Step 6: Level Your Dishwasher
Using a level, check that your Whirlpool dishwasher is even from side to side and front to back. Adjust the feet on the bottom of the unit as needed to achieve a level position. This step is crucial for proper operation and to prevent any potential leaks.
Step 7: Test Your Dishwasher
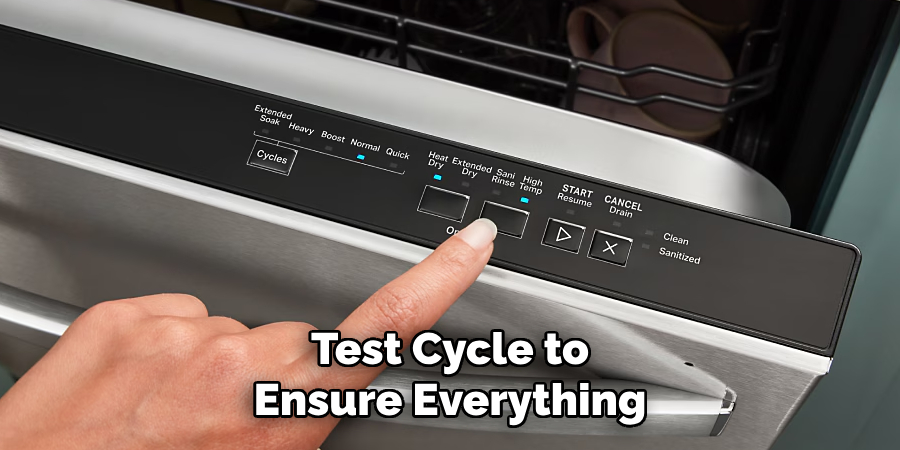
Before using your dishwasher regularly, it’s essential to run a test cycle to ensure everything is working correctly. Follow the instructions in your manual to set up and run a test cycle. Check for any leaks or abnormal noises during the cycle. If you notice anything out of the ordinary, consult the troubleshooting section of your manual or contact Whirlpool customer service for assistance.
It’s also a good idea to test the door and make sure it opens and closes smoothly without any obstructions.
Step 8: Enjoy Your New Whirlpool Dishwasher
Congratulations, you have successfully hooked up your Whirlpool dishwasher! Now it’s time to enjoy all the benefits of having a reliable, efficient dishwasher in your home. Refer to your manual for instructions on loading and running your dishwasher, as well as maintenance tips to keep it running smoothly for years to come.
Following these step-by-step guidelines on how to hook up whirlpool dishwasher will ensure a proper and secure installation of your Whirlpool dishwasher. If you encounter any difficulties or have questions along the way, do not hesitate to consult your manual or reach out to Whirlpool customer service for assistance. Happy dishwashing!
Frequently Asked Questions
Q1: Do I Need Any Special Tools or Equipment to Hook Up My Whirlpool Dishwasher?
A1: Yes, you will need a screwdriver or drill, adjustable wrench, and pliers for the installation process. It’s also important to have a level on hand to ensure your dishwasher is installed correctly.
Q2: Can I Install My Whirlpool Dishwasher Myself?
A2: While it is possible to install your dishwasher yourself, it’s recommended to consult a professional or follow the manufacturer’s instructions carefully to ensure proper installation and safety protocols are followed.
Q3: How Do I Know If My Whirlpool Dishwasher Is Installed Correctly?
A3: After completing the installation process, run a test cycle to check for any leaks or abnormal noises. You should also make sure the door opens and closes smoothly without any obstructions. If you notice any issues, refer to your manual or contact Whirlpool customer service for assistance.
Q4: Can I Connect My Dishwasher to Any Water Supply?
A4: No, it’s crucial to connect your dishwasher to a hot water supply and not a cold one. Cold water will not properly clean dishes and can cause damage to your appliance over time.
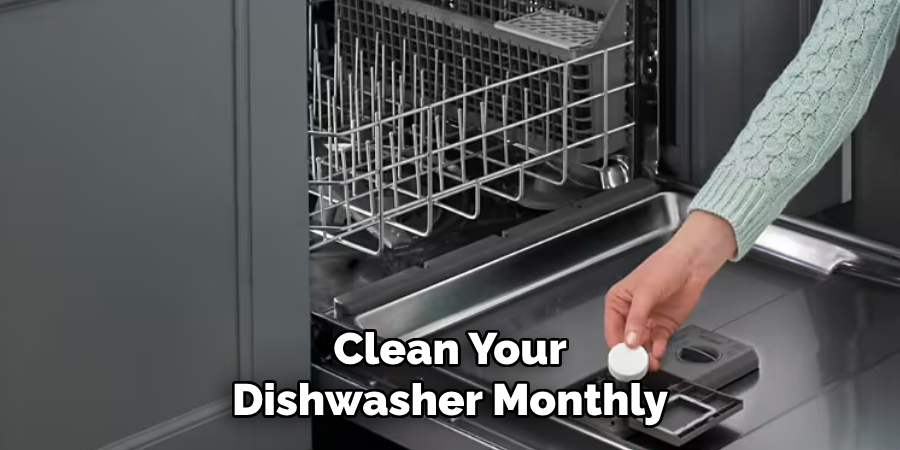
Q5: How Often Should I Clean and Maintain My Whirlpool Dishwasher?
A5: It’s recommended that you clean your dishwasher monthly, including the filter and spray arms. You should also check for any buildup or debris in the drain line and clear it as needed. Refer to your manual for specific maintenance instructions.
Q6: Can I Use Any Detergent in My Whirlpool Dishwasher?
A6: No, it’s important to use a high-quality dishwasher detergent designed specifically for dishwashers. Other types of soap or detergent can damage your dishwasher and affect its performance. Refer to the manual for recommended detergents.
Conclusion
Installing your Whirlpool dishwasher can be a straightforward process if you follow the proper steps. By preparing the installation area, securely connecting the water supply, drain line, and power, and ensuring the appliance is level, you set the foundation for optimal performance. Running a test cycle is a critical final step to confirm that everything is functioning as intended.
With attention to these details, you can confidently rely on your new dishwasher for efficient, hassle-free cleaning. Should you encounter any challenges, the Whirlpool manual and customer support team are excellent resources to help ensure a successful installation. Enjoy the convenience and reliability of your new Whirlpool dishwasher! Thanks for reading this article on how to hook up whirlpool dishwasher.
Professional Focus
Angela Ervin, a former interior designer turned blogger, specializes in kitchen design and renovations. Through her website, she blends her passion for cooking with design expertise, sharing practical and creative ideas. Known for balancing functionality and beauty, Angela’s insightful content has made her a trusted voice in home design and lifestyle.
About the Author
Angela Ervin, an experienced interior designer and blogger, combines her passion for kitchen renovations with storytelling. Living in Petersburg with her family, she enjoys cooking and testing her projects firsthand. Known for her humor and relatable style, Angela shares creative, functional design insights through her content, making her a trusted voice in home design.
Education History
University: Virginia Commonwealth University
Degree: Bachelor of Fine Arts (BFA) in Interior Design
- Angela’s education at VCU focused on mastering core interior design principles, including spatial planning, color theory, materials selection, and sustainable design practices.
- She gained hands-on experience through studio projects and collaborative design exercises, which honed her ability to create functional and aesthetically pleasing environments.
- Her coursework also emphasized problem-solving and practical applications of design, preparing her for real-world projects like her self-directed kitchen renovations.
- The program’s strong foundation in both technical skills and creative expression shaped Angela’s ability to seamlessly integrate form and function in her work.