
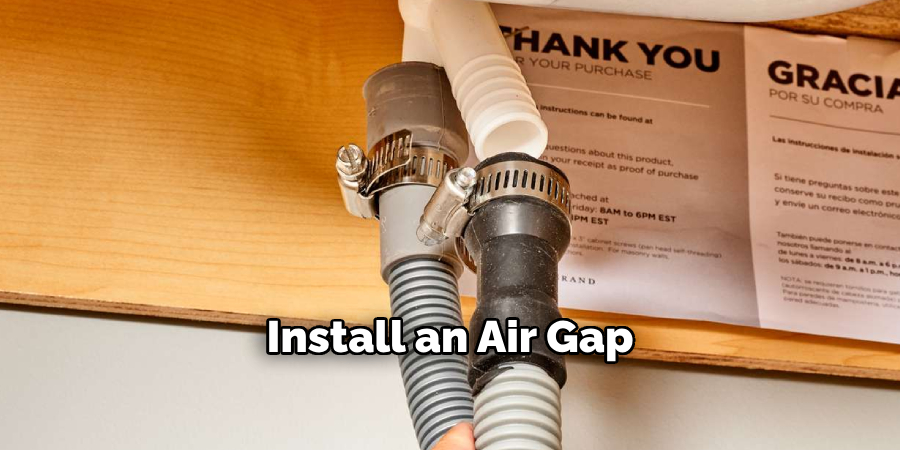
Installing an air gap for your dishwasher is a crucial step in preventing contaminated water from siphoning back into your clean water supply. This small but essential component ensures your dishwasher operates safely and complies with plumbing codes.
In this guide on how to install an air gap for a dishwasher, we will walk you through the process, making it straightforward and easy to follow, whether you’re a seasoned DIY enthusiast or tackling this task for the first time.
Why Install an Air Gap for a Dishwasher?
An air gap is a small device that creates a physical gap between the dishwasher and your plumbing system. It serves as a barrier to prevent dirty water from flowing back into your dishwasher, causing potential health hazards.
Some states have made it mandatory to install an air gap when installing a new dishwasher or replacing an old one. Moreover, having an air gap can also help you save money in the long run by preventing any potential damage to your dishwasher caused by contaminated water.
What You Will Need
Before you start installing an air gap, make sure to have the following tools and materials ready:
An Air Gap Kit
You can purchase an air gap kit from your local hardware store or online. These kits typically include all the necessary components for installation, such as the air gap itself, mounting brackets, and tubing.
Screwdriver
You will need a screwdriver to secure the mounting bracket of the air gap.
Pipe Cutter
If you need to cut any existing plumbing pipes during installation, a pipe cutter will come in handy.
Plumber’s Tape
This tape helps create a watertight seal between different components during installation.
Wrench
A wrench may be needed to tighten and secure any connections between pipes and fittings.
7 Steps on How to Install an Air Gap for a Dishwasher
Step 1: Prepare the Area
Before starting the installation, ensure that the area around your sink and dishwasher is clean and accessible. Remove any items or obstacles that might get in the way of your work. Locate the pre-drilled hole on your sink or countertop, which is typically designed for the air gap installation.

If there is no pre-drilled hole, you may need to drill one yourself, ensuring it matches the diameter of the air gap. Make sure all your tools and materials are within reach to streamline the process. Lastly, turn off the dishwasher and disconnect the power supply for safety.
Step 2: Install the Air Gap Mounting Bracket
Take the mounting bracket included in your air gap kit and position it over the pre-drilled hole on your sink or countertop. Ensure that the bracket aligns properly with the hole and sits securely in place. Use a screwdriver to fasten the screws tightly, anchoring the bracket firmly to the sink or countertop.
Double-check to make sure the bracket is stable and does not move, as this will serve as the base for the air gap installation. Once securely attached, you are ready to move on to mounting the air gap device.
Step 3: Mount the Air Gap
Take the air gap device from your kit and insert it into the mounting bracket, ensuring it fits securely through the pre-drilled hole in your sink or countertop. The larger opening of the air gap should be positioned facing up. Push the device down until it sits firmly in place within the bracket and the hole.
If your air gap includes a decorative cap or cover, place it over the top of the device for a clean, finished look. Make sure the air gap is upright and aligned correctly, as this will prevent any issues during operation. Once mounted, you can proceed to connect the necessary tubing to the air gap.
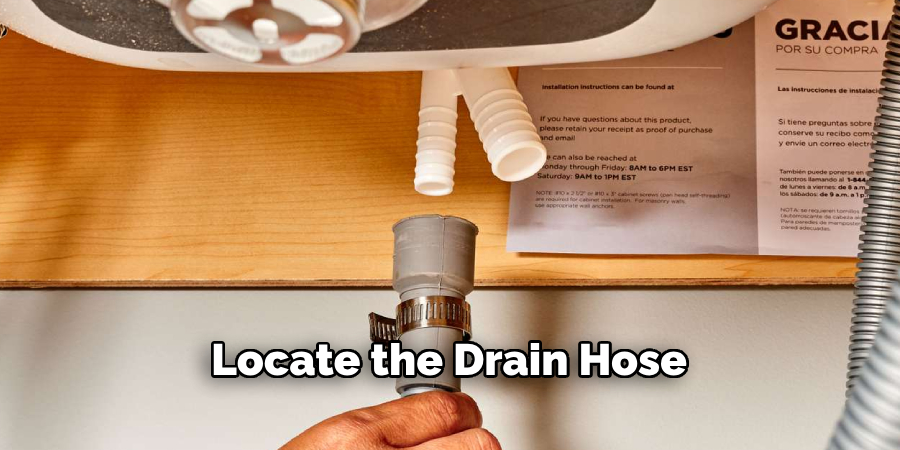
Step 4: Connect the Drain Hose
Locate the drain hose from your dishwasher and connect it to the smaller opening of the air gap. This hose carries water from your dishwasher’s drainage system to the air gap, preventing any contaminated water from flowing back into your dishwasher. Ensure that this connection is secure and tightly fitted to prevent any leaks during use.
It is crucial to make sure the drain hose has a high loop or is positioned above the level of your sink. This configuration helps prevent any backflow of dirty water into your dishwasher, ensuring that your dishes come out clean and safe for use.
Step 5: Connect the Discharge Hose
Next, you will need to connect the discharge hose from the air gap to your plumbing system. Locate the pipe coming from your garbage disposal unit or sink drain and connect it to the larger opening on the air gap device.
Use the plumber’s tape to ensure a tight and secure connection between these two components. The discharge hose will carry any excess water from the air gap to your plumbing system, keeping your dishwasher safe and in good working condition.
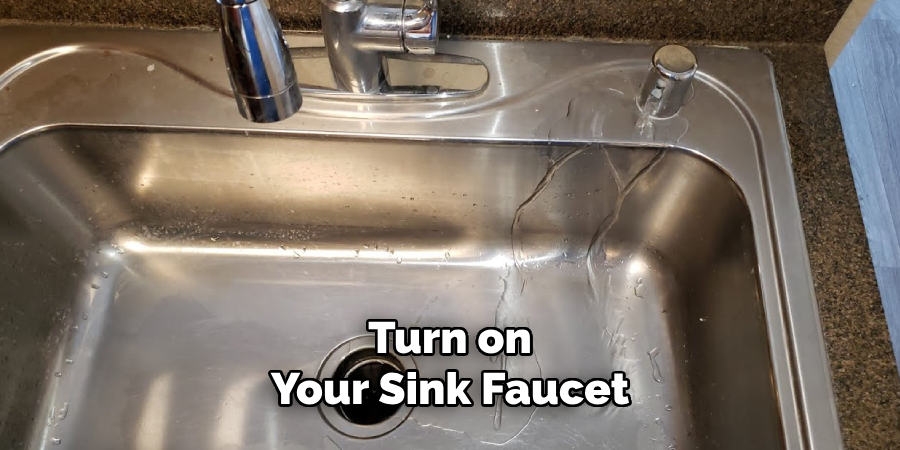
Step 6: Test for Leaks
Before turning on your dishwasher, it is essential to check for any leaks in the system. Turn on your sink faucet and allow water to flow into the sink. Observe all connections, including those between the dishwasher, air gap, and plumbing system, for any signs of leakage.
If everything looks good, you can proceed to turn on the dishwasher and run a cycle to ensure that it is working correctly with no issues. If you notice any leaks or problems during this step, make sure to fix them before using your dishwasher regularly.
Step 7: Reconnect Power Supply
After successfully installing the air gap and completing all necessary checks, you can now reconnect the power supply for your dishwasher. Make sure to follow manufacturer instructions and safety precautions when handling any electrical connections.
Once the power is restored, you can run another test cycle to ensure that your dishwasher operates correctly with the new air gap installed.
Following these seven steps on how to install an air gap for a dishwasher will allow you to install an air gap for your dishwasher quickly and efficiently. Remember to always prioritize safety during the installation process and consult a professional if you encounter any difficulties or have any concerns. Enjoy clean dishes and peace of mind with an air gap in place to protect your dishwasher!
Additional Benefits of Using an Air Gap
- Protects dishwasher from contaminated water
- Prevents backflow into the dishwasher
- Helps to identify and troubleshoot potential plumbing issues
- Easy installation process
- Can potentially lower homeowner’s insurance premiums (check with your provider)
- Reduces the risk of clogged drains and pipes
- It can improve overall hygiene in the kitchen by preventing dirty water from reaching dishes and utensils.
- It can potentially prolong the lifespan of your dishwasher by preventing damage from contaminated water.
- Adds value to your home as it is a recommended safety measure for dishwashers in many building codes and regulations.
- Aesthetically appealing options are available to match your kitchen decor.
Frequently Asked Questions
Q: Can I Install an Air Gap Myself, or Do I Need a Professional?
A: While the installation process is relatively straightforward, it is recommended to consult a professional if you are unfamiliar with plumbing work or encounter any difficulties during the installation. This will ensure proper installation and minimize the risk of potential issues in the future.
Q: Do All Dishwashers Require an Air Gap?
A: Not all dishwashers require an air gap, but it is recommended that one be installed for added protection and peace of mind. Check with your dishwasher’s manufacturer or local building codes to determine if an air gap is necessary for your specific model.
Q: How Often Should I Replace My Air Gap?
A: It is recommended to replace your air gap every five years or sooner if you notice any signs of wear and tear, such as cracks or leaks. Regularly checking and maintaining your air gap can extend its lifespan and keep your dishwasher in good working condition.
Q: Can I Install an Air Gap on My Own Without Any Prior Plumbing Experience?
A: While it is possible to install an air gap without prior plumbing experience, it is recommended to consult a professional for proper installation and to ensure safety measures are followed. If you do choose to tackle the installation yourself, make sure to carefully read all instructions and take necessary precautions. Always use caution when working with any plumbing components or tools.
Conclusion
Installing an air gap for your dishwasher is a simple yet crucial step in ensuring the safety and efficiency of your kitchen’s plumbing system. By following the outlined steps on how to install an air gap for a dishwasher, you can prevent backflow, protect your dishwasher from contaminated water, and improve overall kitchen hygiene. Whether you decide to install the air gap yourself or seek professional assistance, this small addition can save you from potential plumbing issues and provide peace of mind.
Regular maintenance and occasional replacement will keep your air gap functioning effectively for years to come, helping to maintain a clean and healthy environment in your home.
Professional Focus
Angela Ervin, a former interior designer turned blogger, specializes in kitchen design and renovations. Through her website, she blends her passion for cooking with design expertise, sharing practical and creative ideas. Known for balancing functionality and beauty, Angela’s insightful content has made her a trusted voice in home design and lifestyle.
About the Author
Angela Ervin, an experienced interior designer and blogger, combines her passion for kitchen renovations with storytelling. Living in Petersburg with her family, she enjoys cooking and testing her projects firsthand. Known for her humor and relatable style, Angela shares creative, functional design insights through her content, making her a trusted voice in home design.
Education History
University: Virginia Commonwealth University
Degree: Bachelor of Fine Arts (BFA) in Interior Design
- Angela’s education at VCU focused on mastering core interior design principles, including spatial planning, color theory, materials selection, and sustainable design practices.
- She gained hands-on experience through studio projects and collaborative design exercises, which honed her ability to create functional and aesthetically pleasing environments.
- Her coursework also emphasized problem-solving and practical applications of design, preparing her for real-world projects like her self-directed kitchen renovations.
- The program’s strong foundation in both technical skills and creative expression shaped Angela’s ability to seamlessly integrate form and function in her work.