
Replacing a dishwasher may seem like a daunting task, but with the right tools and a step-by-step approach, it can be straightforward and rewarding. Whether you’re upgrading to a newer model or replacing a faulty unit, this guide will help you complete the process with confidence.
By following these instructions on how to replace a dishwasher, you’ll save money on professional installation and gain the satisfaction of completing the project yourself.
Why Replace Your Dishwasher?
Before diving into the steps for replacing a dishwasher, it’s important to understand why you might need to replace your current unit. Here are a few common reasons:
Age
Like all appliances, dishwashers have a lifespan and may become less efficient or stop working altogether over time. If your dishwasher is older than 10 years, it may be time for a replacement.
Wear and Tear
Daily usage can cause wear and tear on dishwashers, leading to leaks, clogs, or other issues that affect their performance. These problems may require frequent repairs or indicate the need for a new unit.
Upgrading
If you’re looking to upgrade to a newer model with more features, replacing your current dishwasher may be the best option. Newer models often have improved energy efficiency and advanced technology for better cleaning.

Tools and Materials Needed
To successfully replace a dishwasher, you’ll need the following tools and materials:
New Dishwasher
Make sure to purchase a model that fits your kitchen layout and plumbing connections. Measure the opening where the dishwasher will go to ensure a proper fit.
Wrench
A wrench will be necessary for disconnecting and reconnecting water supply lines.
Screwdriver
Depending on your specific model, you may need a screwdriver to remove or install screws holding the dishwasher in place.
Adjustable Pliers
These pliers will come in handy for connecting and tightening hoses and clamps.
Tape Measure
Tape measures are used to ensure accurate measurements when installing the new dishwasher.
9 Steps on How to Replace a Dishwasher
Step 1: Prepare the Area
Before beginning the replacement process, it’s essential to prepare the area to ensure a smooth installation. Start by turning off the power to the dishwasher at the circuit breaker to prevent any electrical hazards. Next, shut off the water supply valve, usually located under the kitchen sink, to avoid leaks during the replacement process.
Clear the area around the dishwasher, removing any items from nearby cabinets or countertops for easy access. Finally, place a towel or shallow pan under the water supply line to catch any residual water when disconnecting the old dishwasher. Proper preparation ensures safety and minimizes mess during the installation.
Step 2: Disconnect the Old Dishwasher
With the area prepared, begin disconnecting the old dishwasher. First, locate the water supply line, which is typically a flexible tube connected to the dishwasher. Use an adjustable wrench to loosen and disconnect the line, letting any remaining water drain into the towel or shallow pan placed earlier. Next, find the power connection—this may be a plug into a nearby outlet or a hardwired connections. For hardwired dishwashers, access the junction box (usually located at the base of the unit), remove the cover, and carefully disconnect the wires, labeling them if needed for easier reconnection later.
Finally, disconnect the drain hose, typically attached to the sink drain or garbage disposal. Use pliers to loosen the clamp holding the hose in place, then gently remove it. Once all connections are detached, check for any screws or brackets securing the dishwasher to the countertop or cabinetry. Remove these as necessary to free the unit for removal in the next step.
Step 3: Remove the Old Dishwasher
With all connections disconnected, it’s time to remove the old dishwasher from its space. Start by carefully sliding the dishwasher out from under the countertop. If the unit is resistant, check that no screws or mounting brackets remain secured—this is a common reason for difficulty. Using gentle pressure, wiggle the dishwasher back and forth to loosen it if necessary, and avoid damaging surrounding cabinets or flooring.
Once removed, inspect the area where the dishwasher was installed. Look for any water damage, debris, or obstructions that may need to be addressed before installing the new unit. This is also a good time to clean the installation space to ensure a smooth and clean fit for the replacement dishwasher. Set the old dishwasher aside for proper recycling or disposal according to your local regulations.

Step 4: Prepare the New Dishwasher
Before installing the new dishwasher, there are a few steps to take to prepare it for installation. Start by removing any packaging or protective coverings from the unit. Next, carefully read through the manufacturer’s instructions and familiarize yourself with the specific requirements for installation.
Check that all necessary parts and hardware are included with the dishwasher and gather any additional tools needed for installation. This is also a good time to double-check that the new dishwasher will fit properly in the designated space. If not, adjustments may need to be made before proceeding.
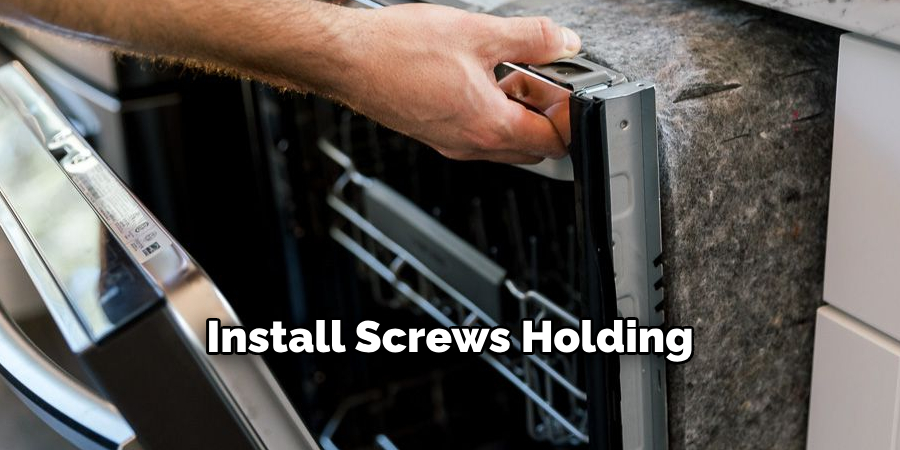
Step 5: Install Mounting Brackets
To secure the new dishwasher, you’ll need to attach the mounting brackets. Start by locating the brackets included with your dishwasher, which are typically packaged with the unit. These brackets are designed to anchor the dishwasher to the countertop or cabinet to prevent it from tipping forward during use.
Refer to the manufacturer’s instructions to determine the correct placement for the brackets. For most models, you’ll need to attach them to the top or sides of the dishwasher. Use a screwdriver to fasten the brackets securely to the unit. If attaching to the countertop, make sure the material can support the screws; for stone or granite countertops, side-mounting brackets may be required instead.
Step 6: Connect the Water Supply
With the brackets in place, it’s time to connect the water supply line. Start by connecting the hose to the dishwasher’s inlet valve, located at the bottom front of most models. Use an adjustable wrench to tighten the connection securely.
Next, attach the other end of the hose to your home’s hot water supply valve. Turn on the water valve and check for any leaks—tighten connections as needed to prevent leaks.
Step 7: Connect the Drain Hose
The next step is to properly connect the drain hose to ensure wastewater is efficiently removed from the dishwasher. Begin by locating the drain hose outlet on the dishwasher, typically found at the back or bottom of the unit. Attach the drain hose firmly to this outlet, using a clamp to secure the connection and prevent leaks.
Next, route the other end of the drain hose to the sink drain or garbage disposal. Most dishwashers require the hose to loop upward to create an air gap and prevent the backflow of dirty water. Secure the drain hose connection with a clamp, ensuring it is tightly fastened at both ends.
Step 8: Secure the Power Connection
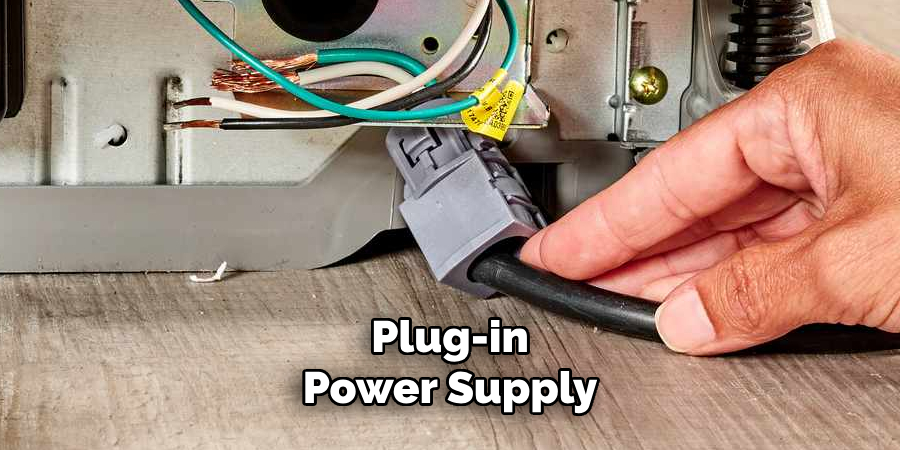
For dishwashers with a plug-in power supply, simply plug the unit into a nearby outlet. If your new dishwasher is hardwired, follow the manufacturer’s instructions to connect and secure the wiring in the junction box. Make sure all connections are tight and properly insulated to prevent electrical hazards.
Otherwise, for hardwired dishwashers, consider hiring a professional electrician to ensure the wiring is done correctly and safely.
Step 9: Test the New Dishwasher
With all the connections securely in place, it’s time to test the new dishwasher. Begin by turning on the water supply and checking for any leaks around the water line or drain hose. Tighten any connections if necessary to eliminate leaks. Next, restore power to the unit by plugging it in or ensuring the hardwired connection is complete.
Following the manufacturer’s instructions on how to replace a dishwasher, run a test cycle to make sure the dishwasher is functioning properly. Once satisfied with the results, congratulations—you’ve successfully installed your new dishwasher!
Additional Tips and Considerations
While the steps outlined above are generally applicable to most dishwashers, it’s important to always refer to the manufacturer’s specific instructions for your particular model. This will ensure proper installation and avoid any potential issues or complications.
Additionally, consider hiring a professional plumber or handyman for dishwasher installation if you’re not comfortable with handling the task yourself. They have the expertise and proper tools to ensure a smooth and successful installation process.
Lastly, don’t forget to recycle or properly dispose of your old dishwasher according to local regulations. Many appliance stores offer recycling services for old appliances, making it easy to responsibly discard your old unit. With your new dishwasher installed, enjoy the convenience and efficiency of having clean dishes with minimal effort!
Frequently Asked Questions
Q1: How Long Does It Typically Take to Install a Dishwasher?
A1: Installing a dishwasher usually takes about 1-2 hours, depending on the complexity of the installation and any potential complications that may arise. It’s important to take the time to properly prepare and install the new dishwasher to avoid any issues in the future.
Q2: Do I Need Any Special Tools for Installing a Dishwasher?
A2: The tools needed may vary depending on the specific model of the dishwasher, but generally, you’ll need an adjustable wrench, screwdriver, pliers, and possibly a drill. Refer to the manufacturer’s instructions for a list of recommended tools for your particular model.
Q3: Can I Install a Dishwasher Myself or Should I Hire a Professional?
A3: It is possible to install a dishwasher yourself if you have some basic knowledge of plumbing and electrical work. However, if you’re not confident in your skills or if the installation seems too complicated, it’s best to hire a professional for safety and peace of mind.
Q4: Can I Replace My Old Dishwasher with Any Model?
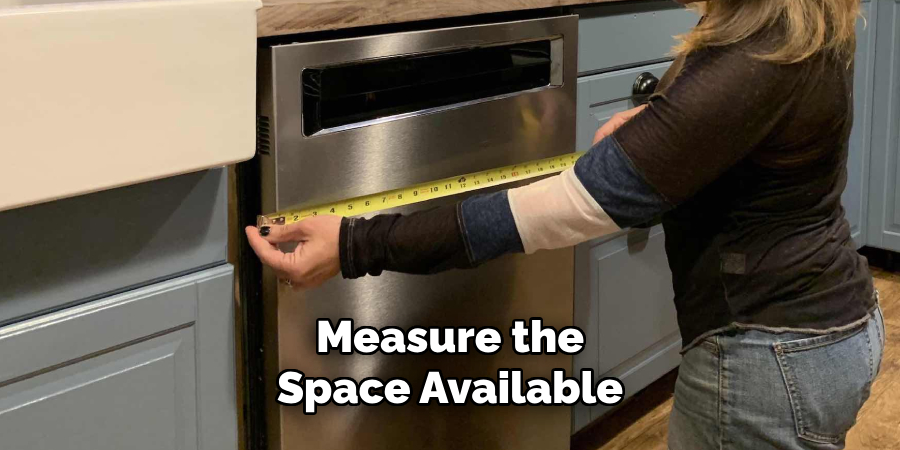
A4: Before purchasing a new dishwasher, make sure to carefully measure the space available in your kitchen to ensure the new unit will fit properly. Additionally, check with your local building codes and regulations to confirm any specific requirements for dishwasher installations. Once you have confirmed compatibility and compliance, you can replace your old dishwasher with any model that fits within those parameters.
Conclusion
Installing a new dishwasher may seem like a daunting task, but by following the steps detailed in this guide on how to replace a dishwasher, you can complete the process with confidence. Proper preparation, careful attention to the connections, and adherence to the manufacturer’s instructions are essential for a successful installation.
Whether you choose to handle it yourself or hire a professional, ensuring that your dishwasher is securely and correctly installed will provide you with years of reliable service and convenience. Enjoy your new appliance and the ease it brings to your daily routine!
Professional Focus
Angela Ervin, a former interior designer turned blogger, specializes in kitchen design and renovations. Through her website, she blends her passion for cooking with design expertise, sharing practical and creative ideas. Known for balancing functionality and beauty, Angela’s insightful content has made her a trusted voice in home design and lifestyle.
About the Author
Angela Ervin, an experienced interior designer and blogger, combines her passion for kitchen renovations with storytelling. Living in Petersburg with her family, she enjoys cooking and testing her projects firsthand. Known for her humor and relatable style, Angela shares creative, functional design insights through her content, making her a trusted voice in home design.
Education History
University: Virginia Commonwealth University
Degree: Bachelor of Fine Arts (BFA) in Interior Design
- Angela’s education at VCU focused on mastering core interior design principles, including spatial planning, color theory, materials selection, and sustainable design practices.
- She gained hands-on experience through studio projects and collaborative design exercises, which honed her ability to create functional and aesthetically pleasing environments.
- Her coursework also emphasized problem-solving and practical applications of design, preparing her for real-world projects like her self-directed kitchen renovations.
- The program’s strong foundation in both technical skills and creative expression shaped Angela’s ability to seamlessly integrate form and function in her work.