
Keeping your GE microwave running efficiently and ensuring the air in your kitchen stays fresh begins with a task many overlook: filter maintenance. Frequently used for reheating leftovers, defrosting frozen foods, or whipping up quick meals, your microwave collects grease, smoke, and odors—especially when used above a range or with high-powered ventilation. Over time, these deposits accumulate in the filter, impacting the machine’s overall performance and even posing potential health and safety risks.
Understanding how to clean GE microwave filter is both simple and essential. A dirty filter forces your microwave’s fan to work harder, leading to reduced efficiency, possible malfunction, and the risk of overheating. By learning effective cleaning techniques, you help safeguard your appliance’s lifespan while promoting a cleaner cooking environment. This article will guide you step by step on how to clean the GE microwave filter, why it matters, and how to keep your microwave performing at its best for years to come.
Understanding the Role of the Microwave Filter
What Does the Microwave Filter Do?
The microwave filter is a small but vital part of your appliance’s operation. Its primary job is to trap airborne grease, smoke, and cooking odors before they recirculate into your kitchen or clog the microwave’s internal ventilation system. When food is heated or cooked—especially high-fat or high-moisture items—these particles travel with the steam and can coat the inside of your microwave and the surrounding airspace.
An efficient filter captures these unwanted particles, helping maintain not only the functionality of the microwave but also keeping the kitchen environment fresh. If neglected, accumulated debris can restrict airflow, increase operational noise, and, in some cases, negatively affect the taste and aroma of the food you prepare.
Types of Filters in GE Microwaves
GE microwaves typically use one or two types of filters—grease filters and charcoal filters.
Grease filters are designed for over-the-range models and are generally made of metal mesh. Their main purpose is to catch grease and other cooking residues. These filters are washable and can be used for an extended period, provided they receive regular cleaning.
Charcoal filters are used primarily to neutralize odors. They are installed above or behind the grease filter and are more common in microwaves that recirculate air rather than vent it outside. Unlike grease filters, charcoal filters are not washable. Instead, they need periodic replacement to remain effective.
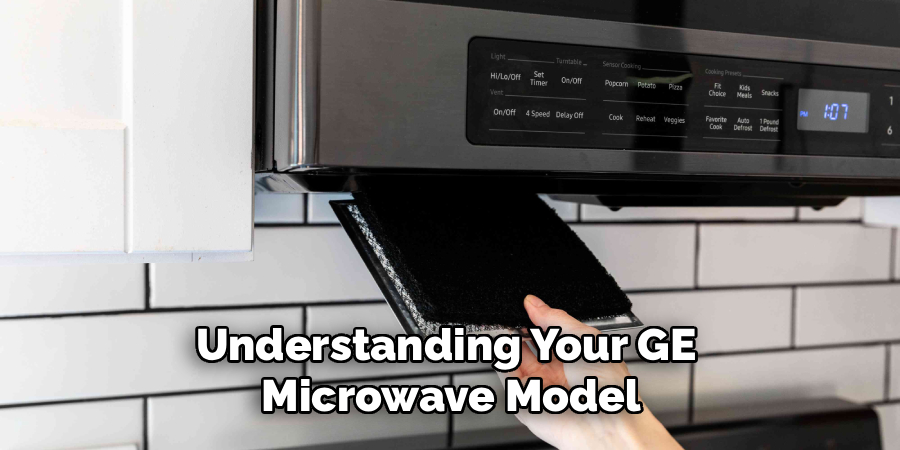
Understanding your GE microwave model and the type of filter it uses ensures that you apply the right cleaning and maintenance methods.
Why Cleaning the GE Microwave Filter Is Necessary
Effects of a Dirty Filter
A filter left unattended quickly turns into a magnet for grime and grease. As layers build up, the filter’s ability to capture new particles diminishes significantly. Ventilation slows, and your microwave may start making louder noises as the fan pushes harder to move air through the clogged mesh. In some instances, the microwave may even shut down or display error codes due to overheating or restricted airflow.
Beyond appliance performance, a dirty filter can also pose health risks. Grease and food residue serve as an ideal breeding ground for bacteria and mold. Repeated cooking without cleaning the filter recirculates contaminated air back into your kitchen, possibly affecting indoor air quality and, ultimately, your well-being.
Benefits of Regular Cleaning
Committing to a cleaning schedule yields several notable advantages. Regularly cleaned filters:
- Enhance microwave performance and efficiency,
- Extend the operational life of the appliance,
- Maintain better kitchen hygiene by reducing smoke, odors, and airborne grease.
- Lower the risk of long-term damage and costly repairs.
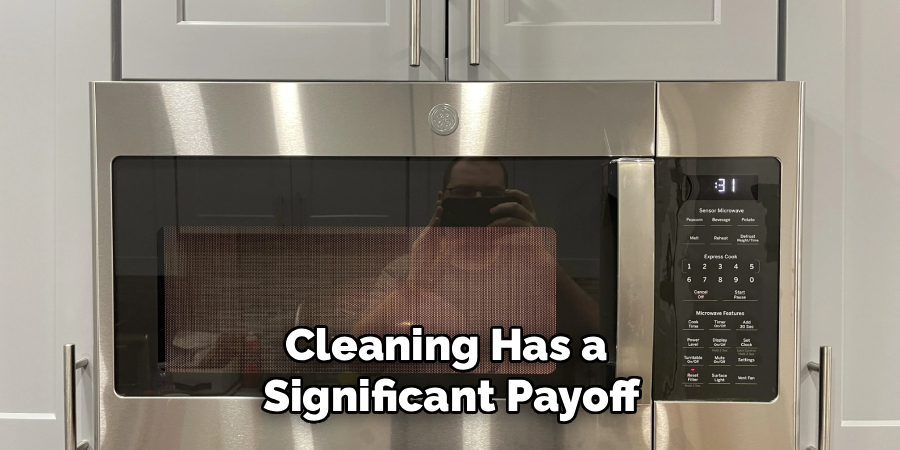
In short, the small investment of time spent on cleaning has a significant payoff.
How to Identify When Your GE Microwave Filter Needs Cleaning
Signs of a Clogged Filter
Not every microwave filter will look obviously dirty, so it’s important to watch for telltale signs that cleaning is overdue. Common indicators include:
- Reduced ventilation or weak airflow when the microwave or range hood fan is active,
- Increased operational noise,
- Accumulation of visible grease, oil, or food particles on the filter surface,
- Lingering or strong cooking odors even after your meal is finished,
- Yellowing or discoloration of the metal mesh (grease filters).
Paying attention to these signs will help you act before residue buildup affects your microwave or kitchen air.
Recommended Cleaning Frequency
The optimal cleaning schedule depends on how often you use your microwave and what types of food you typically prepare. As a general rule of thumb:
- For regular use (several times a week), grease filters should be cleaned at least once a month.
- If you seldom cook greasy or aromatic dishes, cleaning every two to three months may suffice.
- Charcoal filters, since they can’t be washed, should be replaced every six months or according to the manufacturer’s recommendation.
Always consult your GE microwave’s manual, as models and features may slightly vary.
Step-by-Step Guide on How to Clean GE Microwave Filter
Tools and Materials Needed
Before starting, gather the following items:
- Mild dish detergent or non-abrasive cleaner,
- Warm water,
- A soft sponge or washcloth,
- (Optional) A soft-bristled brush for stubborn grime,
- Dry, lint-free towel or paper towels.
Having these supplies on hand makes the process faster and helps prevent accidental damage.
Removing the Filter
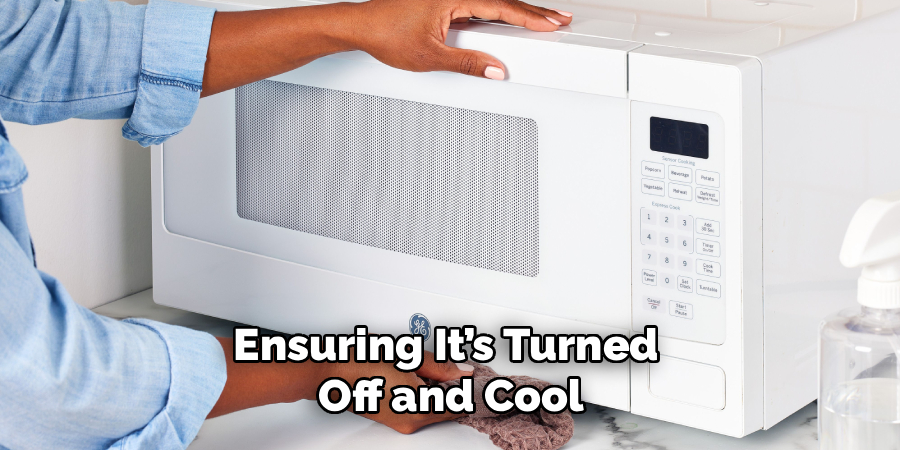
Start by unplugging the microwave or ensuring it’s turned off and cool. Most GE microwave filters are located on the underside of the appliance, especially for over-the-range units. Look for visible metal mesh panels secured with tabs or small screws.
- Gently press or slide the retaining tabs to release the filter.
- If there are screws, carefully unfasten them with the appropriate screwdriver and set them aside.
- Slowly pull the filter out, taking note of its orientation for easy replacement.
Take care not to bend or deform the filter during removal.
Cleaning Process
With the filter removed:
- Fill a sink or basin with warm water and add a small amount of mild detergent.
- Submerge the grease filter and allow it to soak for 10–15 minutes. This helps loosen accumulated grease and debris.
- Use a soft sponge or cloth to gently scrub the mesh. For persistent stains or stuck-on residue, use a soft-bristled brush, moving in the direction of the mesh to avoid damage.
- Rinse thoroughly with warm water to remove all soap and debris.
- For stubborn spots, sprinkle a small amount of baking soda onto the mesh and gently scrub until clean. Commercial kitchen degreasers can also be used, provided they are safe for aluminum.
If you have a charcoal filter, do not attempt to wash it. These must be replaced entirely when saturated, as attempts to clean them can reduce their ability to filter odors.
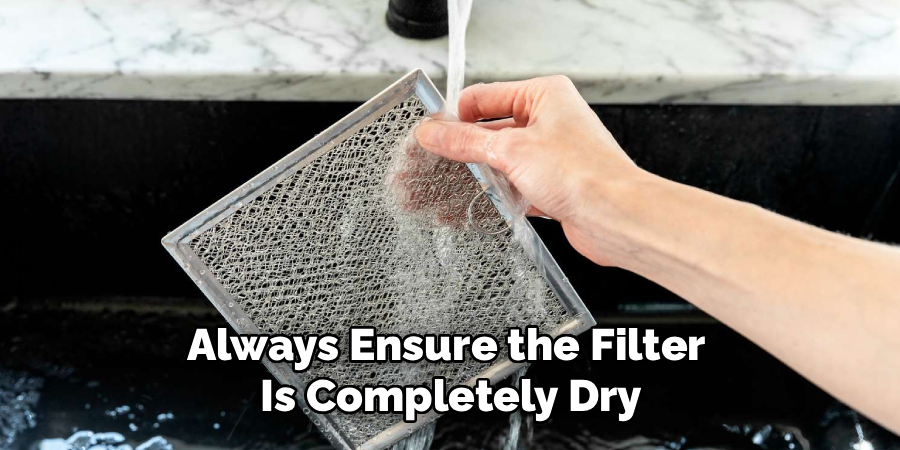
Drying and Reinstalling the Filter
After cleaning:
- Shake off excess water gently.
- Lay the filter flat on a clean, dry towel or paper towel and allow it to air dry completely. Avoid using heat sources, as this may deform the mesh.
- Once dry, insert the filter back into its housing according to your microwave’s design—ensuring that it fits snugly and securely.
- Reattach any screws or tabs as needed.
Always ensure the filter is completely dry before reinstalling to prevent unwanted moisture buildup inside the appliance.
Preventative Maintenance Tips
Keeping Filters Cleaner for Longer
Proactive habits can significantly reduce how often a filter needs deep cleaning or replacement. Try to:
- Wipe down the microwave interior and the area around the filter after preparing messy or greasy foods.
- Cover food with a microwave-safe lid or paper towel to minimize spatters and airborne residue.
- Avoid frequent cooking of high-fat foods unless necessary, as these generate the most grease buildup.
Taking a few seconds to clean as you go prevents stubborn grime from accumulating.
Scheduling Regular Cleanings
To ensure you never miss a cleaning, set a reminder on your phone or calendar based on your average usage. Many homeowners find it helpful to pair filter cleaning with other regular kitchen chores. If you have a busy household or cook daily, checking the filter monthly can keep your appliance operating at its best.
Troubleshooting Common Issues
Problems That May Arise During Cleaning
Occasionally, you may encounter a stuck filter or persistent grime that just won’t budge. In these cases, avoid forcing the filter, as bending or damaging the mesh can compromise its effectiveness. For stuck-on grease, allow the filter to soak longer and try gently scrubbing again. If your filter is stuck within the microwave, check the user manual for specific removal tips tailored to your model.
If you notice corrosion, heavy discoloration, or signs of physical damage (such as torn mesh), the filter may be past its useful life.
When Cleaning Isn’t Enough
Sometimes, despite your best efforts, a filter simply won’t come clean. This typically occurs with very old filters or those that have been neglected for a long time. Grease and oil can bake onto the mesh over years of heavy use, forming a residue that can’t be removed with standard cleaning. Metal filters showing rust or warped frames should be replaced, as should charcoal filters that are saturated with odors or losing their structure.
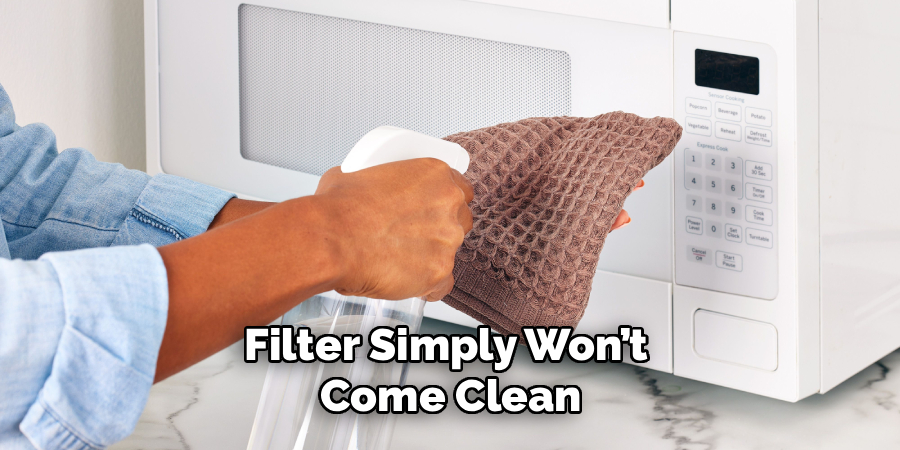
Whenever replacement is necessary, use filters specifically designed for your GE microwave model for the best fit and performance.
Benefits of Clean GE Microwave Filters
Enhanced Appliance Efficiency
A clean filter makes a significant difference in your microwave’s day-to-day operation. With unobstructed airflow, the exhaust fan runs more quietly and cools the unit more effectively, reducing the risk of overheating or mechanical strain. As a result, the microwave can heat food more evenly and at the right speed, saving you time and energy.
Improved Indoor Air Quality
Clean filters do more than protect the appliance—they keep your kitchen environment healthier and more pleasant. Effective grease and odor trapping means less smoke, fewer lingering smells, and improved air quality for anyone cooking or spending time in the kitchen. Especially in homes without external ventilation, a clean filter is your first line of defense against indoor air pollution from cooking.
Conclusion
Learning how to clean GE microwave filter is a straightforward yet crucial practice for anyone who relies on their microwave daily. Regular cleaning supports both appliance performance and kitchen cleanliness, keeping odors at bay and extending the life of your equipment. By observing the signs of a dirty filter, following a consistent cleaning routine, and knowing when replacement is necessary, you’ll enjoy smoother operation and a fresher kitchen atmosphere.
Start by implementing the step-by-step cleaning guide outlined here, and make filter maintenance a seamless part of your household care. Prioritizing how to clean the GE microwave filter means you’re not just caring for an appliance—you’re investing in your home’s safety, efficiency, and overall well-being.
Professional Focus
Angela Ervin, a former interior designer turned blogger, specializes in kitchen design and renovations. Through her website, she blends her passion for cooking with design expertise, sharing practical and creative ideas. Known for balancing functionality and beauty, Angela’s insightful content has made her a trusted voice in home design and lifestyle.
About the Author
Angela Ervin, an experienced interior designer and blogger, combines her passion for kitchen renovations with storytelling. Living in Petersburg with her family, she enjoys cooking and testing her projects firsthand. Known for her humor and relatable style, Angela shares creative, functional design insights through her content, making her a trusted voice in home design.
Education History
University: Virginia Commonwealth University
Degree: Bachelor of Fine Arts (BFA) in Interior Design
- Angela’s education at VCU focused on mastering core interior design principles, including spatial planning, color theory, materials selection, and sustainable design practices.
- She gained hands-on experience through studio projects and collaborative design exercises, which honed her ability to create functional and aesthetically pleasing environments.
- Her coursework also emphasized problem-solving and practical applications of design, preparing her for real-world projects like her self-directed kitchen renovations.
- The program’s strong foundation in both technical skills and creative expression shaped Angela’s ability to seamlessly integrate form and function in her work.