
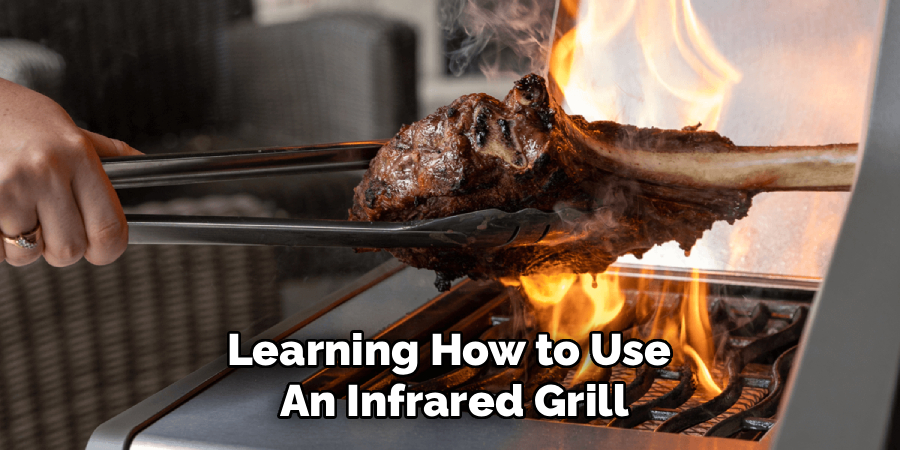
Infrared grilling has revolutionized the way people prepare their favorite meals outdoors. Unlike traditional grilling methods, an infrared grill uses advanced technology to heat food evenly and efficiently. Whether you’re a seasoned griller or just starting out, mastering how to use an infrared grill can dramatically elevate your culinary game. By capturing high temperatures quickly and distributing heat uniformly, this powerful tool allows you to sear meats, cook veggies, and toast bread with precision.
This guide will walk you through the steps to use an infrared grill effectively, discuss why it’s an excellent addition to your outdoor cooking arsenal, and answer frequently asked questions. By the time you’re finished reading, you will feel confident to fire up your grill for a perfect cookout experience.
Why is Learning to Grill on an Infrared Grill Important?
Infrared grills offer unparalleled benefits compared to their traditional counterparts. First and foremost, they are known for reaching high temperatures quickly. This makes them perfect for searing steaks, locking in juices, and achieving restaurant-quality char marks. They are also incredibly energy-efficient because they work by radiating heat directly to the food instead of heating the surrounding air.
Another crucial advantage is their ability to cook evenly. With conventional grills, uneven heating zones can lead to burnt or undercooked food. Infrared technology eliminates this issue, ensuring your dishes come out evenly cooked every time. Additionally, these grills produce less smoke compared to other types, which makes them perfect for neighborhoods where smoke might disturb neighbors.
If you’re a home cook aiming for consistency and efficiency or someone new to outdoor grilling, learning how to use an infrared grill will open the door to quicker, tastier, and hassle-free grilling.
8 Step by Steps Guides on How to Use an Infrared Grill
Step 1: Understand Your Grill’s Components
The first step in learning how to use an infrared grill is becoming familiar with its main components. Infrared grills typically feature either ceramic burners or metal panels that radiate heat. Most models come with adjustable temperature controls, which allow you to fine-tune the heat to suit different foods. Take time to read your grill’s user manual to understand how it works.
Knowing how infrared technology generates heat is important. Instead of using open flames, the grill radiates energy, which directly heats the food. This makes preheating faster and ensures consistent results. Many grills also include drip trays to catch excess fat, making them easier to clean than traditional grills.
Step 2: Prepare Your Grill for Cooking
Before using your infrared grill, ensure it’s properly cleaned and set up. Check the gas or propane source to ensure it is secure and free of leaks. Then clean the grilling surface to remove any leftover food debris or oil from previous use. Preheating is crucial with infrared grills, so you’ll want to turn it on and allow it to heat up for 5-10 minutes, depending on the manufacturer’s instructions.
Skipping preheating can result in uneven cooking, as the grill needs time to distribute heat evenly across the surface. A well-preheated grill guarantees the food cooks properly and ensures the perfect sear.
Step 3: Adjust the Temperature for Your Dish
Infrared grills give you precise temperature control, making it easier to create delicious dishes. Most models allow you to set the temperature for high-heat searing or adjust it for low-and-slow cooking. To sear steaks, for example, opt for higher temperatures in the 700°F range. For grilling fish or vegetables, lower heat will help retain their delicate textures.
Use a meat thermometer to verify internal temperatures for meats, ensuring they are safe to consume. Each type of food benefits from a specific heat level, so experiment to master the art of precision cooking.
Step 4: Add Cooking Oil or Marinade
Infrared grills excel at reaching high temperatures, so it’s essential to prepare your food to avoid drying out. Apply a thin layer of cooking oil to both the grill grates and your ingredients to minimize sticking. For meats, marinating beforehand enhances flavor and tenderness. Marinades that include acids like lemon juice or vinegar are great for breaking down tougher cuts of meat.
Avoid over-marination, as acids can cause the meat to cook unevenly once it hits the grill. Stick to your chosen recipe’s guidelines for the best results.
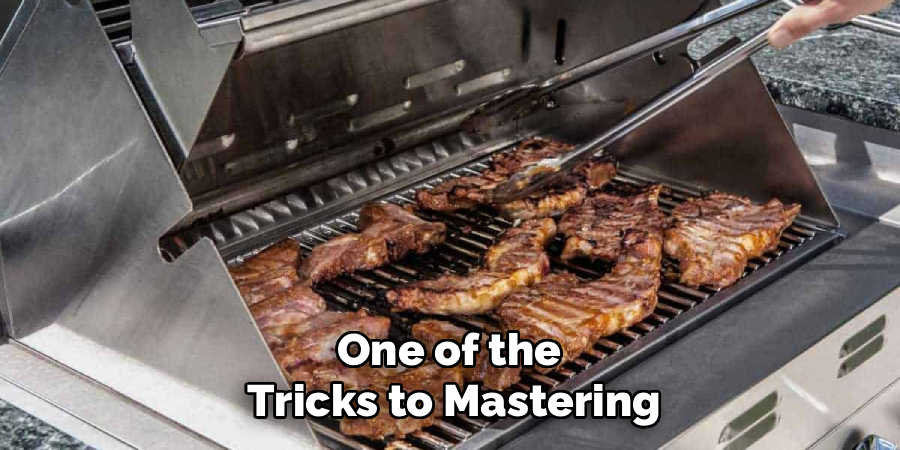
Step 5: Use Direct vs. Indirect Heat
One of the tricks to mastering how to use an infrared grill is knowing when to use direct and indirect heat. Direct heat involves placing food directly over the burners for searing, while indirect heat allows you to cook food away from the immediate flame for longer periods. This is especially useful for thicker cuts of meat that require a gentle cooking process.
For example, you can start by searing a steak over direct heat to lock in juices, then move it to indirect heat to finish at the desired doneness. This two-zone cooking method works great for delicate items like fish as well.
Step 6: Mind the Cooking Time
Infrared grills cook faster than traditional grills, which means you’ll need to keep a close eye on cooking times to prevent overcooking. Due to the high heat, meats like steaks and burgers generally take less than 10 minutes to reach the perfect level of doneness. Flip your food only once to preserve its juices and ensure an even cook.
Avoid opening the grill frequently during cooking as this can cause temperature fluctuations. Keeping the grill lid closed will maintain consistent heat distribution.
Step 7: Allow Food to Rest After Cooking
Once you’re done grilling, give your food a few minutes to rest before serving. This applies to meats in particular, as resting allows the juices to redistribute throughout the cut, ensuring it remains moist and flavorful. Place the meat on a clean plate and loosely cover it with aluminum foil to retain the heat while it rests.
Serve your perfectly grilled food immediately to enjoy the full benefits of infrared cooking. You’ll notice the difference in taste and texture from this precise cooking method.

Step 8: Clean the Grill Properly
Cleaning your grill after every use prolongs its life and ensures better performance during future cookouts. Turn off the grill and allow it to cool slightly. Use a grill brush to remove food debris from the grates. If your model includes a drip tray, empty and clean it as well.
For stubborn stains, some grills allow for soap and water cleaning. Avoid harsh abrasives that may damage the infrared components. A well-maintained grill delivers consistently excellent results.
Additional Cleaning and Maintenance Tips
Deep Clean Regularly
Schedule a thorough cleaning of your grill at least once every few months, especially if you use it frequently. Remove the grates, burner protectors, and any detachable parts for a more detailed clean. Wash these components with warm, soapy water, and rinse them thoroughly before reassembling.
Check for Gas Leaks
For gas grills, inspect the hoses and connections regularly to ensure there are no leaks. A quick way to check is to apply soapy water to the connections and look for bubbles when the gas is turned on—bubbles indicate a leak that needs immediate attention.
Protect Your Grill
When not in use, invest in a durable grill cover to protect it from the elements. This helps prevent rust, dirt buildup, and weather-related wear, boosting the longevity of your grill.
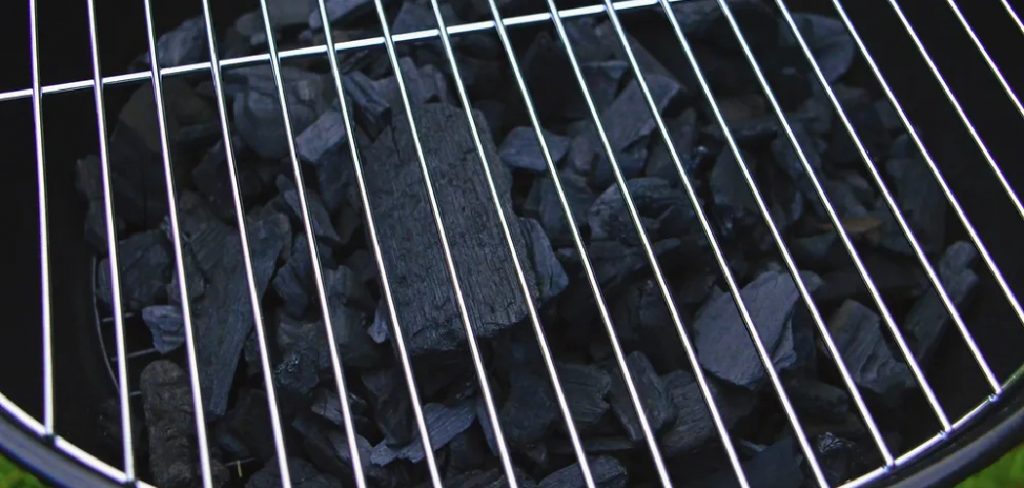
Empty and Clean Ash Trays
For charcoal grills, empty the ash trays after every use. Allow the ashes to cool completely before disposing of them, and clean the tray to prevent buildup that can restrict airflow.
Inspect Burners and Igniters
Periodically check your burners and igniters to ensure they are functioning correctly. Remove any debris or residue that might block the burners, and test the igniters to confirm they spark reliably.
Oil the Grates
To prevent food from sticking and to protect the grates from rust, lightly oil them before cooking. Use a paper towel or brush with a small amount of vegetable oil, and avoid using non-stick sprays that can leave a residue.
Store Properly in the Off-Season
If you won’t be using your grill for an extended period, clean it thoroughly and store it in a dry, sheltered location. Secure the cover tightly to safeguard it from dust and moisture.
By following these tips, you can maintain your grill’s condition and ensure it continues delivering top-notch performance for years to come.

Frequently Asked Questions
1. Can you use an infrared grill for slow cooking?
Yes, many infrared grills offer versatile temperature controls, making them suitable for both high-temperature searing and low-temperature slow cooking. Adjust the heat settings to the lower ranges to cook dishes like ribs or pork shoulder slowly, ensuring tender and flavorful results.
2. Is an infrared grill suitable for beginners?
Absolutely! Infrared grills are beginner-friendly due to their consistent heat, easy controls, and quick cooking times. For first-time users, the learning curve is minimal compared to charcoal or wood-fired options.
3. How do I prevent food from sticking to an infrared grill?
Applying a thin layer of oil to the grill grates and your food before cooking can prevent sticking. Ensure the grill is adequately preheated, as this helps create a natural non-stick surface.
4. Why does an infrared grill cook faster than traditional grills?
Infrared grills heat food directly through radiation rather than transferring heat through the air. This method eliminates heat loss, enabling the grill to reach higher temperatures quickly and cook food faster.
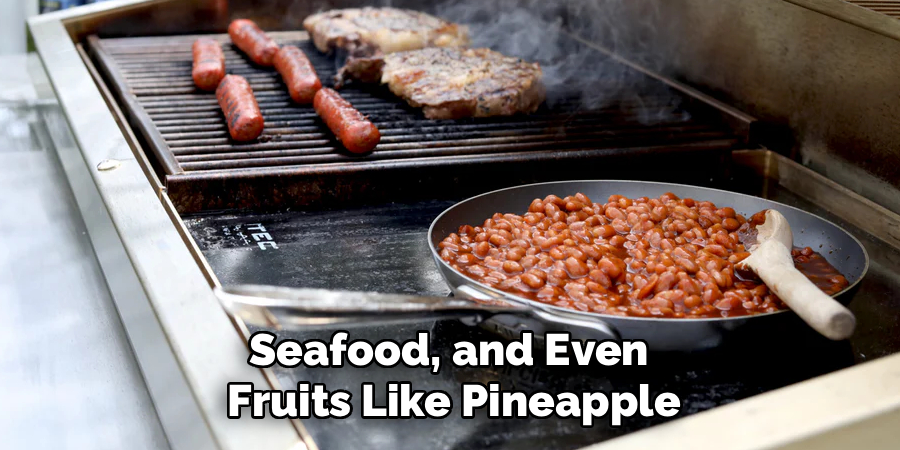
5. What can you cook besides meat on an infrared grill?
You can grill a variety of foods, including vegetables, seafood, and even fruits like pineapple. You can also toast bread or warm pita, making it a versatile tool for any meal.
Conclusion
Learning how to use an infrared grill opens up a world of possibilities for outdoor cooking enthusiasts. From searing steaks to grilling delicate fish, this tool ensures every dish comes out perfectly cooked, with less effort and time. With its ability to heat evenly, reduce smoke, and deliver consistent results, it’s an excellent option for beginners and seasoned grillers alike.
By experimenting with different marinades, rubs, and grilling techniques, you can elevate the flavors of your dishes and impress guests at any gathering. An infrared grill encourages creativity, allowing you to try new recipes and push the boundaries of traditional cooking methods. Whether preparing a quick weeknight dinner or hosting a weekend barbecue, its versatility ensures there’s always something delicious on the menu.
Now that you know how to use an infrared grill, it’s time to fire it up and create your next delicious barbecue masterpiece. Whether you’re hosting a casual weekend cookout or preparing a gourmet dinner, your infrared grill is sure to impress.
Professional Focus
Angela Ervin, a former interior designer turned blogger, specializes in kitchen design and renovations. Through her website, she blends her passion for cooking with design expertise, sharing practical and creative ideas. Known for balancing functionality and beauty, Angela’s insightful content has made her a trusted voice in home design and lifestyle.
About the Author
Angela Ervin, an experienced interior designer and blogger, combines her passion for kitchen renovations with storytelling. Living in Petersburg with her family, she enjoys cooking and testing her projects firsthand. Known for her humor and relatable style, Angela shares creative, functional design insights through her content, making her a trusted voice in home design.
Education History
University: Virginia Commonwealth University
Degree: Bachelor of Fine Arts (BFA) in Interior Design
- Angela’s education at VCU focused on mastering core interior design principles, including spatial planning, color theory, materials selection, and sustainable design practices.
- She gained hands-on experience through studio projects and collaborative design exercises, which honed her ability to create functional and aesthetically pleasing environments.
- Her coursework also emphasized problem-solving and practical applications of design, preparing her for real-world projects like her self-directed kitchen renovations.
- The program’s strong foundation in both technical skills and creative expression shaped Angela’s ability to seamlessly integrate form and function in her work.