
There’s nothing quite like a barbecue to bring friends and family together. However, one of the least glamorous but absolutely essential tasks that come with grilling is keeping your gas grill clean. Learning how to clean a gas grill not only extends its lifespan but also ensures your food tastes better by removing residues that can affect flavor. More importantly, regular cleaning safeguards you from potential fire hazards caused by accumulated grease and grime. If you’re feeling a little daunted, don’t worry—we’ve got a beginner-friendly guide to walk you through the process. By the end, you’ll find that maintaining your grill is easier than it sounds.
Start by gathering the necessary tools for cleaning your gas grill. You’ll need a grill brush, a bucket of warm soapy water, a sponge, and possibly a putty knife for scraping tough residue. Begin by ensuring the grill is turned off and has completely cooled down. Remove the grates and soak them in the soapy water. Using the grill brush, scrub away any stuck-on debris while the grates are soaking. Once clean, rinse them with water and allow them to dry.
Meanwhile, use the putty knife or sponge to scrape away grease and grime from the interior surfaces of the grill. Finally, wipe down the outside of the grill to keep it looking pristine. Regular maintenance like this will keep your grill in top condition and ready for your next barbecue.
Why Cleaning a Gas Grill Matters
Cleaning your gas grill is critical for several reasons. First, a dirty grill can significantly alter the flavor of your food. Old grease and burnt food particles can stick to whatever you’re cooking, adding less-than-appealing tastes. Second, regular cleaning prevents the buildup of carcinogens, enhancing the safety of your meals. Third, accumulated grease is a fire hazard, and regular maintenance reduces the risk of flare-ups while grilling. Finally, keeping your grill in pristine condition extends its life, saving you money on replacements or repairs. Whether you’re a seasoned griller or a beginner, understanding why this task is essential will motivate you to keep your equipment in prime condition.
10 Step-by-Step Guide on How to Clean a Gas Grill
A clean gas grill isn’t just about cleaning grates—it’s a comprehensive process that ensures your grill performs well and lasts longer. Follow these detailed steps to ensure you’re doing it properly.
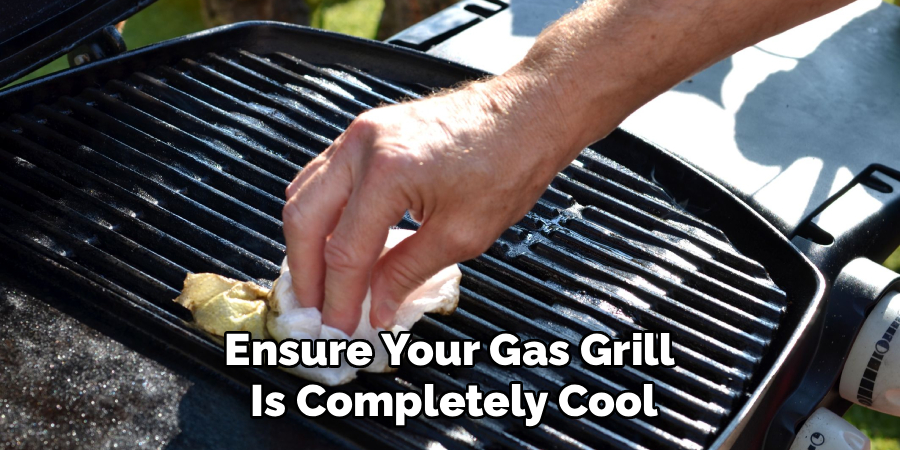
Step 1: Disconnect and Cool Down
Before starting, ensure your gas grill is completely cool. Turn off the gas supply and disconnect the propane tank or gas connection if your grill is hardwired. Cleaning a grill while it’s hot may not only cause burns but can also lead to safety risks. After disconnecting gas sources, double-check to ensure there’s no lingering gas smell.
Step 2: Remove the Grill Grates and Flame Tamers
For a deep clean, take out the grill grates, along with the flame tamers or heat deflectors, if your model includes these. These components are usually the dirtiest as they’re closest to the food and open flames. Removing them helps make cleaning each part more manageable.
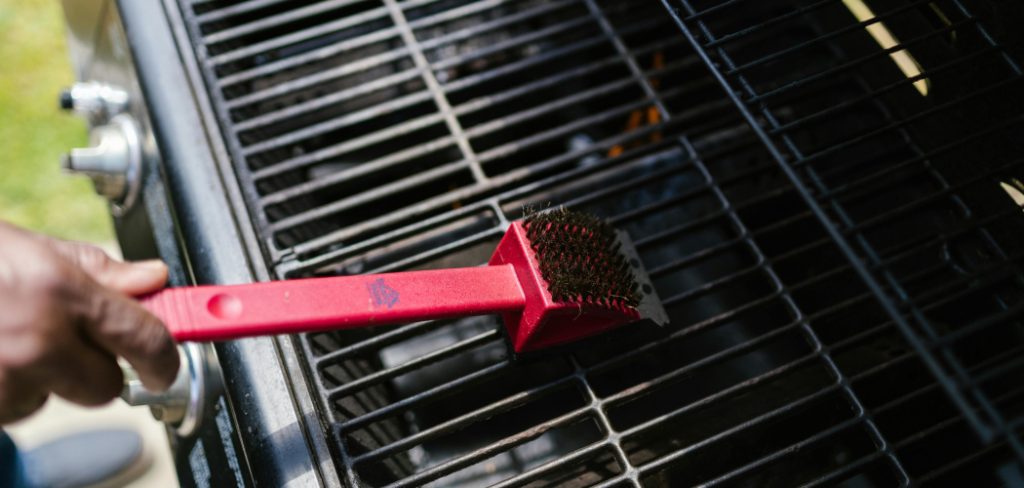
Step 3: Brush and Scrape the Grates
The grill grates are often encrusted with charred food and grease. Using a sturdy grill brush, scrub the grates thoroughly to remove loose debris. If there’s stubborn buildup, soak the grates in warm, soapy water for about 30 minutes before scrubbing them again. For chrome or porcelain grates, use a non-abrasive scrubber to avoid damaging the finish.
Step 4: Clean the Flame Tamers
Flame tamers, located directly above the burners, protect them from drippings and distribute heat evenly. These parts often collect grease and carbon buildup. Using a grill brush or a sponge soaked in soapy water, scrub both sides of the flame tamers. Allow them to dry completely before placing them back.
Step 5: Inspect and Clean the Burners
The burners are the heart of your gas grill, so keeping them clean is vital. Carefully remove or expose the burners, per your grill’s owner’s manual. Look for clogs or debris in the burner ports where the flames appear. Use a soft brush or a toothpick to clear any obstructions without damaging the metal.
Step 6: Empty and Clean the Grease Tray
Beneath your grill is a grease tray or drip pan that collects fat and oils. Over time, this tray fills up, creating a potential fire hazard. Slide out the tray and scrape off solidified grease and food particles. Wash it with warm, soapy water, dry it completely, and reinsert it back into its slot.

Step 7: Clean the Interior of the Grill
Debris and ash often reside at the bottom of the grill. Using a plastic scraper, remove any crusted material. Wipe clean with soapy water to eliminate grease stains. Be sure to dry the interior to prevent rust from forming.
Step 8: Focus on the Grill’s Exterior
The exterior of your grill is just as important. Use a non-abrasive kitchen sponge and stainless steel cleaner to remove any grease or dirt. Pay close attention to knobs, handles, and the lid, as these areas often attract grime during cooking. Finally, buff the surface with a microfiber cloth to leave your grill looking brand new.
Step 9: Reassemble the Grill
Once all components are clean and dry, reassemble your grill in reverse order. Place the burners, flame tamers, and grates back into position, ensuring everything is secure. Reconnect the gas supply and test for leaks before using the grill.
Step 10: Perform a Test Burn
After everything is reassembled, ignite the grill to do a final burn-off for about 15 minutes. This step ensures any residual cleaning solution evaporates, reducing the chances of affecting the taste of your food. Now your grill is ready for its next cooking session!
Grill Cleaning Checklist
Use this checklist to ensure your grill is thoroughly cleaned and ready for use:
- Tools & Materials
- Grill brush or scraper
- Mild dish soap
- Warm water
- Sponge or cloth
- Bucket
- Toothbrush for small areas
- Non-abrasive cleaning spray (optional)
- Disposable gloves
- Cleaning Steps
- Turn off and disconnect the gas supply if applicable.
- Allow the grill to cool completely.
- Remove the grates, flame tamers, and burners.
- Scrub all debris from the grates and internal surfaces.
- Clean the burners using a brush or cloth.
- Wash flame tamers and grates with warm soapy water.
- Wipe down the grill’s exterior with a damp cloth or non-abrasive cleaner.
- Scrub hard-to-reach areas with a toothbrush.
- Empty the grease tray and clean it thoroughly.
- Reassemble all parts securely and reconnect the gas supply.
- Perform a test burn for 15 minutes.
- Post-Cleaning Check
- Ensure there are no gas leaks.
- Confirm all parts are properly reassembled.
- Dispose of waste and cleaning materials responsibly.
Following this checklist will keep your grill in optimal condition, ensuring a safe and enjoyable cooking experience.

Frequently Asked Questions
How often should I clean my gas grill?
It’s a good idea to clean your gas grill lightly after every use to remove food residue and prevent grease buildup. A deeper clean, like the one detailed above, should be done every few months or at least twice a year, depending on usage frequency.
Can I clean my grill grates in the dishwasher?
While some grill grates may be labeled dishwasher-safe, many aren’t suited for this method because the high humidity in dishwashers can cause rusting. It’s better to soak and scrub them manually with soapy water for thorough results. Always check the manufacturer’s cleaning recommendations if you’re unsure.
What tools are best for cleaning a gas grill?
Must-have tools include a grill brush with stiff bristles, a plastic scraper, non-abrasive sponges, and microfiber cloths. A stainless-steel cleaner or degreaser can also be helpful for maintaining the exterior of your grill.
How do I clean rust off grill grates?
If your grates have rust, use a wire brush and vinegar mixture to scrub away the rust. For stubborn rust, create a paste using baking soda and water, apply it to the grates, and leave it for 30 minutes before scrubbing. Rinse and completely dry to prevent further rusting.
Is it safe to use oven cleaner on a gas grill?
Oven cleaner may damage certain parts of the grill, particularly porcelain-coated or stainless-steel surfaces. Instead, opt for cleaners specifically designed for grills to avoid potential harm.

Conclusion
Cleaning a gas grill might seem like a chore, but with the right steps, it’s straightforward and rewarding. By learning how to clean a gas grill, you’re ensuring better-tasting food, enhancing safety, and extending your grill’s usefulness. Regular maintenance doesn’t just protect your investment; it also sets you up for many years of successful grilling! Why wait? Grab those cleaning tools and give your grill the care it deserves—your next barbecue will taste even better.
Remember, a well-maintained grill is the key to creating memorable meals and enjoyable gatherings. Taking the time to clean and care for your grill is a small effort that yields significant rewards. Whether it’s a weekend cookout with friends or a casual family dinner, a properly cleaned grill ensures every dish is prepared to perfection.
Professional Focus
Angela Ervin, a former interior designer turned blogger, specializes in kitchen design and renovations. Through her website, she blends her passion for cooking with design expertise, sharing practical and creative ideas. Known for balancing functionality and beauty, Angela’s insightful content has made her a trusted voice in home design and lifestyle.
About the Author
Angela Ervin, an experienced interior designer and blogger, combines her passion for kitchen renovations with storytelling. Living in Petersburg with her family, she enjoys cooking and testing her projects firsthand. Known for her humor and relatable style, Angela shares creative, functional design insights through her content, making her a trusted voice in home design.
Education History
University: Virginia Commonwealth University
Degree: Bachelor of Fine Arts (BFA) in Interior Design
- Angela’s education at VCU focused on mastering core interior design principles, including spatial planning, color theory, materials selection, and sustainable design practices.
- She gained hands-on experience through studio projects and collaborative design exercises, which honed her ability to create functional and aesthetically pleasing environments.
- Her coursework also emphasized problem-solving and practical applications of design, preparing her for real-world projects like her self-directed kitchen renovations.
- The program’s strong foundation in both technical skills and creative expression shaped Angela’s ability to seamlessly integrate form and function in her work.