
Installing a built-in microwave oven can add both convenience and style to your kitchen. Unlike countertop models, built-in microwaves are designed to seamlessly integrate into your cabinetry, saving valuable counter space while providing a sleek and modern look. However, proper installation is key to ensuring the appliance functions efficiently and safely.
This guide on how to install a built in microwave oven will walk you through the essential steps and considerations to successfully install a built-in microwave oven in your home.
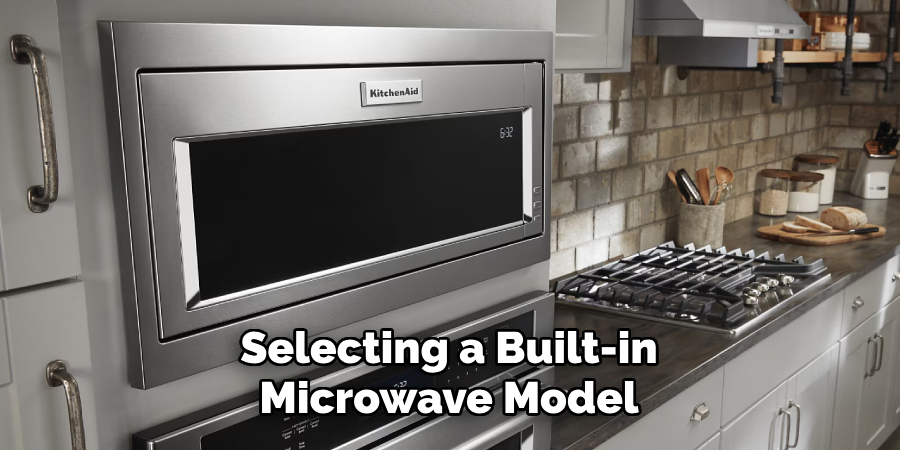
Benefits of a Built-in Microwave Oven
Built-in microwaves offer numerous benefits over their countertop counterparts. Here are some reasons why you may want to consider installing a built-in microwave in your kitchen:
Space-saving:
Built-in microwaves are designed to be installed into the wall or cabinetry, freeing up valuable counter space. This is especially useful for smaller kitchens where every inch counts.
Aesthetic appeal:
Built-in microwaves are sleek and modern, seamlessly integrating into your kitchen’s design without taking away from the overall aesthetic.
Customization options:
There are various models of built-in microwaves with different sizes, designs and features available in the market. This allows you to choose one that best fits your needs and complements your kitchen’s style.
Enhanced functionality:
Built-in microwaves can be installed at a convenient height, making it easier to access and use. Some models also come with additional features such as convection cooking, grilling and steam functions, allowing for more versatile cooking options.
Needed Materials
Before you start the installation process, make sure you have all the necessary materials and tools on hand. Here’s a list of items that you will need:
Built-in Microwave Oven:
Choose a microwave model that is specifically designed for built-in installation. Refer to the manufacturer’s instructions for specific dimensions and requirements.
Screws and Mounting Brackets:
These will be used to secure the microwave in place, so make sure to choose ones that are sturdy and appropriate for your wall or cabinetry material.
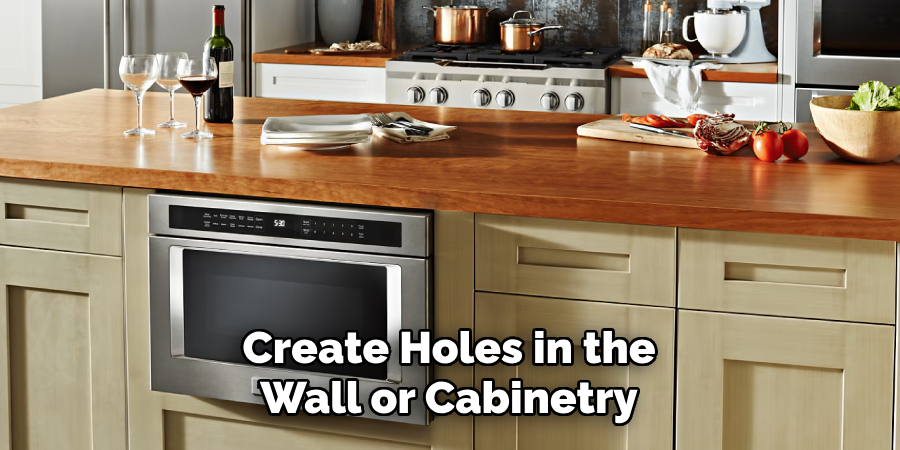
Drill and Appropriate Drill Bits:
You will need these tools to create holes in the wall or cabinetry for mounting brackets and screws.
Electrical Tools:
This includes wire strippers, electrical tape, and screwdrivers if any electrical work needs to be done during installation.
Level:
A level will help ensure the microwave is installed evenly and securely.
8 Step-by-step Guidelines on How to Install a Built in Microwave Oven
Step 1: Measure the Space
The first step in installing a built-in microwave oven is to measure the space where it will be installed. Begin by identifying the designated area in your cabinetry or wall. Using a tape measure, carefully record the width, height, and depth of the space to ensure it aligns with the dimensions of your chosen microwave model. Leave additional room for ventilation as specified in the manufacturer’s guidelines.
Accurate measurements are essential for a secure fit and to avoid any modifications to your cabinetry later in the process. Double-check your measurements to ensure accuracy before proceeding to the next step.
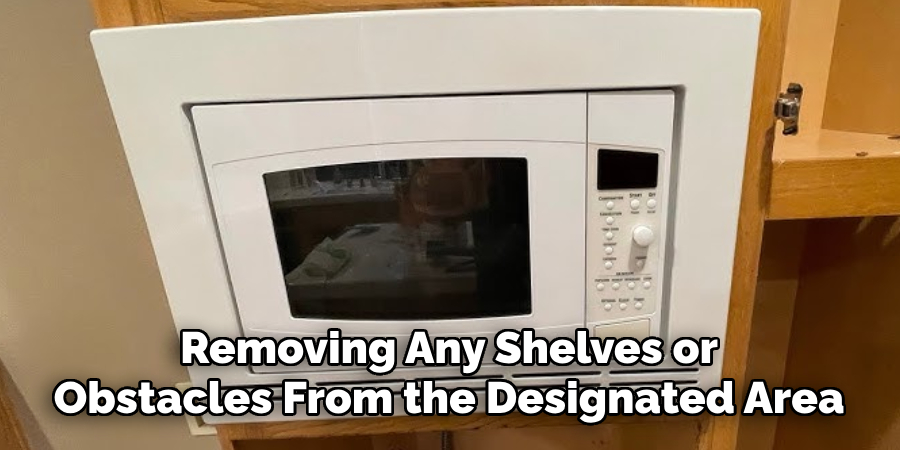
Step 2: Prepare the Installation Space
Once you have your measurements, it’s time to prepare the installation space. Begin by removing any shelves or obstacles from the designated area in your cabinetry or wall. You may also need to adjust or remove any panels that are preventing a proper fit for the microwave.
Next, check that the power source is located nearby and easily accessible for electrical connections. If not, you may need to hire an electrician to install a new outlet.
Step 3: Install Upper Cabinets (If Necessary)
If your chosen microwave model requires upper cabinets for support, now is the time to install them. Follow the manufacturer’s instructions provided with your cabinets, making sure they are level and securely attached to the wall.
The microwave will be mounted onto these upper cabinets, so it’s essential to ensure they are level and sturdy.
Step 4: Install the Mounting Bracket
Using your drill and appropriate drill bits, create holes in the wall or cabinetry for the mounting bracket. Refer to the manufacturer’s instructions on where to place these holes.
Once the holes are created, attach the mounting bracket using screws. Make sure it is secure and able to hold the weight of your chosen microwave model.
Step 5: Prepare Microwave for Installation
Before installing the microwave, remove any packaging material and accessories from inside. Carefully read through the manufacturer’s installation instructions before proceeding. Some models may require additional steps such as attaching a trim kit or ventilation system.
You may also need to adjust the position of the feet or installation brackets on the microwave to ensure a proper fit.
Step 6: Install the Microwave
With the help of another person, carefully lift and place the microwave onto the mounting bracket. Make sure it is level and securely attached.
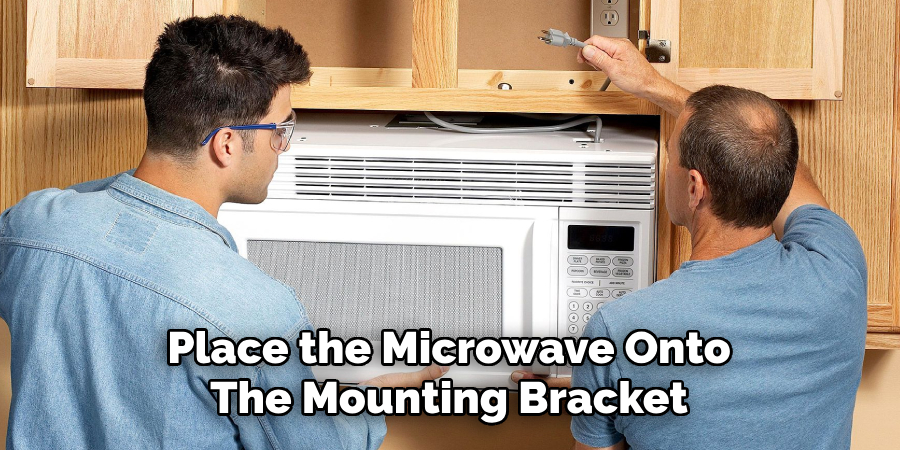
Double-check that all electrical connections are properly made according to manufacturer’s instructions.
Step 7: Test and Adjust
Plug in your microwave and test if it is functioning correctly. If necessary, make any adjustments such as leveling or tightening screws for a secure fit.
Make sure to also test any additional features such as convection cooking or grilling functions, if applicable.
Step 8: Finish Installation
Once you are satisfied with the placement and functionality of your built-in microwave, finish the installation by attaching any trim kits or ventilation systems according to manufacturer’s instructions.
Clean up any remaining packaging materials and debris, and enjoy your new space-saving, stylish built-in microwave oven!
Following these step-by-step guidelines on how to install a built in microwave oven will ensure a successful and hassle-free installation of your built-in microwave. Remember to always refer to the manufacturer’s instructions for specific dimensions and requirements, as well as any additional steps or precautions. With proper installation and maintenance, your built-in microwave will continue to be a convenient and stylish addition to your kitchen for years to come.
Safety Precautions
It is important to take proper safety precautions when installing a built-in microwave oven. Here are some tips to keep in mind:
- Always refer to the manufacturer’s instructions for specific guidelines and safety precautions.
- Make sure there is a designated power source nearby before beginning installation.
- Use caution when handling heavy objects such as the microwave and mounting brackets.
- If electrical work is required, make sure to turn off the power source before making any connections.
- Use appropriate tools and follow proper safety procedures when using them.
- If necessary, seek professional help for installation or electrical work.
By following these guidelines and taking proper safety precautions, you can safely and successfully install a built-in microwave oven in your kitchen. Enjoy the convenience and style of a built-in microwave without the hassle of bulky countertop models! So, it is always better to consult with experts before starting such installations.
Additional Tips
- If your cabinetry or wall space is uneven, use shims to ensure a level fit for the microwave.
- Consider hiring a professional if you are not confident in your ability to instal a built-in microwave.
- Regularly clean and maintain your built-in microwave to ensure its longevity and proper functioning.
- If possible, choose a model with energy-saving features to reduce electricity costs.
- Always unplug the microwave before cleaning or performing any maintenance tasks.
- Consult with an electrician if you are unsure about the power source or electrical connections required for installation.
- Consider the placement of your built-in microwave in relation to other appliances and work areas in your kitchen for convenience and functionality.
- If you encounter any issues during installation, refer to the manufacturer’s troubleshooting guide or contact customer support for assistance.
Frequently Asked Questions
Q1: Do I Need to Hire a Professional for Installation?
A: It is recommended to consult with a professional if you are unsure about your ability to properly install a built-in microwave. They can ensure proper placement and connections for safety and efficiency.
Q2: Can I Install a Built-In Microwave in Any Cabinet?
A: No, you must have a designated space for the microwave with proper dimensions and support. Refer to the manufacturer’s instructions for specific requirements.
Q3: How Do I Know Which Model of Built-In Microwave to Choose?
A: Consider your kitchen layout and needs for size, features, and power source access when selecting a built-in microwave model. Consult with experts or do research on different models to find the best fit for your kitchen.
Conclusion
Installing a built-in microwave oven can greatly enhance the functionality and aesthetics of your kitchen. By following the step-by-step guidelines on how to install a built in microwave oven, adhering to safety precautions, and utilizing the additional tips provided, you can ensure a hassle-free installation process.
Whether you choose to undertake the task yourself or hire a professional, proper preparation and attention to detail are key to achieving a secure and efficient setup. A well-installed microwave not only saves countertop space but also provides a sleek, modern look to your kitchen, making it a worthwhile upgrade for any home.
Professional Focus
Angela Ervin, a former interior designer turned blogger, specializes in kitchen design and renovations. Through her website, she blends her passion for cooking with design expertise, sharing practical and creative ideas. Known for balancing functionality and beauty, Angela’s insightful content has made her a trusted voice in home design and lifestyle.
About the Author
Angela Ervin, an experienced interior designer and blogger, combines her passion for kitchen renovations with storytelling. Living in Petersburg with her family, she enjoys cooking and testing her projects firsthand. Known for her humor and relatable style, Angela shares creative, functional design insights through her content, making her a trusted voice in home design.
Education History
University: Virginia Commonwealth University
Degree: Bachelor of Fine Arts (BFA) in Interior Design
- Angela’s education at VCU focused on mastering core interior design principles, including spatial planning, color theory, materials selection, and sustainable design practices.
- She gained hands-on experience through studio projects and collaborative design exercises, which honed her ability to create functional and aesthetically pleasing environments.
- Her coursework also emphasized problem-solving and practical applications of design, preparing her for real-world projects like her self-directed kitchen renovations.
- The program’s strong foundation in both technical skills and creative expression shaped Angela’s ability to seamlessly integrate form and function in her work.