Attaching a dishwasher to a cabinet is a straightforward process that ensures your appliance is securely installed and functions properly. A firmly attached dishwasher prevents unnecessary movement during operation, reducing noise and preventing potential damage.

This guide on how to attach dishwasher to cabinet will walk you through the necessary tools, preparation steps, and techniques to safely and effectively secure your dishwasher to the surrounding cabinetry.
Why Should You Attach Your Dishwasher to the Cabinet?
Before we dive into the steps, let’s first understand why it is important to attach your dishwasher to the cabinet.
Stability
As mentioned earlier, attaching your dishwasher to a cabinet ensures that it remains stable during operation, reducing noise and preventing damage. This stability also helps in keeping the appliance in place when opening and closing the door, preventing it from tipping over or falling out of alignment.
Safety
A securely attached dishwasher is safer to use, as it eliminates the risk of accidents caused by movement or shifting during operation. This is especially important for homes with small children or pets who may accidentally bump into the appliance while it’s running. By attaching your dishwasher to a cabinet, you can have peace of mind knowing that it is safely installed and won’t pose a potential hazard.
Aesthetics
Attaching your dishwasher to the cabinet also helps in maintaining a neat and seamless look in your kitchen. With no gaps or visible screws, your appliance will blend in seamlessly with the surrounding cabinetry, giving your kitchen a more polished and cohesive appearance.
What You Will Need
Before you begin the process of attaching your dishwasher to the cabinet, make sure you have the following tools on hand:
Screwdriver (Manual or Electric)
This will be used to tighten and secure the screws in place.
Level
A level tool will help you ensure that the dishwasher is properly aligned and balanced before attaching it to the cabinet.
Mounting Brackets
These brackets will be attached to the sides of the dishwasher, providing a stable base for securing it to the cabinet.
Screws
You will need screws of appropriate size and type, depending on your specific dishwasher model. It’s always a good idea to refer to your appliance’s manual or consult with a professional if unsure.
7 Steps on How to Attach Dishwasher to Cabinet
Step 1: Prepare the Area
Before attaching the dishwasher to the cabinet, it is essential to prepare the area to ensure a smooth installation process. Start by turning off both the water supply and the power to the dishwasher. This step is crucial for safety and prevents any accidents during installation. Next, make sure that the dishwasher fits properly within the designated space in your cabinetry. Use a measuring tape to confirm that the dimensions align and that there is enough room for the appliance to slide in easily.
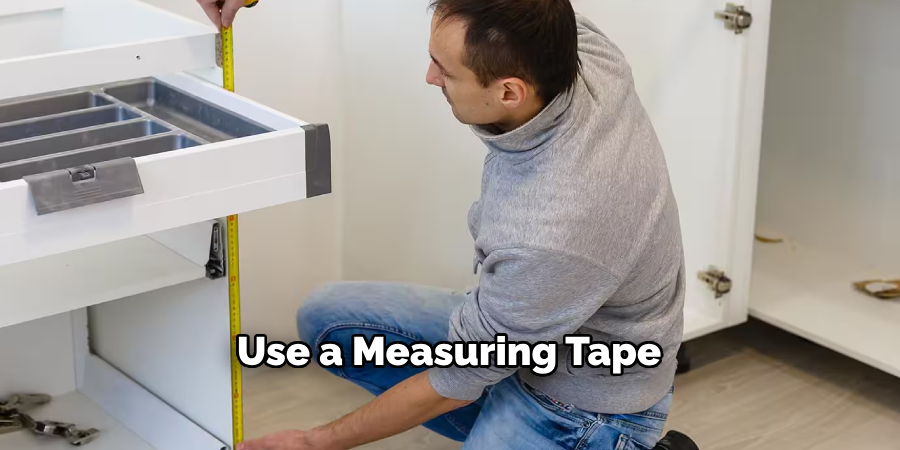
Clear the area of any debris or leftover materials from previous installations, as these can interfere with the alignment. Lastly, check that the water line, drain hose, and power cord are accessible and free of tangles to avoid complications during setup. Taking the time to prepare the area will set the foundation for a successful attachment process.
Step 2: Attach the Mounting Brackets
Once the area is prepared, the next step is to attach the mounting brackets to the dishwasher. Locate the mounting bracket slots on the top or sides of the dishwasher, depending on the model. If the brackets need to be installed on the top, carefully position them into the slots provided on the appliance and secure them using the screws included with your dishwasher. If side mounting is required, attach the brackets to the appropriate side slots, ensuring they are aligned properly.
Make sure to tighten the screws firmly but avoid over-tightening to prevent damage to the brackets or dishwasher. The mounting brackets are crucial for providing stability and will serve as the connection points to secure the appliance to the cabinet. Double-check that the brackets are securely in place before proceeding to the next step.
Step 3: Place the Dishwasher in Position
With the mounting brackets securely attached, carefully slide the dishwasher into its designated space in the cabinet. Ensure that the appliance is centered and fits snugly within the opening. Use a level to check that the dishwasher is properly aligned both horizontally and vertically. Adjust the leveling legs at the bottom of the appliance as needed to achieve a balanced position.
Take care not to pinch or twist the water line, drain hose, or power cord as you slide the dishwasher into place. These connections should remain accessible and free of obstruction for easy operation and long-term reliability. Once the dishwasher is correctly positioned, verify that it is flush with the front of the cabinetry for a seamless appearance. This positioning step is critical to ensure both functional stability and aesthetic appeal before securing the appliance to the cabinet.
Step 4: Adjust the Legs
Most dishwashers come equipped with adjustable legs to help level out any unevenness on the floor or cabinet surface. Use a wrench to turn the legs clockwise or counterclockwise until they are at an even height and level with each other. This will prevent any wobbling or tilting during operation, ensuring that the appliance is stable and secure.

It is essential to level the dishwasher both horizontally and vertically. A horizontal misalignment can cause the door to not close properly, while a vertical one may affect the appliance’s draining capabilities. Take your time with this step to achieve an even and stable position before proceeding.
Step 5: Secure the Dishwasher
With the dishwasher properly aligned and leveled, it’s time to secure it to the cabinet using screws. Starting from the top, use a screwdriver or electric drill to drive screws through the mounting brackets into the underside of your countertop or cabinet. Depending on your dishwasher model, there may be additional holes for attaching screws at the bottom of the appliance as well. Refer to your manual for specific instructions on screw placement and type.
Carefully drive the screws, making sure not to strip or damage the brackets or cabinet in the process. This step is crucial for securing the dishwasher in place and preventing it from tipping over during use. Double-check that all screws are tight and secure before moving on to the next step.
Step 6: Reconnect Water Supply and Power
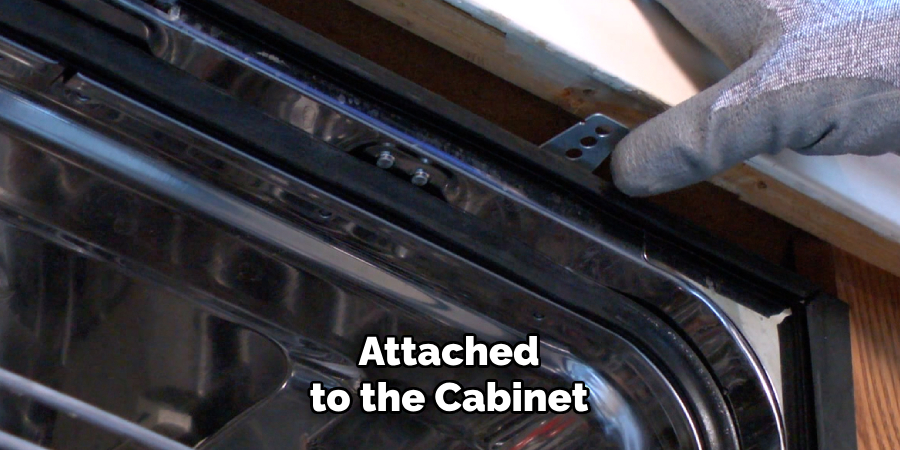
With the dishwasher safely attached to the cabinet, you can now reconnect the water supply and power source. Turn on both valves of your water supply line, ensuring there are no leaks or kinks in the hose. Plug your appliance’s power cord into a designated outlet (usually located under the sink). Make sure that the power is on and the appliance is receiving electricity.
Some dishwashers may require additional steps to connect the water supply or power source, depending on the model and installation requirements. Always refer to your manual if unsure about any of these connections. Once everything is set up correctly, run a test cycle to check for proper functioning before using it regularly.
Step 7: Level Again
After reconnecting all necessary components, double-check that the dishwasher is leveled both horizontally and vertically. It’s common for slight shifts to occur during attachment or reconnections, so this step ensures that everything is still properly aligned. If needed, make small adjustments with the leveling legs until you are satisfied with the position.
Following these steps on how to attach dishwasher to cabinet will ensure a successful installation of your dishwasher and provide you with a reliable and functional kitchen appliance. Remember to always consult your manual for specific instructions and safety precautions before attempting any installations. By properly attaching the mounting brackets, positioning the dishwasher correctly, and securing it in place, you can enjoy convenient dishwashing for years to come.
Additional Tips for Maintenance
Proper installation is key to maximizing the longevity of your dishwasher. However, regular maintenance is also essential to keep it running efficiently. Here are some additional tips to help maintain your dishwasher:

- Clean the dishwasher filter regularly to prevent food particles and debris from clogging the drain and causing malfunctions.
- Check for any leaks or water damage around the base of the appliance and address them promptly.
- Use a dishwasher cleaner periodically to remove any buildup or residue that can affect the performance of your appliance.
- Inspect and clean the spray arms and nozzles to ensure they are free of obstructions and functioning correctly.
Frequently Asked Questions
Q: Can I Install a Dishwasher by Myself?
A: While it is possible to install a dishwasher by yourself, it is recommended to have a professional do the installation to ensure safety and proper functioning. However, if you have experience with plumbing and electrical work, installing a dishwasher can be a manageable DIY project.
Q: How Long Does It Take to Install a Dishwasher?
A: The time it takes to install a dishwasher varies depending on factors such as the type of appliance, the complexity of the installation process, and any adjustments that need to be made. On average, it can take anywhere from 1-3 hours for a professional installer and 2-4 hours for someone doing it themselves.
Q: Do I Need Special Tools or Equipment to Install a Dishwasher?
A: Most dishwashers come with the necessary hardware and attachments for installation. However, you may need additional tools such as a wrench, screwdriver, and electric drill to complete the installation process successfully. It is also essential to have someone to assist you during certain steps of the installation.
Q: Can Any Dishwasher Fit Under My Cabinet?
A: Most standard-sized dishwashers are designed to fit under most kitchen cabinets. However, it is crucial to measure your space accurately before purchasing a dishwasher to ensure it will fit correctly. There are also smaller or compact dishwasher options available for smaller spaces.

Conclusion
Installing a dishwasher might seem like a daunting task, but with careful planning and attention to detail, it is a project that many homeowners can successfully complete. By following the outlined steps on how to attach dishwasher to cabinet— from properly leveling the appliance to securing it in place and reconnecting utilities — you can ensure a safe and efficient setup.
Remember to consult your appliance manual for model-specific guidance and avoid cutting corners to achieve the best results. A well-installed and maintained dishwasher not only enhances your kitchen’s convenience but also adds value to your home, making the effort worthwhile.
Professional Focus
Angela Ervin, a former interior designer turned blogger, specializes in kitchen design and renovations. Through her website, she blends her passion for cooking with design expertise, sharing practical and creative ideas. Known for balancing functionality and beauty, Angela’s insightful content has made her a trusted voice in home design and lifestyle.
About the Author
Angela Ervin, an experienced interior designer and blogger, combines her passion for kitchen renovations with storytelling. Living in Petersburg with her family, she enjoys cooking and testing her projects firsthand. Known for her humor and relatable style, Angela shares creative, functional design insights through her content, making her a trusted voice in home design.
Education History
University: Virginia Commonwealth University
Degree: Bachelor of Fine Arts (BFA) in Interior Design
- Angela’s education at VCU focused on mastering core interior design principles, including spatial planning, color theory, materials selection, and sustainable design practices.
- She gained hands-on experience through studio projects and collaborative design exercises, which honed her ability to create functional and aesthetically pleasing environments.
- Her coursework also emphasized problem-solving and practical applications of design, preparing her for real-world projects like her self-directed kitchen renovations.
- The program’s strong foundation in both technical skills and creative expression shaped Angela’s ability to seamlessly integrate form and function in her work.
