
Caulking kitchen countertops is an essential maintenance task that helps protect your kitchen surfaces from moisture, dirt, and damage. Over time, the sealant around your countertops can wear down or crack, allowing water and debris to seep in. Properly applying caulk not only enhances the appearance of your countertops but also ensures their longevity.
This guide on how to caulk kitchen countertops will walk you through the steps to effectively caulk your kitchen countertops, ensuring a clean and professional finish.

Why Caulk Your Kitchen Countertops?
Caulking your kitchen countertops offers numerous benefits, such as:
Prevents Water Damage:
Without proper caulking, water can seep in between the seams of your countertops and cause damage to the underlying structure. This can lead to mold growth, rotting wood, and other costly repairs.
Keeps Out Dirt and Debris:
Caulking also helps keep out dirt and debris from getting trapped in between the seams. This not only makes your countertops easier to clean but also prevents germs and bacteria from building up in these areas.
Enhances Appearance:
Caulking can give your kitchen countertops a finished look by filling in any gaps or imperfections along the edges. It also provides a smooth transition between different materials, such as where the countertop meets the backsplash.
Materials Needed
Before starting the caulking process, gather all necessary materials to ensure a smooth and efficient application. You will need:
Caulk Gun:
You can purchase a manual or battery-powered caulk gun at any hardware store. A caulk gun allows for precise control and even distribution of the caulk.
Caulk:
Choose a high-quality, waterproof caulking that is specifically designed for kitchen and bathroom use. Silicone, acrylic latex, and polyurethane are all suitable options.
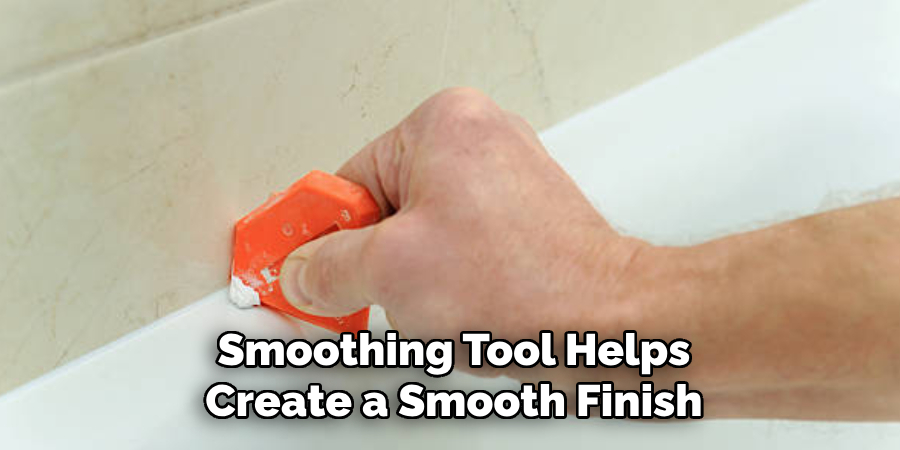
Caulk Smoothing Tool:
A smoothing tool helps create a smooth finish while removing excess caulk and air bubbles.
Painter’s Tape:
Painter’s tape will help protect your countertops from any accidental messes and ensure clean lines.
Denatured Alcohol or Other Cleaner:
Before applying the caulk, it is essential to thoroughly clean and dry the area to be caulked. Denatured alcohol or another suitable cleaner can help remove any residue and ensure proper adhesion of the caulk.
8 Step-by-step Guides on How to Caulk Kitchen Countertops
Step 1: Prepare the Area
Begin by removing any old caulk from the seams of your kitchen countertops. You can use a utility knife or a caulk removal tool to scrape away the old material without damaging the surface. Next, clean the area thoroughly with denatured alcohol or a suitable cleaner to ensure there is no grease, dirt, or residue left behind.
Allow the area to dry completely before proceeding. For extra precision, use painter’s tape along the edges of the seam to create clean, straight lines and protect surrounding surfaces from excess caulk.
Step 2: Load the Caulk Gun
Cut the tip of the caulk tube at a 45-degree angle using a utility knife. Make sure to cut the tip to a size that matches the width of the seam you will be caulking. Puncture the inner seal of the tube using a nail or the built-in puncture tool on your caulk gun.
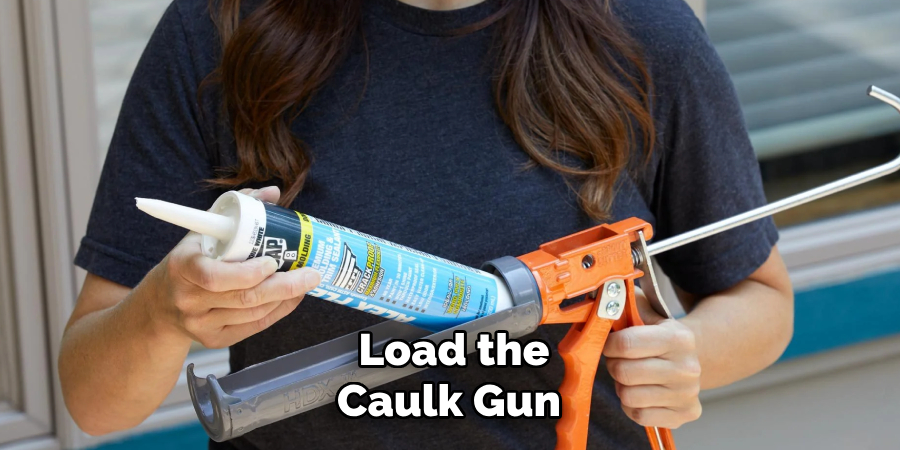
Place the caulk tube into the caulk gun, ensuring it is seated securely. Squeeze the trigger gently to test the flow and adjust your grip for smooth, even application. Your caulk gun is now ready for use.
Step 3: Apply the Caulk
Hold the caulk gun at a 45-degree angle and position the tip of the tube at the beginning of the seam you want to caulk. Gently squeeze the trigger to apply an even bead of caulk along the seam. Move the caulk gun steadily and at a consistent speed to ensure an even application. Avoid stopping and starting mid-seam, as this can create uneven lines or gaps.
If necessary, rotate the caulk gun to maintain the correct angle as you move along corners or edges. Once the entire seam is caulked, release the trigger to stop the flow of caulk.
Step 4: Smooth the Caulk
Using a caulk smoothing tool, gently press and smooth the caulk into the seam while removing any excess and air bubbles. Move the tool in one continuous motion along the entire length of the seam, applying enough pressure to ensure proper adhesion. Wipe off any excess caulk onto a paper towel or rag as you go.
The smoother the caulk, the cleaner and more professional your finished result will be.
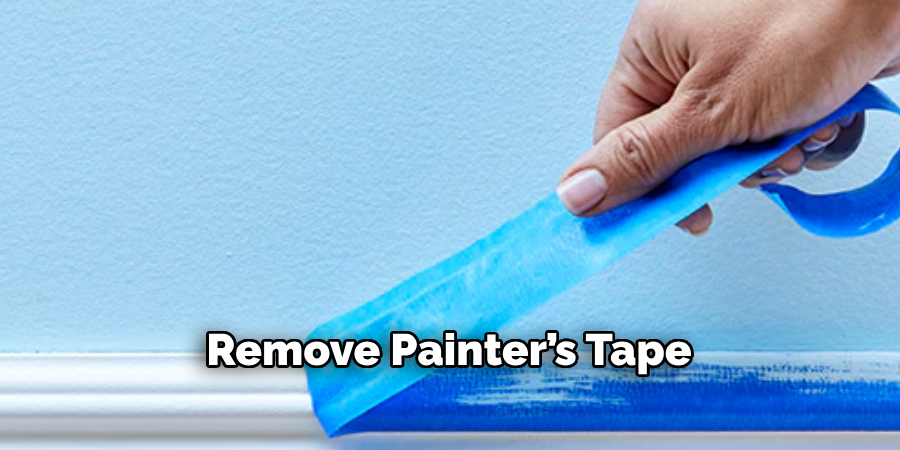
Step 5: Remove Painter’s Tape
Once you have smoothed the caulk and are satisfied with its appearance, carefully remove the painter’s tape while the caulk is still wet. Pull the tape away at a 45-degree angle to avoid disturbing the fresh caulk or creating uneven edges.
Removing the tape promptly will ensure clean, straight lines and prevent the caulk from drying onto the tape. Dispose of the tape properly and inspect the seam for any minor touch-ups that may be needed.
Step 6: Clean Up
After removing the painter’s tape, inspect the surrounding area for any stray caulk that may have been inadvertently applied. Use a damp rag or paper towel to gently wipe away excess caulk while it is still wet. For stubborn spots, you can apply a small amount of denatured alcohol or an appropriate cleaner to the rag before wiping.
Dispose of any used materials, such as paper towels or gloves, and clean your caulk smoothing tool and caulk gun with warm, soapy water if you used water-based caulk. If you used silicone or another type of non-water-soluble caulk, consult the manufacturer’s instructions for proper cleanup. Make sure the workspace is tidy and free from debris before leaving the caulk to cure.
Step 7: Allow the Caulk to Dry
The drying time for caulk varies depending on the type and brand you used. Read the label instructions carefully to determine how long your caulk needs to dry before using or exposing it to moisture. Some caulks may require up to 24 hours of curing time, while others may be ready for use within a few hours.
Avoid touching or disturbing the caulk during this time, as it can cause it to lose its shape and result in an uneven finish. Keep the area well-ventilated and free from any excess moisture that could hinder proper drying.
Step 8: Inspect Your Work
Once the caulk has dried and cured completely, inspect it for any imperfections or areas that may need touch-ups. Use a utility knife to carefully remove any excess caulk or uneven edges. If necessary, you can reapply a small amount of caulk and smooth it out again with your tool.
Once you are satisfied with the results, stand back and admire your newly caulked kitchen countertops! With proper maintenance and care, your new caulk should last for several years before needing to be replaced.
Following these step-by-step guides on how to caulk kitchen countertops will ensure a professional and long-lasting finish. Remember to always use the right materials and tools for your specific project, and take your time to create clean, even lines. With a little practice and patience, you can become an expert at caulking and tackle any future projects with confidence.
Additional Tips for Caulking Success
- When buying caulking, choose a color that matches your countertop or backsplash to create a seamless appearance.
- Always follow the manufacturer’s instructions on the tube for best results.
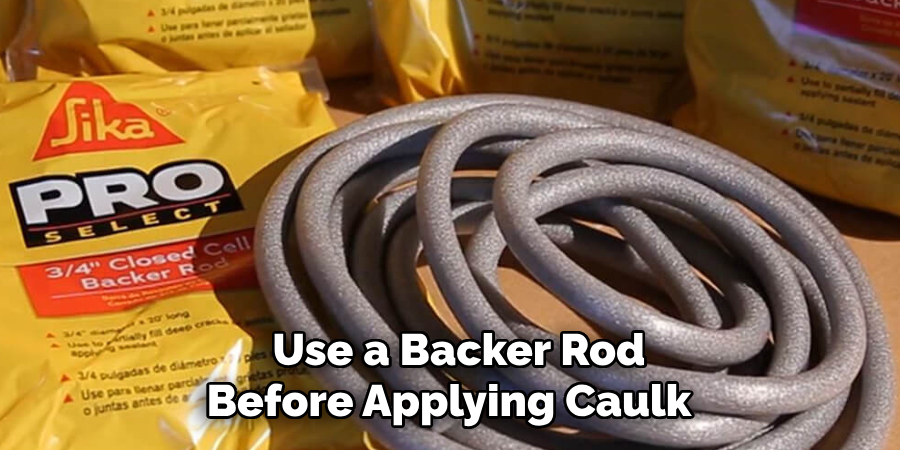
- For larger or deeper seams, use a backer rod before applying caulk to fill in any gaps and prevent cracking.
- If you are working with porous materials such as granite or marble, use a silicone-based caulk to prevent staining.
- When using silicone caulk, keep a bowl of water nearby to dip your fingers in while smoothing the caulk. This will help prevent it from sticking to your skin and create smoother lines.
- Regularly inspect and touch up caulking as needed to maintain its appearance and functionality.
Frequently Asked Questions
Q: How Often Should I Recaulk My Kitchen Countertops?
A: It is recommended to recaulk every 1-2 years, depending on the amount of wear and tear and exposure to moisture.
Q: Can I Caulk Over Old Caulk?
A: It is not recommended to caulk over old caulk, as it can result in an uneven appearance and reduce the adhesion of the new caulk. It is best to remove old caulk completely before applying a fresh bead.
Q: What Type of Caulk Should I Use for Kitchen Countertops?
A: For most kitchen countertops, a water-based acrylic or silicone-based caulk will work well. Consult with a professional if you are unsure of which type to use for your specific countertop material.
Q: How Do I Repair Cracked Caulk?
A: To repair cracked caulk, first remove the old caulk and clean the area thoroughly. Then, apply a new bead of caulk and smooth it out using the steps outlined above. Properly maintaining your caulk and addressing any issues early on can prevent more significant repairs in the future.
Conclusion
Caulking your kitchen countertops is a straightforward yet essential task to ensure a sleek and durable finish. By following the steps outlined in this guide on how to caulk kitchen countertops, you can achieve a professional and polished look that protects your surfaces from moisture, stains, and damage. Patience, proper tools, and attention to detail are key to a successful caulking job.
With these skills, not only will your countertops look cleaner and more refined, but their longevity and functionality will also be significantly enhanced. Whether it’s your first time caulking or you’re refining your technique, these best practices will set you up for long-term success.
Professional Focus
Angela Ervin, a former interior designer turned blogger, specializes in kitchen design and renovations. Through her website, she blends her passion for cooking with design expertise, sharing practical and creative ideas. Known for balancing functionality and beauty, Angela’s insightful content has made her a trusted voice in home design and lifestyle.
About the Author
Angela Ervin, an experienced interior designer and blogger, combines her passion for kitchen renovations with storytelling. Living in Petersburg with her family, she enjoys cooking and testing her projects firsthand. Known for her humor and relatable style, Angela shares creative, functional design insights through her content, making her a trusted voice in home design.
Education History
University: Virginia Commonwealth University
Degree: Bachelor of Fine Arts (BFA) in Interior Design
- Angela’s education at VCU focused on mastering core interior design principles, including spatial planning, color theory, materials selection, and sustainable design practices.
- She gained hands-on experience through studio projects and collaborative design exercises, which honed her ability to create functional and aesthetically pleasing environments.
- Her coursework also emphasized problem-solving and practical applications of design, preparing her for real-world projects like her self-directed kitchen renovations.
- The program’s strong foundation in both technical skills and creative expression shaped Angela’s ability to seamlessly integrate form and function in her work.