
Grill mats are a handy kitchen tool, offering you a clean and non-stick surface for cooking food. However, keeping these mats clean is essential if you want to ensure their longevity and maintain their usefulness. Neglected grill mats can affect the quality of your food, eventually becoming less effective or even unhygienic. If you’ve been wondering how to clean grill mats effectively, this guide is here to help. With straightforward steps and expert tips, you’ll learn how to restore your grill mats to their original state, keeping them in top condition for your next barbecue.
Start by allowing the grill mat to cool completely before handling it. Rinse off any loose debris using warm water, which will help remove surface particles. For tougher residue, use a soft sponge or cloth with a mixture of mild dish soap and warm water to gently scrub the mat. Avoid abrasive cleaners or harsh scrubbers as they can damage the surface. Once cleaned, rinse thoroughly to remove any soap, and allow the mat to air dry completely before storing it. Proper care and cleaning will ensure your grill mat remains in excellent shape for many barbecues to come.
Why Cleaning Grill Mats is Important
Grill mats are exposed to high heat, oils, grease, and food debris, making regular cleaning more than just a good habit. Here’s why this task should be a priority:
Hygiene and Food Safety
Residual food particles and grease can create a breeding ground for bacteria. This not only compromises the cleanliness of your cooking surface but could also negatively affect your health.
Better Cooking Results
A dirty grill mat might lead to uneven cooking surfaces, causing your food to stick or burn. Proper cleaning ensures a smooth, non-stick finish, improving your grilling experience.
Extended Lifespan
Grill mats aren’t cheap, so ensuring their longevity is essential. A clean mat will resist cracking or damage from leftover oils, grease, or chemicals over time.
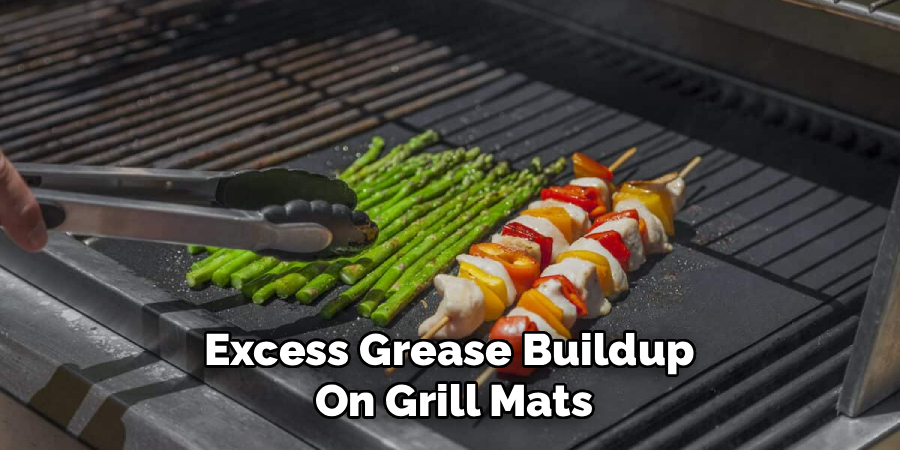
Prevent Smoke and Odors
Excess grease buildup on grill mats can cause excessive smoking, leaving a burnt, unpleasant smell. Regular cleaning eliminates these issues, giving you a more enjoyable cooking experience.
Now that you understand the “why,” it’s time to learn how to clean grill mats using a straightforward, step-by-step approach.
10 Step by Steps Guides on How to Clean Grill Mats
Cleaning grill mats may sound daunting, but it’s surprisingly simple with the right techniques. Follow this detailed guide to ensure your grill mats remain in perfect condition.
Step 1: Check the Manufacturer’s Instructions
Before starting, always consult the instructions provided by the manufacturer. Materials and coatings vary, and some grill mats may have unique care requirements you need to follow.
For example, certain mats are dishwasher-safe, while others need to be hand-washed with care. Ignoring these guidelines could unintentionally damage your mat.
Step 2: Allow the Grill Mat to Cool
It’s crucial to ensure your grill mat is cool to the touch before you start cleaning it. Attempting to clean a hot or warm mat can cause burns or spread grease and residue unnecessarily. Once your mat has cooled completely, move on to the next steps.
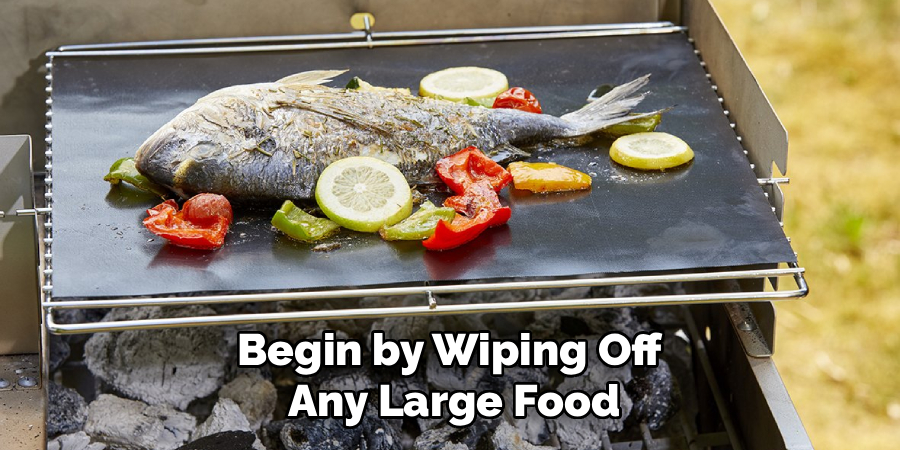
Step 3: Remove Excess Debris and Grease
Begin by wiping off any large food particles or grease residue with a soft cloth or scraper. Using paper towels can also be handy for absorbing leftover oils. This pre-cleaning step prevents debris from clogging your sink or damaging its drainage system when you wash the mat.
Step 4: Pre-Soak in Warm, Soapy Water
Prepare a basin or sink filled with warm water and a few drops of mild dish soap. Submerge your grill mat and allow it to soak for 10–20 minutes. This helps loosen stubborn grease and food stuck to its surface, making it easier to clean in subsequent steps.
Step 5: Scrub Gently with a Soft Sponge
Once the soak is complete, use a non-abrasive sponge to scrub the surface of your mat gently. Avoid using steel wool or other harsh scrubbers, as these could damage the mat’s non-stick coating. Pay special attention to typically problematic areas, such as spots with heavy grease or burnt-on food.
Step 6: Rinse Thoroughly
Rinse the mat under warm, running water to remove all traces of soap and grease. Ensure there’s no residue left from cleaning solutions, as these can linger and affect your food during your next cooking session.
Step 7: Spot Clean Stubborn Stains
If some stains remain after rinsing, mix a paste of baking soda and water. Apply it to the affected areas and scrub gently with a sponge. Baking soda is an excellent, non-abrasive cleaning agent, perfect for removing tough stains without harming the mat’s surface.
Step 8: Dry the Grill Mat Completely
Lay the mat flat on a clean towel, allowing it to air-dry completely. Alternatively, you can wipe it with a microfiber towel to remove excess moisture. Storing a wet mat can lead to mold or bacteria growth, so ensure it’s utterly dry before putting it away.

Step 9: Test the Mat Before Reuse
To ensure thorough cleaning, inspect the mat for any residual grease or food stains. Feel its surface to confirm it’s clean and non-stick. This ensures it’s ready for use and will perform effectively during your next grilling session.
Step 10: Consider Use of the Dishwasher (Optional)
For dishwasher-safe grill mats, place them on the top rack and run a gentle wash cycle. Avoid using high-heat settings, as they might warp or degrade the mat material. Always check the manufacturer’s guidelines before opting for this method.
By following these 10 steps, you’ll keep your grill mats clean, maintain their non-stick surface, and ensure they last for years to come.
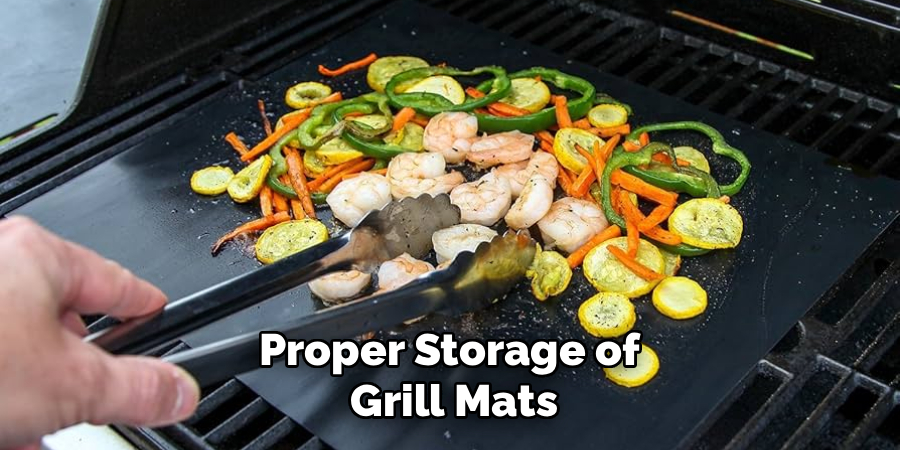
Storing Your Grill Mats
Proper storage of grill mats is essential to preserve their quality and extend their lifespan. After cleaning and thoroughly drying the mats, roll them up instead of folding to prevent creases or cracks in the material. Store them in a designated container, such as a plastic storage tube or a sealable bag, to protect them from dust and moisture. Keep the mats in a cool, dry place away from direct sunlight or extreme temperatures, which could cause warping or deterioration. By incorporating these simple storage practices, you ensure your grill mats remain in optimal condition for your next cooking adventure.
Regular maintenance of your grill mats doesn’t just preserve their functionality; it also ensures safe and healthy cooking. After each use, thoroughly clean the mats with warm soapy water and a non-abrasive sponge to remove grease and food particles. Avoid using harsh chemicals or scouring pads, as these can damage the non-stick surface. Proper cleaning not only extends the lifespan of your mats but also prevents the buildup of residue that could transfer unwanted flavors to your food during future use.
Frequently Asked Questions
1. Can I Put Grill Mats in the Dishwasher?
Yes, many grill mats are designed to be dishwasher-safe. However, it’s essential to check the manufacturer’s guidelines first. Place them on the top rack and use a gentle wash cycle for best results. Avoid high heat settings, which could compromise the mat’s material or non-stick coating.
2. What Cleaning Products Should I Avoid?
Avoid using harsh chemical cleaners, steel wool, or metal tools when cleaning your grill mats. These can scratch or damage the surface, weakening its non-stick layer and decreasing its overall durability. Stick to mild dish soap and non-abrasive sponges for safe cleaning.
3. How Often Should I Clean My Grill Mats?
Ideally, grill mats should be cleaned after every use. Doing this prevents grease and food particles from hardening on the surface, making subsequent cleaning processes much easier and maintaining healthy, hygienic cooking conditions.
4. What if My Grill Mat Has Stains That Won’t Come Off?
For stubborn stains, use a gentle solution of baking soda and water. Apply the paste to the stains, allowing it to sit for 10–15 minutes before scrubbing gently with a soft sponge. This natural, non-toxic method is effective for tackling tough grease or residue.
5. Can I Use a Grill Mat Immediately After Cleaning?
While you can use a grill mat shortly after cleaning, it’s crucial to ensure it’s completely dry. Reusing it while damp could result in strange smells, uneven grilling, or even bacterial growth, so allow ample drying time before storing or using it again.
Conclusion
Knowing how to clean grill mats ensures you get the best performance out of this essential grilling accessory. By following the steps shared here, you’ll keep your mats in great condition, making them last longer while maintaining tasty and safe cooking results. Regular care prevents grease buildup, supports food safety, and eliminates odors, so there’s no downside to cleaning after every use.
Proper maintenance of your grilling tools and accessories not only enhances their longevity but also ensures the quality of your meals. Incorporating cleaning and care routines into your post-grilling process can make a significant difference, leaving you well-prepared for every delicious barbecue session. Small efforts in upkeep lead to consistently great results and a hassle-free grilling experience.
Why wait? Grab your grill mats, give them a thorough cleaning, and get ready for your next barbecue adventure!
Professional Focus
Angela Ervin, a former interior designer turned blogger, specializes in kitchen design and renovations. Through her website, she blends her passion for cooking with design expertise, sharing practical and creative ideas. Known for balancing functionality and beauty, Angela’s insightful content has made her a trusted voice in home design and lifestyle.
About the Author
Angela Ervin, an experienced interior designer and blogger, combines her passion for kitchen renovations with storytelling. Living in Petersburg with her family, she enjoys cooking and testing her projects firsthand. Known for her humor and relatable style, Angela shares creative, functional design insights through her content, making her a trusted voice in home design.
Education History
University: Virginia Commonwealth University
Degree: Bachelor of Fine Arts (BFA) in Interior Design
- Angela’s education at VCU focused on mastering core interior design principles, including spatial planning, color theory, materials selection, and sustainable design practices.
- She gained hands-on experience through studio projects and collaborative design exercises, which honed her ability to create functional and aesthetically pleasing environments.
- Her coursework also emphasized problem-solving and practical applications of design, preparing her for real-world projects like her self-directed kitchen renovations.
- The program’s strong foundation in both technical skills and creative expression shaped Angela’s ability to seamlessly integrate form and function in her work.