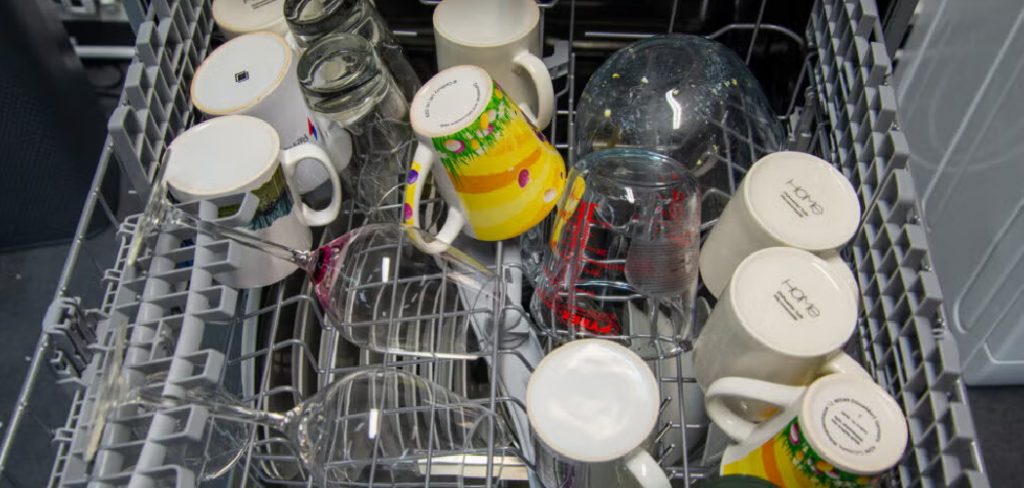
Maintaining a clean KitchenAid dishwasher ensures optimal performance, prolongs the appliance’s lifespan, and achieves spotless, hygienic dishes with every cycle.
Over time, food particles, grease, and mineral deposits can accumulate inside the dishwasher, reducing its efficiency and potentially leading to unpleasant odors or harmful mold and mildew growth. Regular cleaning not only helps avoid these issues but also prevents clogging and ensures that your dishwasher continues to perform at its best.

This article provides a comprehensive, step-by-step guide on how to clean kitchen aid dishwasher appliances safely and effectively. It outlines simple yet practical methods and the right products to use for descaling, cleaning filters, and addressing common maintenance concerns.
By following these guidelines, you’ll be able to keep your dishwasher in peak condition, ensuring it serves you fresh, sparkling-clean dishes for years to come.
Materials and Tools Needed
To clean your KitchenAid dishwasher thoroughly and efficiently, having the right materials and tools on hand is essential. Here’s a list of what you’ll need to get started:
Essential Materials
- White Vinegar: Ideal for natural cleaning, descaling, and eliminating build-up.
- Baking Soda: Known for its odor-removing properties and ability to lift stains.
- Dish Soap: Preferably a mild or non-toxic formula to avoid damaging surfaces.
- Soft Cloth or Microfiber Towel: Perfect for wiping down the dishwasher’s interior and exterior.
- Toothbrush or Small Scrub Brush: Helps reach tight corners and clean intricate sections.
- Sponge or Non-abrasive Scrubbing Pad: Useful for safely tackling residue without scratching surfaces.
Tools You Might Need
- Measuring Cup: Handy for accurately measuring cleaning liquids like vinegar or soap.
- Bucket: Useful for soaking removable parts, such as the filter or utensil holder.
- Toothbrush or Cleaning Brush (again): Particularly beneficial for cleaning the spray arm’s holes and other small, hard-to-reach areas.
By gathering these materials and tools, you’ll be well-prepared to clean and maintain your KitchenAid dishwasher effectively while ensuring no damage to its components.

Preparing the Dishwasher for Cleaning
Step 1: Empty the Dishwasher
Begin by removing all dishes, utensils, and racks from the dishwasher. This step ensures you can thoroughly access all surfaces inside the appliance. Take out the utensil holder and any removable racks or trays; these will need separate cleaning later.
Step 2: Check for Debris
Inspect the bottom of the dishwasher for any food particles, debris, or grime that might have accumulated over time. Use a soft cloth or a vacuum with a narrow attachment to gently remove any visible remnants. This will help ensure the cleaning process is effective and prevent the buildup of unpleasant odors.
Step 3: Inspect the Drain
Locate the drain at the base of the dishwasher and check it for clogs or blockages. Food scraps, grease, and soap scum can accumulate here and impede proper drainage over time. Use a small brush or your fingers, if necessary, to clear out any visible debris. Keeping the drain area clean helps maintain the dishwasher’s efficiency and prevents drainage problems.
How to Clean Kitchen Aid Dishwasher: Cleaning the Interior of the Dishwasher
Step 1: Clean the Spray Arms
Remove the spray arms carefully to access any blocked nozzles or accumulated grime. Use a toothbrush or a small brush to scrub away food particles, grease, and mineral buildup. Focus on the tiny holes in the spray arms, as blockages in these areas can affect water flow and cleaning efficiency. Run water through the spray arms to ensure no debris remains and that the water flows freely before reattaching them.

Step 2: Clean the Filter
If your dishwasher has a removable filter, take it out and rinse it thoroughly under warm running water. Use mild dish soap and a soft brush to scrub away any grease, food particles, or mineral deposits that have built up on the filter. Cleaning the filter regularly is essential to prevent clogs and maintain optimal dishwasher performance. Reinsert the filter properly within the appliance once the filter is clean and dry.
Step 3: Clean the Interior Walls and Door
Wipe down the interior walls, door, and gasket using a microfiber cloth and a mild dish soap solution. Focus on spots where grease, residue, or grime accumulates, such as edges and corners. For stubborn stains, mix baking soda with water to form a paste, apply it to the affected areas, and allow it to sit for several minutes. Gently scrub these areas with a soft sponge before cleaning them with a damp cloth. This ensures a spotless and odor-free dishwasher interior.
How to Clean Kitchen Aid Dishwasher: Deep Cleaning with Vinegar and Baking Soda
Step 1: Vinegar Rinse
Place a cup of white vinegar on the top rack of the dishwasher, ensuring it is secured to prevent tipping during the cycle. Run a hot-water cycle with the dishwasher empty, apart from the vinegar. The acidity of the vinegar works effectively to break down grease, limescale, and other mineral deposits that may have accumulated inside the dishwasher over time.
If placing a cup on the top rack isn’t feasible, you can pour the vinegar directly onto the bottom of the dishwasher to achieve the same result. This ensures a thorough cleaning of hard-to-reach areas while deodorizing the appliance.
Step 2: Baking Soda Cycle
After completing the vinegar rinse, sprinkle 1/2 cup of baking soda evenly across the bottom of the dishwasher. Baking soda is a gentle abrasive that helps tackle stains while neutralizing odors within the appliance. Run a short hot-water cycle to allow the baking soda to work its way through the interior.

This step removes any lingering residue, cleans up stubborn spots, and refreshes and spotless the dishwasher. Combining the power of vinegar and baking soda ensures your dishwasher is thoroughly deep-cleaned and ready for optimal performance.
Cleaning the Exterior of the Dishwasher
Step 1: Wipe Down the Exterior
To maintain the sleek appearance of your dishwasher, begin by wiping down the exterior using a soft cloth dipped in warm water mixed with a small amount of mild dish soap. This will effectively remove dust, smudges, and grease. Pay attention to all areas, including the control panel, handle, and sides.
If you have a stainless steel dishwasher, opt for a dedicated stainless steel cleaner or a vinegar-water solution to achieve a streak-free shine. Always wipe along the steel grain to avoid scratches and maintain a polished look.
Step 2: Clean the Handle and Buttons
The handle and buttons are high-touch areas where grime, grease, and fingerprints can build up over time. Use a microfiber cloth for these spots; it is gentle and ensures no scratches or residue are left behind. For stubborn grime, use a diluted vinegar-water mix or a gentle cleaning solution applied with a soft brush or cloth.
Pay special attention to crevices around buttons, ensuring that all dirt is removed for a spotless finish. With these steps, your dishwasher’s exterior will gleam, complementing its clean and refreshed interior.
Maintaining a Clean Dishwasher
Keeping your dishwasher in top condition ensures it runs efficiently and extends its lifespan. Follow these steps to maintain a clean and functional appliance:
Step 1: Regular Cleaning Routine
Clean the dishwasher once a month or as needed to avoid buildup. Begin by checking and cleaning the filter, as a clogged filter can lead to unpleasant odors and reduced performance. Remove it and rinse it under warm water to clear any trapped food particles or debris. Next, inspect the spray arms to ensure they are not blocked.

Use a toothpick or fine brush to clear any obstructions in the spray holes, which can affect water flow. Finally, check and clean the drain at the bottom of the dishwasher to prevent clogs and ensure efficient operation.
Step 2: Use the Right Detergent
Choosing the right detergent plays a crucial role in maintaining cleanliness and efficiency. Use a high-quality detergent that is specifically formulated for your dishwasher type.
Avoid overusing detergent, as excess soap can lead to residue buildup and reduce cleaning performance. Following the manufacturer’s detergent recommendations can help prevent unnecessary wear and tear while ensuring spotless results.
Step 3: Run Hot Water Cycles Regularly
Every couple of weeks, run a hot water cycle with no dishes in the dishwasher. This practice helps flush out any lingering grime, soap scum, or mineral buildup from hard water. Additionally, the hot water sanitizes the interior, leaving your appliance fresh and ready for use. Regular maintenance will keep your dishwasher running smoothly and looking clean for years to come.
Troubleshooting Common Dishwasher Issues
Even with regular maintenance, dishwashers can encounter problems. Here are some common issues and how to address them:
Issue: Dishwasher Smells
If your dishwasher has an unpleasant odor despite cleaning efforts, run another empty cycle using a cup of white vinegar or a few tablespoons of baking soda. These natural cleaners help neutralize odors and remove lingering residue. If the smell persists, examine the drain and spray arms for buildup or debris, and clean them thoroughly.
Issue: Water Not Draining
When water fails to drain properly, inspect the dishwasher drain for visible blockages. Clear away any food particles or debris. Next, remove and clean the filter, as a clogged filter can impede water flow. Additionally, check the drain hose for kinks, clogs, or obstructions. Resolving these issues should restore proper drainage.
Issue: Dishes Aren’t Getting Clean
If dishes come out dirty, ensure that the spray arms can rotate freely and that their holes are not blocked. Test the water flow and clean the arms if necessary.
Verify that the detergent dispenser is functioning correctly and that you’re using the right detergent for your water type. If mineral deposits are present, use vinegar or a descaling agent to combat hard water buildup. These steps will help restore your dishwasher’s cleaning performance.

Conclusion
Regular maintenance ensures your KitchenAid dishwasher runs efficiently, avoids unpleasant odors, and keeps your dishes sparkling clean. You can optimize its performance and prevent common issues by incorporating a monthly cleaning schedule. Remember to use high-quality detergent, clean the filter regularly, and run periodic cleaning cycles with vinegar and baking soda.
These practices are essential for maintaining your dishwasher’s longevity and effectiveness. For a detailed guide on maintaining your appliance, refer to this comprehensive resource on how to clean Kitchen Aid dishwasher to keep it in top condition.
Professional Focus
Angela Ervin, a former interior designer turned blogger, specializes in kitchen design and renovations. Through her website, she blends her passion for cooking with design expertise, sharing practical and creative ideas. Known for balancing functionality and beauty, Angela’s insightful content has made her a trusted voice in home design and lifestyle.
About the Author
Angela Ervin, an experienced interior designer and blogger, combines her passion for kitchen renovations with storytelling. Living in Petersburg with her family, she enjoys cooking and testing her projects firsthand. Known for her humor and relatable style, Angela shares creative, functional design insights through her content, making her a trusted voice in home design.
Education History
University: Virginia Commonwealth University
Degree: Bachelor of Fine Arts (BFA) in Interior Design
- Angela’s education at VCU focused on mastering core interior design principles, including spatial planning, color theory, materials selection, and sustainable design practices.
- She gained hands-on experience through studio projects and collaborative design exercises, which honed her ability to create functional and aesthetically pleasing environments.
- Her coursework also emphasized problem-solving and practical applications of design, preparing her for real-world projects like her self-directed kitchen renovations.
- The program’s strong foundation in both technical skills and creative expression shaped Angela’s ability to seamlessly integrate form and function in her work.
