
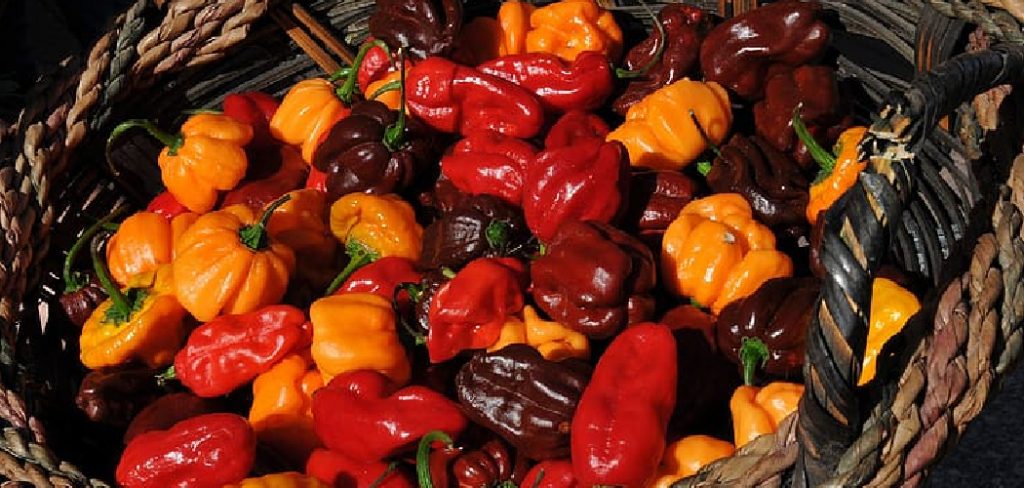
Are you tired of buying expensive dried habanero peppers from the store? Well, you’re in luck because drying your peppers at home is easy and a great way to save money.
How to dry habanero peppers in oven is an efficient and straightforward method to preserve their intense heat and flavor for long-term use. This technique allows you to create a versatile ingredient that can be stored for months and easily incorporated into various recipes, from spicy sauces to flavorful spice blends. As a bonus, the drying process also intensifies the heat and flavor of habanero peppers, making them even more potent in your dishes.
With just a few simple steps and essential kitchen tools, you can transform fresh habanero peppers into a dried and shelf-stable form, perfect for enhancing your culinary creations year-round. Let’s get started!
What Are the Benefits of Drying Habanero Peppers in Oven?
Drying habanero peppers in the oven offers numerous benefits, making it a popular method amongst home cooks. Some of the notable advantages include:
- Cost-effective: As mentioned earlier, buying dried habanero peppers from the store can be expensive. By drying your peppers at home, you can save money and have a constant supply of this spice without breaking the bank.
- Preserves Heat and Flavor: Unlike other preservation methods like freezing or pickling, drying habanero peppers in the oven allows them to retain their intense heat and robust flavor for an extended period.
- Convenient Storage: Dried habanero peppers take up less space than fresh peppers, making them easier to store in your pantry or spice cabinet. They also have a longer shelf life, so you can enjoy the flavor of habanero peppers all year round.
- Versatile Ingredient: Dried habanero peppers can be used in various dishes and recipes, adding a spicy kick and complex flavor profile. You can use them whole or ground into powder, making them a versatile ingredient for any kitchen.
Now that we know the benefits, let’s dive into the steps on how to dry habanero peppers in oven.
What Will You Need?
To dry habanero peppers in the oven, you will need the following items:
- Fresh habanero peppers
- Baking sheet
- Parchment paper or aluminum foil
- Oven
- Kitchen gloves (optional)
Once you have all the necessary items, it’s time to start drying your peppers!
8 Easy Steps on How to Dry Habanero Peppers in Oven
Step 1: Preheat Your Oven
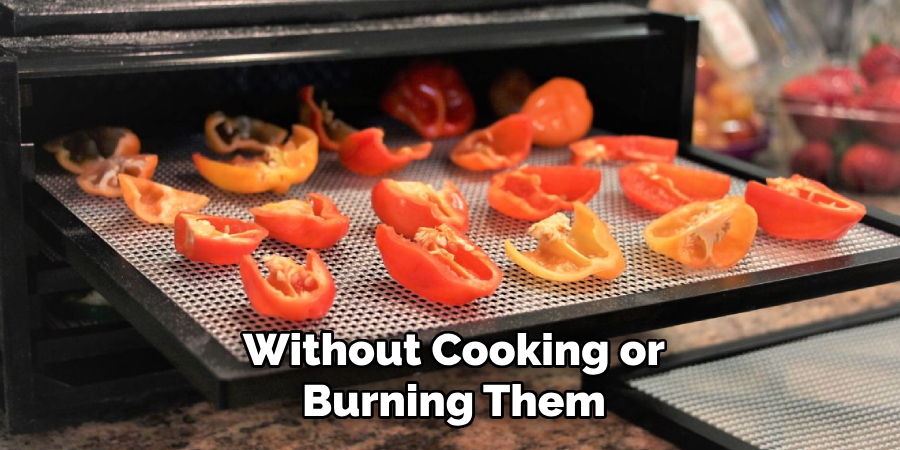
Start by preheating your oven to the lowest temperature setting, typically around 140°F to 170°F (60°C to 75°C). This low and slow heat ensures that the peppers dry thoroughly without cooking or burning them. A steady, low temperature is crucial for preserving the peppers’ vibrant color, flavor, and heat. If your oven doesn’t go as low as 140°F, consider cracking the oven door slightly to allow some heat to escape, maintaining a consistent drying environment. This step sets the stage for proper dehydration, so take the time to confirm your oven is calibrated and ready.
Step 2: Prepare the Peppers
Start by selecting fresh, high-quality peppers for the best results. Wash the peppers thoroughly under cool running water to remove dirt or debris. Once clean, pat them dry using a clean kitchen towel or paper towels. Next, decide if you want to dry the peppers whole or if you’ll slice them for faster drying. If slicing, use a sharp knife and cut the peppers into uniform pieces, as consistent sizes will help ensure even drying.
Remove the stems and seeds if desired, especially if you want a milder flavor—seeds can add extra heat. For smaller peppers, such as chili peppers, leaving them whole is an option, but be sure to puncture them with a toothpick or skewer to allow moisture to escape during drying. Lastly, arrange the prepared peppers in a single layer on your drying tray or oven rack, ensuring no overlap and proper airflow and efficient dehydration. This careful preparation will help retain the peppers’ nutrients, aroma, and vibrant flavor.
Step 3: Slice the Peppers
Slicing the peppers is essential to streamline the drying process and ensure consistency in the final product. A sharp knife is crucial for clean, even cuts, contributing to quicker and more uniform drying. For larger peppers like bell peppers or poblanos, slicing them into thin, even strips or small, bite-sized pieces is recommended. This not only aids in faster drying but also makes them easier to store and use in recipes later. Be sure to handle the peppers carefully, especially when working with spicy varieties, as their oils can irritate the skin or eyes. Wearing gloves during this process is a helpful precaution.
Additionally, consider the end use of your dried peppers when deciding how to slice them. If you plan to grind them into a powder, smaller slices will dry faster and blend more efficiently. For cooking purposes, larger pieces may be preferable.
Step 4: Line Baking Sheet with Parchment Paper
Lining the baking sheet with parchment paper is essential for an efficient and mess-free drying process. The parchment paper prevents the peppers from sticking to the baking sheet’s surface, making cleanup significantly easier. Additionally, it ensures proper air circulation around the peppers, which is critical for even drying. If parchment paper is unavailable, a silicone baking mat can be an alternative, as it provides a similarly non-stick and reusable surface.
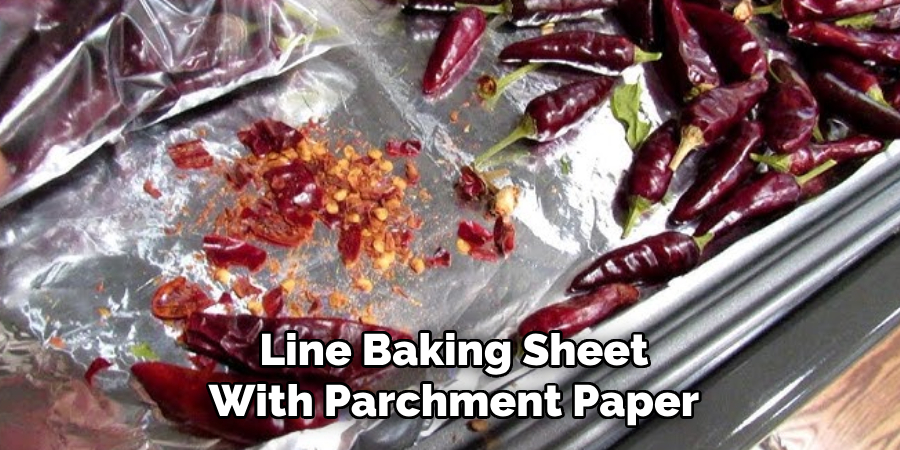
When arranging the pepper slices on the prepared baking sheet, spread them evenly in a single layer. Avoid overlapping or crowding the pieces, as this can trap moisture and lead to uneven drying. Proper spacing allows warm air to reach all parts of each slice, ensuring consistency in the final result.
Step 5: Dry the Peppers in the Oven
Preheat your oven to a low temperature, typically around 120°F to 150°F (50°C to 65°C), depending on your oven’s settings. Place the baking sheet with the pepper slices on the middle rack. It’s important to keep the oven door slightly ajar throughout the drying process to allow moisture to escape and to maintain air circulation. You can use a wooden spoon or heat-resistant object to prop the door open if necessary.
Check on the peppers periodically to monitor their progress and ensure they are drying evenly. Depending on the slices’ thickness and the peppers’ water content, this process can take anywhere from 4 to 12 hours. Rotate the baking sheet every couple of hours to promote even drying, and flip the slices occasionally if needed. The peppers are thoroughly dried when they become brittle and break easily without bending.
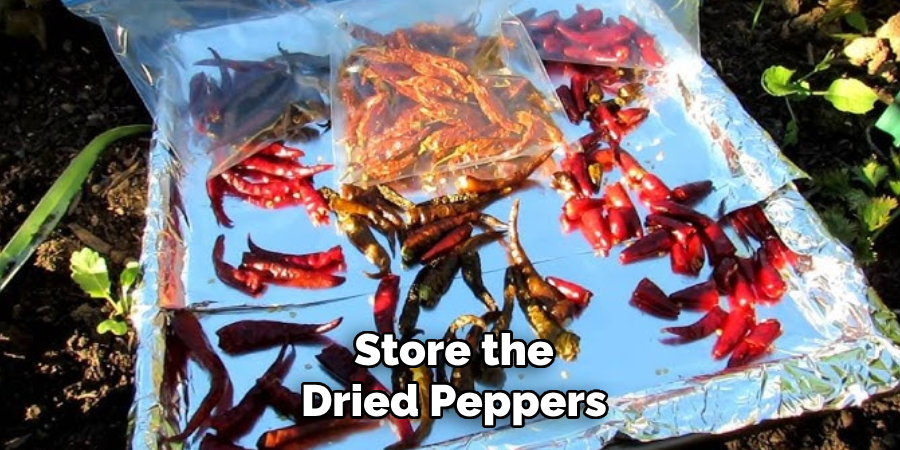
Step 6: Store the Dried Peppers
Once the peppers are fully dried and cooled to room temperature, transfer them to an airtight container for storage. Glass jars, vacuum-sealed bags, or food-grade plastic containers work well to preserve dried peppers. Store the container in a cool, dark, and dry place to maintain the peppers’ flavor and texture over time. Properly dried and stored peppers can last for several months, allowing you to enjoy their rich, concentrated flavor in various recipes. Additionally, you can grind the dried peppers into powder for use as a spice or seasoning.
Step 7: Use the Dried Peppers
Dried peppers are incredibly versatile and can enhance your cooking in many ways. Rehydrate them by soaking in warm water for approximately 15–30 minutes, and then use them in sauces, soups, or stews to add depth of flavor. Alternatively, you can use their dried form by crushing them into flakes or powder to sprinkle over dishes like pasta, pizza, or roasted vegetables. Experimenting with dried peppers allows you to explore new layers of flavor and bring a unique touch to your culinary creations.
Step 8: Share and Enjoy Your Creations
Once you’ve mastered the art of drying and using peppers, share your culinary creations with friends and family. Incorporate dried peppers into your signature dishes or experiment with new recipes to showcase their flavor. Sharing recipes and dishes not only spreads the joy of cooking but inspires others to explore using dried peppers in their meals. Whether it’s a hearty stew, a spicy seasoning blend, or a flavorful sauce, dried peppers can elevate your cooking to the next level.

By following these simple steps, you can enjoy the benefits of dried peppers all year round. From adding a kick to your dishes to preserving your garden’s bounty, drying peppers is a versatile and rewarding skill for any home cook.
Conclusion
How to dry habanero peppers in oven is an efficient and straightforward method to preserve their intense heat and vibrant flavor for future use.
By carefully preparing the peppers, setting the correct oven temperature, and monitoring the drying process, you can achieve perfectly dried peppers that retain their quality. This technique not only extends the shelf life of your harvest but also allows you to enjoy the spicy essence of habaneros in various dishes anytime. With just a little patience and effort, drying habanero peppers in the oven becomes a valuable skill for enhancing your culinary adventures.
Hopefully, this guide has given you the confidence and knowledge to try drying habanero peppers in your own kitchen.
Professional Focus
Angela Ervin, a former interior designer turned blogger, specializes in kitchen design and renovations. Through her website, she blends her passion for cooking with design expertise, sharing practical and creative ideas. Known for balancing functionality and beauty, Angela’s insightful content has made her a trusted voice in home design and lifestyle.
About the Author
Angela Ervin, an experienced interior designer and blogger, combines her passion for kitchen renovations with storytelling. Living in Petersburg with her family, she enjoys cooking and testing her projects firsthand. Known for her humor and relatable style, Angela shares creative, functional design insights through her content, making her a trusted voice in home design.
Education History
University: Virginia Commonwealth University
Degree: Bachelor of Fine Arts (BFA) in Interior Design
- Angela’s education at VCU focused on mastering core interior design principles, including spatial planning, color theory, materials selection, and sustainable design practices.
- She gained hands-on experience through studio projects and collaborative design exercises, which honed her ability to create functional and aesthetically pleasing environments.
- Her coursework also emphasized problem-solving and practical applications of design, preparing her for real-world projects like her self-directed kitchen renovations.
- The program’s strong foundation in both technical skills and creative expression shaped Angela’s ability to seamlessly integrate form and function in her work.