
Granite countertops are highly sought after for their durability, natural beauty, and timeless elegance, making them popular in kitchens and bathrooms. However, despite their sturdy nature, granite is not indestructible. Over time, heavy use or accidental impacts can result in chips or cracks that detract from the countertop’s flawless appearance.
Knowing how to fix a chip on granite countertop is essential for maintaining its visual appeal and structural integrity. Repairing chips not only restores the countertop to its original state but also helps prevent the damage from worsening, which could lead to more extensive and costly repairs.
This article provides a step-by-step guide on how to fix a chip on granite countertop, helping you preserve the long-lasting charm and functionality of your granite surfaces.
Materials and Tools Needed
Essential Materials
- Epoxy Resin Or Granite Repair Kit (specifically designed for chips): These are formulated to blend seamlessly with granite, ensuring a durable and inconspicuous repair.
- Granite Polishing Compound (for finishing): Helps restore the shine and smoothness of the countertop.
- Clean Cloth Or Rag: Necessary for cleaning and wiping down the surface before and after the repair process.
- Painter’s Tape (optional): Useful for protecting the surrounding area and creating clean edges.
- Sandpaper or buffing tool (for smoothing): Aids in leveling the repaired area with the rest of the countertop.
Tools You’ll Need
- Putty Knife Or Plastic Spatula (for applying the repair compound): Enables precise application for an even and polished finish.
- Small Mixing Container (if using epoxy): Ensures proper blending of components for effective adhesion.
- Gloves For Safety: Protect your hands from irritants while working with repair compounds.
- Masking Tape (for creating an outline around the repair area): Prevents spreading the repair material beyond the intended spot.
These materials and tools ensure you have everything required for a successful granite countertop repair. Proper preparation and having the right items on hand can make the process easier and more effective.
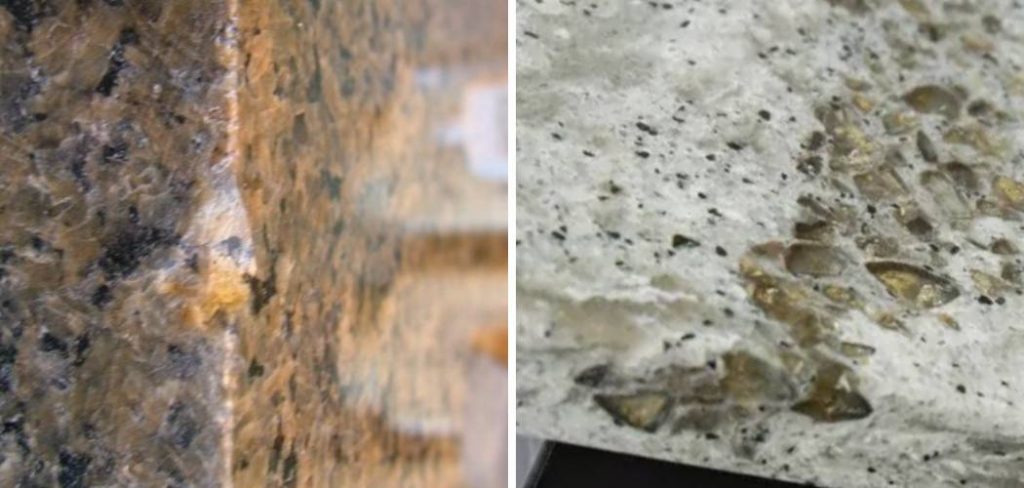
Identifying the Type of Chip
When repairing a granite countertop, identifying the type of chip is a crucial first step. Chips can vary in size and depth, directly impacting the repair method needed.
Small Chips vs. Large Chips
Small shallow chips, often less than a quarter of an inch deep, can typically be repaired using a simple resin or epoxy solution. These fillers are designed to bond seamlessly with the granite, restoring both appearance and functionality. On the other hand, larger chips may require more extensive repairs. Larger areas of damage often involve filling the chip with resin or stone filler and carefully blending the repair to match the surrounding surface. This process ensures a smoother and less noticeable finish.
Understanding the Surface Damage
Carefully assess the depth, size, and location of the chip to determine the best preparation strategy prior to applying any repair material. For instance, deeper chips may require leveling or cleaning to ensure the filler adheres properly.
Inspecting for Cracks
Another critical aspect when examining the damage is ensuring the chip is isolated and not part of a larger crack network. Cracks extending from the chip might compromise the countertop’s structural integrity and often require professional repair services to address the issue effectively.
Preparing the Area for Repair
Proper preparation is vital to ensure the success and durability of any countertop repair. Taking the time to clean, protect, and smooth the chipped area helps create the ideal surface for repair materials to adhere securely.
Step 1: Cleaning the Chip Area
Begin by thoroughly cleaning the chipped area using a mild soap and water solution. This step removes any dirt, grease, or residue that might interfere with the repair process. Be gentle yet thorough, scrubbing the area lightly to ensure that all contaminants are removed. Once the cleaning is complete, dry the area thoroughly using a clean, lint-free cloth. The area must be completely moisture-free before proceeding to the next steps, as water can hinder the effectiveness of the repair materials.
Step 2: Taping the Repair Area
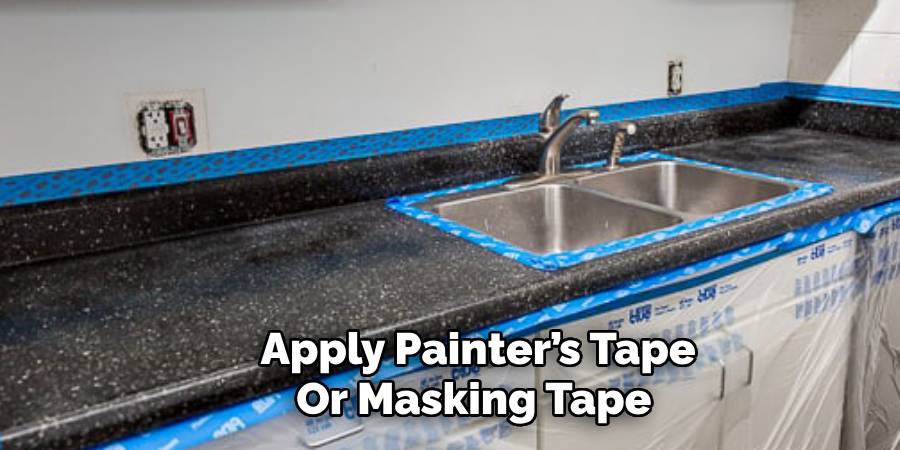
To protect the surrounding surface and create a clean boundary for the repair, carefully apply painter’s tape or masking tape around the chipped area. This precautionary measure helps ensure that the repair materials, such as resin or epoxy, do not spill or spread onto undamaged countertop sections. Properly placed tape also makes the repair process easier and more precise.
Step 3: Sanding (If Necessary)
For deeper chips with rough or jagged edges, sanding may be required. Using fine-grit sandpaper, gently sand the chipped area to smooth out any irregularities. This ensures that the repair compound adheres uniformly and creates a more polished final result. Take care not to over-sand the surface, as this could widen the chip or damage unchipped areas.
How to Fix a Chip on Granite Countertop: Filling the Chip with Repair Compound
Step 1: Mixing the Repair Material
If you are using an epoxy resin, follow the manufacturer’s guidelines carefully to mix the resin and hardener. Ensure the mixture is thoroughly combined to achieve the intended consistency and strength. For granite repair kits, use the pre-mixed compound if provided, or mix as instructed in the kit’s manual. Pay attention to achieving a uniform color, especially if tinting agents are required to match the granite’s natural appearance.
Step 2: Applying the Repair Compound
Gently apply the mixed repair compound to the chipped area using a putty knife, plastic spatula, or another smooth applicator. Be sure to fully fill the chip, ensuring no gaps or air bubbles remain. The goal is to make the repair level with the surrounding granite, so take your time to spread the compound evenly. If the repair compound includes color additives, verify that the applied section blends seamlessly with the existing surface for a more natural finish.
Step 3: Smoothing the Repair
Once the compound is in place, use the putty knife or a similar flat-edged tool to smooth the surface of the repair. Carefully remove excess material around the chip’s edges while ensuring the compound remains level. Clean away any residue on the unchipped areas immediately, as the compound can begin hardening quickly and may become difficult to remove. Taking this extra step helps maintain the granite’s overall appearance and makes later refinements easier.
Allowing the Repair to Dry and Set
Step 1: Drying Time
Allow the repair material to dry completely, following the drying time recommended on the product label (usually between 1-3 hours). It is crucial to avoid using the countertop during this period to prevent any accidental disturbances to the repair. For optimal results, ensure the area is well-ventilated, as this may help accelerate the drying process.
Step 2: Checking for Imperfections
Once the material is dry, closely examine the repair area to check for any imperfections, such as uneven surfaces or gaps. If you notice any inconsistencies, don’t hesitate to apply a second thin layer of the repair compound. Smooth it carefully, maintaining the level with the surrounding surface, and allow it to dry according to the product instructions. This step ensures a seamless and polished finish, preserving the natural elegance of the granite.
Sanding and Polishing the Repaired Area
Step 1: Sanding the Surface
Once the repair material is fully dry, the next step is to sand the area to ensure a smooth, even surface. Use a fine-grit sandpaper, typically between 400-600 grit, as it provides precision without damaging the surrounding granite. Work in gentle, circular motions, focusing on the repaired section. Combine the repair with the surrounding granite so that the transition is seamless. Be patient and mindful during this process, ensuring the surface becomes level and maintains the countertop’s natural contour. Periodically wipe the area with a clean, dry cloth to remove fine dust and monitor your progress.
Step 2: Polishing the Area
After achieving a smooth finish through sanding, it’s time to restore the shine to the repaired section. Apply a small amount of granite polishing compound directly to the area. Using a soft cloth or a polishing pad, gently buff the surface in small, circular motions. Keep applying even pressure, and continue buffing until the repaired area matches the glossy finish of the rest of the countertop. This step restores the granite’s luster and ensures the repair remains inconspicuous. Once satisfied with the result, clean the surface with a damp cloth and allow it to dry completely before use. Proper sanding and polishing ensure a well-finished repair, preserving both the functionality and aesthetic appeal of your granite countertop.
Final Inspection and Touch-Ups
Step 1: Inspecting the Finished Repair
Take a moment to closely examine the repaired area to ensure the work is complete and seamless. Check that the chip has been fully filled and that the surface is level and smooth, matching the surrounding granite. Pay attention to ensure the color and texture of the repaired section blend naturally with the rest of the countertop. Use good lighting to spot any imperfections that might require additional attention.
Step 2: Touch-Up
If any discrepancies are noticeable, apply additional polishing compound or a second layer of resin to refine the finish. Focus on achieving a smoother, more consistent appearance. Buff the area gently once more, ensuring the gloss matches the rest of the surface. Repeat as necessary until you are satisfied with the results. Careful touch-ups ensure the repair remains undetectable while restoring the countertop’s original aesthetic and functional integrity.
Conclusion
Learning “how to fix a chip on granite countertop” involves a few simple but essential steps. Start by thoroughly cleaning and preparing the damaged area to ensure proper adhesion. Next, apply the repair compound carefully to fill the chip, following the manufacturer’s instructions. Finish the process by sanding and polishing the area to create a smooth and seamless surface that blends with the rest of the countertop. Proper preparation and attention to detail are key for a successful repair. For larger or deeper chips, it’s advisable to consult a professional for a permanent solution.
Professional Focus
Angela Ervin, a former interior designer turned blogger, specializes in kitchen design and renovations. Through her website, she blends her passion for cooking with design expertise, sharing practical and creative ideas. Known for balancing functionality and beauty, Angela’s insightful content has made her a trusted voice in home design and lifestyle.
About the Author
Angela Ervin, an experienced interior designer and blogger, combines her passion for kitchen renovations with storytelling. Living in Petersburg with her family, she enjoys cooking and testing her projects firsthand. Known for her humor and relatable style, Angela shares creative, functional design insights through her content, making her a trusted voice in home design.
Education History
University: Virginia Commonwealth University
Degree: Bachelor of Fine Arts (BFA) in Interior Design
- Angela’s education at VCU focused on mastering core interior design principles, including spatial planning, color theory, materials selection, and sustainable design practices.
- She gained hands-on experience through studio projects and collaborative design exercises, which honed her ability to create functional and aesthetically pleasing environments.
- Her coursework also emphasized problem-solving and practical applications of design, preparing her for real-world projects like her self-directed kitchen renovations.
- The program’s strong foundation in both technical skills and creative expression shaped Angela’s ability to seamlessly integrate form and function in her work.