
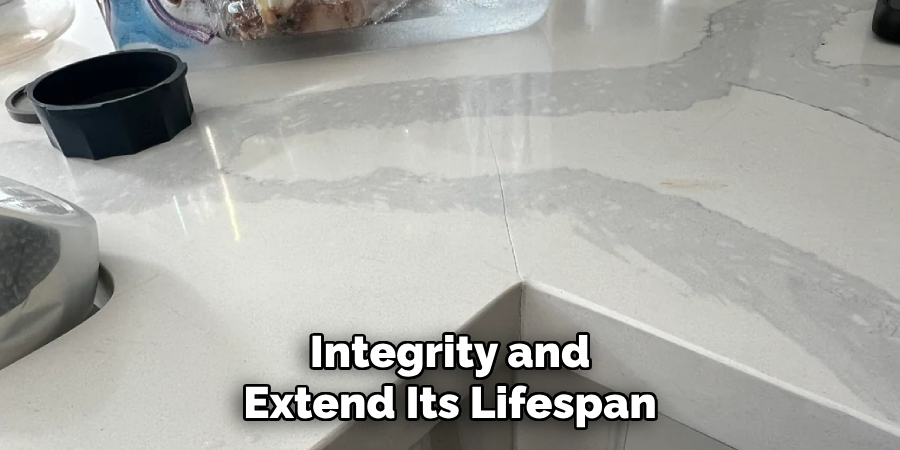
Cracked grout on a kitchen countertop not only affects its appearance but can also lead to further damage if moisture seeps into the underlying surfaces. Fortunately, fixing cracked grout is a straightforward process that can restore your countertop’s integrity and extend its lifespan.

This guide on how to fix cracked grout on kitchen countertop will walk you through the steps needed to repair the grout efficiently and effectively, ensuring a durable and polished result.
Why Does Grout Crack on Kitchen Countertops?
Before diving into the steps for fixing cracked grout, it’s essential to understand why grout cracks in the first place. The most common reasons for this issue include:
Movement of the Countertop
If your countertop is not securely installed or has a subpar support system, it can shift and cause stress on the grout lines, leading them to crack. This is especially common in older homes where the countertops may have settled over time.
Use of Poor Quality Grout
Using low-quality or incorrect grout for your kitchen countertop can also result in cracks. It’s crucial to use a high-quality grout that is appropriate for your specific countertop material and ensure it is properly mixed and applied.
Water Damage
Water damage can weaken the grout, making it more susceptible to cracking. If your countertop is not adequately sealed or if water frequently comes into contact with the grout, it can lead to cracks over time.
Materials Needed
To fix cracked grout on a kitchen countertop, you will need the following materials:
Grout Saw or Oscillating Tool
A grout saw or oscillating tool will be needed to remove the damaged grout.
New Grout
Choose a high-quality, waterproof grout that matches the color of your existing grout.
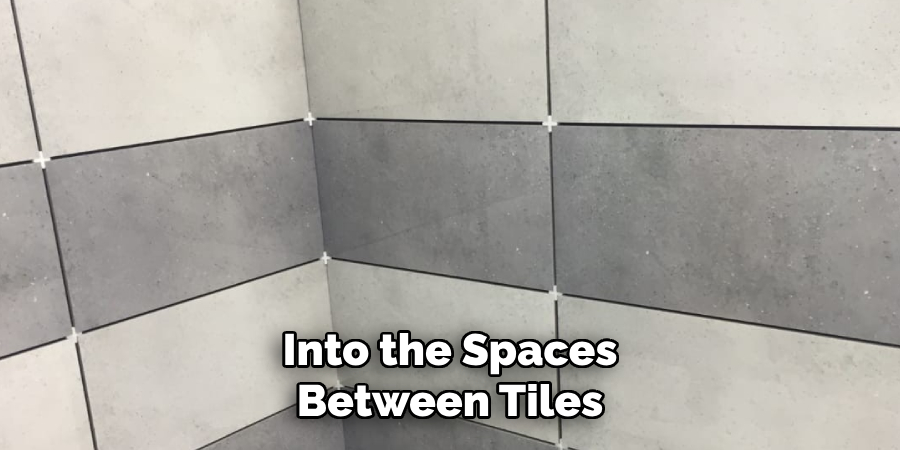
Grout Float
This tool is used to apply new grout into the spaces between tiles.
Squeegee
A squeegee can help smooth and level the new grout after application.
Sponge
You will need a damp sponge to wipe away excess grout and clean the surface.
7 Step-by-step Guides on How to Fix Cracked Grout on Kitchen Countertop
Step 1: Clean the Area
Before starting the repair process, make sure to thoroughly clean the area around the cracked grout. Use a soft-bristled brush or a vacuum cleaner to remove any dust, debris, or loose grout particles. This step ensures that the new grout adheres properly and provides a strong bond.
If there are any grease or stains on the surface, clean them with a mild detergent and warm water, and allow the area to dry completely before moving to the next step.
Step 2: Remove the Damaged Grout
Use a grout saw or oscillating tool to remove the damaged grout. Be careful not to damage the surrounding tiles.
Start by cutting along the length of the cracked grout, then work on removing it in small sections at a time. Make sure to wear safety glasses and gloves during this step as there may be sharp edges from the broken grout.
Once all the damaged grout is removed, use a vacuum cleaner or brush to remove any remaining debris.
Step 3: Prepare New Grout
Mix the new grout according to the manufacturer’s instructions. Carefully follow the recommended water-to-grout ratio to achieve the ideal consistency, which should be smooth and free of lumps. Avoid adding too much water, as this can weaken the grout and lead to future cracking. Use a mixing paddle or a small trowel to stir the grout thoroughly until it reaches a uniform texture.
Once mixed, allow the grout to sit for the recommended time (often referred to as slaking) before applying it. This step ensures that the grout is properly hydrated and ready for use. Make sure to only prepare enough grout for the area you plan to repair, as grout can harden quickly if left unused.
Step 4: Apply New Grout
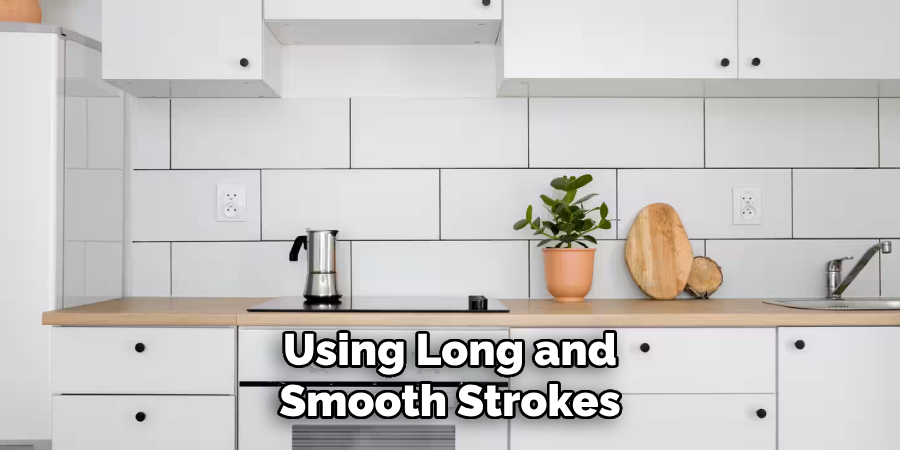
Using a grout float, apply the new grout into the spaces between tiles. Hold the float at a 45-degree angle and use it to push the grout into the joints, filling them completely. Make sure to work in small sections at a time to prevent the grout from drying out before you can smooth it.
It’s best to work diagonally across the joints, using long and smooth strokes. This helps ensure that the grout is evenly distributed and properly fills all the spaces.
Step 5: Smooth and Level Grout
Once the grout is applied, use a squeegee or the flat edge of the grout float to smooth and level the grout lines. Hold the tool at a slight angle and move it diagonally across the tiles to remove any excess grout while ensuring the joints are evenly filled. This step is crucial for achieving a consistent and polished finish.
Work carefully and double-check that all gaps are properly sealed with grout. If you notice any low spots or holes, reapply a small amount of grout and smooth it out immediately. After leveling the grout, allow it to set for a few minutes according to the manufacturer’s instructions before proceeding to the next step.
Step 6: Wipe Away Excess Grout
After the grout has set for a few minutes, use a damp sponge to wipe away any excess grout from the tile surface. Rinse the sponge frequently and avoid applying too much pressure to prevent removing too much grout from the joints.
Once all the excess grout is removed, allow it to dry for about 30 minutes before moving on to the final step.
Step 7: Seal the Grout
The last step is sealing the newly repaired grout. Use a high-quality grout sealer and follow the manufacturer’s instructions carefully. Most sealers require you to apply multiple coats with drying time in between. Once the sealer has dried, your repaired grout should be strong and waterproof.
Following these steps on how to fix cracked grout on kitchen countertop will help you fix cracked grout on your kitchen countertop and prevent future cracks. Remember to regularly clean and seal your grout to maintain its strength and appearance. Proper maintenance can significantly prolong the life of your countertop’s grout, saving you time and money in the long run.
Additional Tips and Tricks
- To prevent future grout cracks, make sure to regularly clean and seal your kitchen countertop.
- For larger or more severe cracks, it may be necessary to completely remove all the grout from the affected area and reapply new grout.
- If you are unsure about repairing cracked grout yourself, it’s best to seek professional help to ensure a proper and long-lasting fix.
- Consider using caulk instead of grout for areas where movement is expected, such as along the edges of countertops near walls or appliances.
- Investing in a high-quality grout saw or oscillating tool can make the removal process easier and more precise.
- Protect your hands with gloves and your eyes with safety glasses when working with grout tools.
- For a seamless repair, try to match the color of your new grout as closely as possible to the existing grout. If necessary, you can also use a grout stain to help achieve a better match.
- Regularly wipe down your kitchen countertop after use to prevent buildup of dirt, grease, and other substances that can weaken the grout over time.
Frequently Asked Questions
Q: Can I Use the Same Grout for Both Floor and Countertop Repairs?
A: It’s best to use a different type of grout for each surface, as floor grout is typically more durable and less prone to cracking than countertop grout.
Q: How Often Should I Seal My Grout?
A: Seal your grout at least once a year to maintain its strength and appearance. However, high-traffic areas may require more frequent sealing.
Q: Can Cracked Grout Cause Any Health Issues?
A: Cracked or damaged grout can allow moisture and bacteria to seep into the spaces between tiles, leading to mold growth and potential health hazards. Therefore, it’s important to repair cracked grout promptly and properly.
Q: Is There a Way to Prevent Cracked Grout in the First Place?
A: Yes, some preventative measures include using a grout additive for added flexibility, using unsanded grout for smaller joints, and ensuring proper subfloor preparation before installing tiles. However, even with these precautions, it’s still important to regularly maintain and repair your grout to prevent future cracking.

Conclusion
Repairing cracked grout on your kitchen countertop may seem daunting, but by following the proper steps on how to fix cracked grout on kitchen countertop, you can restore both its appearance and functionality. From carefully removing damaged grout to sealing the new application, taking the time to perform each step meticulously ensures a durable and long-lasting repair.
Regular maintenance, such as cleaning and sealing, will also help keep your countertop looking its best and prevent future damage. By investing a little effort now, you can save yourself costly repairs down the road and enjoy a reliable, attractive kitchen for years to come.
Professional Focus
Angela Ervin, a former interior designer turned blogger, specializes in kitchen design and renovations. Through her website, she blends her passion for cooking with design expertise, sharing practical and creative ideas. Known for balancing functionality and beauty, Angela’s insightful content has made her a trusted voice in home design and lifestyle.
About the Author
Angela Ervin, an experienced interior designer and blogger, combines her passion for kitchen renovations with storytelling. Living in Petersburg with her family, she enjoys cooking and testing her projects firsthand. Known for her humor and relatable style, Angela shares creative, functional design insights through her content, making her a trusted voice in home design.
Education History
University: Virginia Commonwealth University
Degree: Bachelor of Fine Arts (BFA) in Interior Design
- Angela’s education at VCU focused on mastering core interior design principles, including spatial planning, color theory, materials selection, and sustainable design practices.
- She gained hands-on experience through studio projects and collaborative design exercises, which honed her ability to create functional and aesthetically pleasing environments.
- Her coursework also emphasized problem-solving and practical applications of design, preparing her for real-world projects like her self-directed kitchen renovations.
- The program’s strong foundation in both technical skills and creative expression shaped Angela’s ability to seamlessly integrate form and function in her work.