
Creating a wooden countertop is a rewarding DIY project that offers a cost-effective, stylish, and customizable alternative to store-bought options. Wooden countertops bring a sense of natural warmth and charm to any kitchen, making them a popular choice among homeowners. One of the key benefits of using wood is its versatility; it is easy to work with, allows for various design customizations, and can be refinished over time to maintain its beauty and durability.
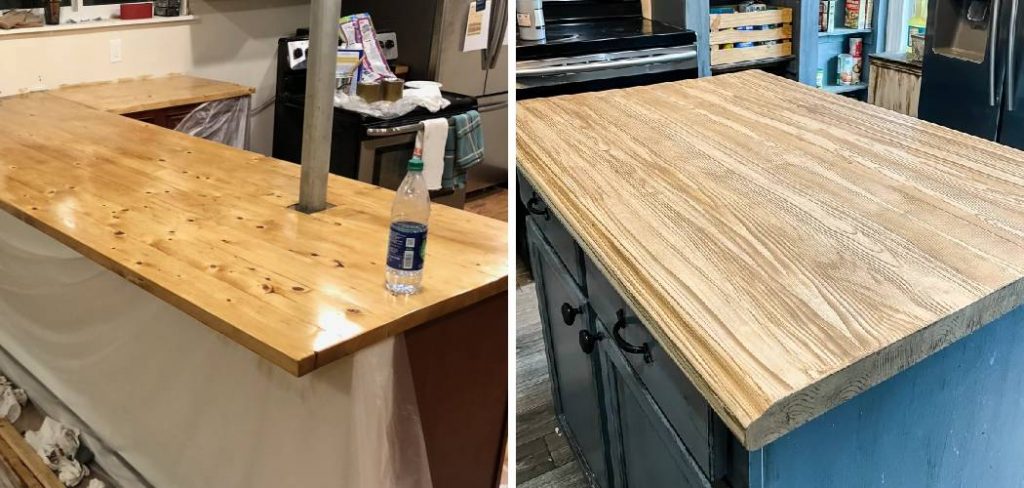
This guide is designed to help you understand how to make a countertop from wood, providing detailed step-by-step instructions to ensure a successful project. From selecting the right type of wood to preparing, assembling, finishing, and installing your countertop, we’ll walk you through the entire process to help you create a stunning and functional centerpiece for your kitchen.
Choosing the Right Wood for Your Countertop
Selecting the right wood is crucial in creating a durable and visually appealing countertop. Different types of wood offer unique advantages, making it essential to choose one that aligns with your needs and aesthetic preferences.
Best Types of Wood for Countertops
- Hardwoods: Maple, oak, walnut, and cherry are excellent options for countertops due to their durability and long-lasting nature. These woods are resistant to wear and can handle everyday usage effortlessly.
- Softwoods: Pine and cedar are more affordable choices but tend to be less durable. They are better suited for low-traffic areas or projects with budget constraints.
Considerations When Choosing Wood
- Hardness Rating: Check the Janka hardness scale to ensure the wood meets your durability requirements. Harder woods perform better over time as countertops.
- Grain Pattern and Color: Consider the natural appearance of the wood to match your kitchen decor. Some woods feature elegant, fine grains, while others may have bold, prominent textures.
- Pre-Glued Butcher Block vs. DIY Assembly: Pre-glued slabs simplify the process, but DIY plank assembly allows for a more personalized and custom design.
Sourcing the Wood
You can purchase wood from local lumberyards or home improvement stores, which often provide a variety of choices. Alternatively, reclaimed wood offers a sustainable and budget-friendly option, adding character and uniqueness to your project.
Measuring and Cutting the Wood
Step 1: Measuring Your Countertop Space
Before cutting, measuring your countertop space’s dimensions accurately is crucial. Use a reliable measuring tape to determine both the length and width of the area where the countertop will be installed. Be sure to account for any desired overhang, which typically extends 1 to 2 inches beyond the cabinets. Double-check your measurements to avoid errors, as precise dimensions are essential for a proper fit.

Step 2: Cutting the Wood to Size
Once your measurements are finalized, it’s time to cut the wood to size. Use a table or circular saw for straight, clean cuts, as these tools offer precision and stability. If you’re creating a butcher block-style countertop, you must cut multiple planks to the appropriate length. Take the time to clamp the wood securely to the working surface to ensure safe and accurate cuts. Smooth out rough edges with sandpaper or a sander to prevent splinters and prepare the wood for assembly.
Step 3: Planning for Sink and Stove Cutouts (if applicable)
If your countertop design includes cutouts for a sink, stove, or other fixtures, measure and mark the exact placement of these openings. Use a template if provided by the manufacturer of the appliance or sink to get precise outlines. A jigsaw is the ideal tool for curved or interior cutouts, allowing for detailed and controlled cutting. Work slowly and carefully to avoid mistakes, ensuring the openings align perfectly with the fixtures. Once complete, smooth the edges of the cutouts to maintain a professional finish.
How to Make a Countertop from Wood: Assembling the Countertop
Step 1: Joining Planks (if not using a single slab)
If your countertop consists of multiple planks, the first step is to join them to form a solid surface securely. Begin by laying the planks flat and dry-fitting them to ensure a snug, even fit. Apply a generous layer of wood glue along the edges you plan to join, then press the boards together firmly. Use clamps to hold the planks in place as the glue dries, ensuring the seams are tight and even. For added strength and alignment, consider using biscuit joinery or dowels. These additional reinforcements can help prevent boards from shifting and provide extra durability to the completed surface.
Step 2: Sanding the Surface
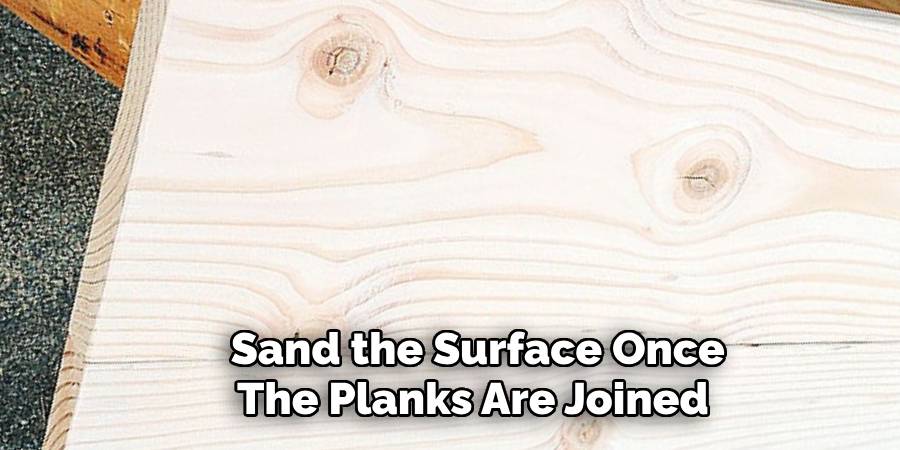
The next step is to sand the surface once the planks are joined and the glue fully dries. Use coarse sandpaper, such as 80-grit, to remove any rough spots, excess glue, or uneven areas. Gradually progress to finer grits, finishing with 220-grit sandpaper, to achieve a smooth, even finish. Sanding is crucial to prepare the countertop for finishing, ensuring that the surface is free of imperfections and ready to accept stain, sealant, or paint. Always sand along the grain of the wood for optimal results.
Step 3: Reinforcing the Countertop
For added stability, particularly in larger installations, consider reinforcing the countertop. Support brackets can be installed underneath to prevent sagging or bowing, especially where the countertop extends beyond cabinetry. Alternatively, a plywood base can provide additional strength, particularly if the countertop supports heavy appliances or fixtures. Proper reinforcements ensure your countertop remains durable and reliable for years to come.
Sealing and Finishing the Wood
Proper sealing and finishing are essential to protect and enhance the appearance of your wooden countertop. Following the right steps ensures the surface is durable, moisture-resistant, and visually appealing.
Step 1: Choosing a Finish
Select a finish that suits your needs and preferences. Food-safe options such as mineral oil, tung oil, or butcher block conditioner are ideal for food preparation areas, ensuring safety while maintaining a natural look. For areas requiring superior water resistance, consider waterproof finishes like polyurethane or epoxy resin, which protect against spills and humidity.
Step 2: Applying the Finish
Once you’ve chosen a finish, apply it carefully using a brush or a clean cloth. Work in thin, even coats, ensuring an even distribution across the entire surface. Allow each coat to dry completely before applying another layer, a process crucial for achieving a lasting and consistent finish. Depending on the finish, drying times may vary, so refer to the product instructions for guidance.
Step 3: Buffing and Polishing
After applying multiple coats, lightly sand the surface between applications using fine-grit sandpaper. This step removes imperfections and prepares the wood for the next coat. Once the final layer has dried, use a soft cloth to buff the countertop, bringing out its natural shine and achieving a polished, professional look.

Sealing and finishing your countertop with care protects it and enhances the wood’s natural beauty, ensuring it remains a centerpiece in your home for years to come.
Installing the Wooden Countertop
Step 1: Positioning the Countertop
Place the countertop carefully on top of the cabinets or support base, ensuring it is appropriately aligned with the edges and walls. Use a level to verify that everything is even, and adjust the base if necessary to avoid uneven surfaces.
Step 2: Securing the Countertop
To secure the countertop, attach it from underneath using screws and brackets. Ensure the screws are the correct length to avoid poking through the surface of the wood. It is essential to leave small gaps around the edges to account for natural wood expansion and contraction due to temperature and humidity changes. Proper spacing can help prevent warping or cracking over time.
Step 3: Sealing the Edges and Joints
Once the countertop is securely in place, use caulk or wood filler to seal any gaps, especially where the countertop meets walls or other surfaces. This step provides a finished look and prevents moisture from seeping into these areas, protecting the wood from potential damage. Allow the sealant to cure fully according to the manufacturer’s instructions before using your newly installed wooden countertop.
Maintaining and Caring for a Wooden Countertop
Proper maintenance is essential to keep your wooden countertop looking beautiful and functional for years to come. Here are some tips to ensure it’s longevity and durability.
Daily Cleaning Tips
Use a soft cloth or sponge with mild soap and warm water to clean your wooden countertop. Wipe the surface gently to remove dirt and spills, then dry it immediately with a clean towel to avoid excessive moisture, which can lead to warping or swelling. Steer clear of harsh cleaners or abrasive scrubbing pads, as they can damage the finish.
Regular Maintenance

To maintain the integrity of your countertop, reapply oil or sealant every few months. This process helps protect the wood from stains, moisture, and general wear. If scratches, stains, or minor damage occur over time, lightly sand the affected areas with fine-grit sandpaper and refinish with an appropriate sealing product. This will restore the smooth, polished appearance of the wood. By staying consistent with these practices, your wooden countertop will remain a stunning feature of your space and serve as a durable and practical work surface.
Conclusion
Creating a wooden countertop involves several key steps, including selecting the right wood, cutting and shaping the materials, assembling the pieces, finishing the surface, and installing it properly. Following these steps ensures a well-crafted and durable result. A well-maintained wooden countertop offers numerous benefits—it is long-lasting, visually appealing, and eco-friendly. Remember, sealing and ongoing care are essential to preserve its beauty and functionality. Whether you are learning “how to make a countertop from wood” or maintaining an existing one, taking your time and prioritizing quality will ensure a timeless addition to your space.
Professional Focus
Angela Ervin, a former interior designer turned blogger, specializes in kitchen design and renovations. Through her website, she blends her passion for cooking with design expertise, sharing practical and creative ideas. Known for balancing functionality and beauty, Angela’s insightful content has made her a trusted voice in home design and lifestyle.
About the Author
Angela Ervin, an experienced interior designer and blogger, combines her passion for kitchen renovations with storytelling. Living in Petersburg with her family, she enjoys cooking and testing her projects firsthand. Known for her humor and relatable style, Angela shares creative, functional design insights through her content, making her a trusted voice in home design.
Education History
University: Virginia Commonwealth University
Degree: Bachelor of Fine Arts (BFA) in Interior Design
- Angela’s education at VCU focused on mastering core interior design principles, including spatial planning, color theory, materials selection, and sustainable design practices.
- She gained hands-on experience through studio projects and collaborative design exercises, which honed her ability to create functional and aesthetically pleasing environments.
- Her coursework also emphasized problem-solving and practical applications of design, preparing her for real-world projects like her self-directed kitchen renovations.
- The program’s strong foundation in both technical skills and creative expression shaped Angela’s ability to seamlessly integrate form and function in her work.