
Removing an old dishwasher filter is an essential maintenance task to keep your dishwasher running efficiently and ensuring your dishes come out sparkling clean. Over time, filters can become clogged with food particles, grease, and debris, reducing
performance and even causing unpleasant odors. This guide explores the key aspects of how to remove old dishwasher filter.
The Role of a Dishwasher Filter in Keeping Water Clean
The dishwasher filter plays a critical role in maintaining the cleanliness and efficiency of your dishwasher. Its primary function is to trap food particles, grease, and debris from the water used during the wash cycle. By doing so, the filter prevents these contaminants from recirculating onto your dishes and clogging the dishwasher’s spray arms or drain. A clean filter ensures that water flows freely and remains free of impurities, contributing to better cleaning performance and reducing the risk of unpleasant odors. Regular maintenance of the filter is essential to keep your dishwasher functioning optimally and ensuring consistently clean results.
Tools and Supplies Needed
Before removing the old dishwasher filter, it’s important to gather the necessary tools and supplies to ensure a smooth process. Here’s what you’ll need:
- Soft-bristle Brush or Sponge: For cleaning the filter and removing stuck-on debris.
- Dishwashing Detergent: A mild detergent to help clean the filter effectively.
- Towels or Cloths: To dry the filter and clean any spills around the area.
- Bucket or Basin (Optional): For rinsing the filter thoroughly.
- Flashlight (Optional): To better inspect the filter area in case of limited visibility.
Having these tools and supplies ready will make the removal and cleaning process quick and efficient.
10 Methods How to Remove Old Dishwasher Filter
1. Turn Off the Dishwasher and Power Supply
Before attempting any repairs or maintenance, it is crucial to turn off the power to your dishwasher. Safety should always be your first priority when working with electrical appliances. Locate the dishwasher’s power switch or, if necessary, turn off the circuit breaker that supplies electricity to the dishwasher. This prevents the risk of electrical shock or accidental activation of the dishwasher while you are working on it. Once the power is turned off, you can confidently proceed to remove the filter.
2. Empty the Dishwasher and Remove the Racks
The next step in removing an old dishwasher filter is to empty the dishwasher of all dishes, utensils, and other items. This gives you clear access to the bottom of the dishwasher, where the filter is typically located. After clearing the appliance, remove the bottom
dish rack by sliding it out of the appliance. Removing the rack not only creates more space but also allows you to access the filter and the area around it without any obstacles.
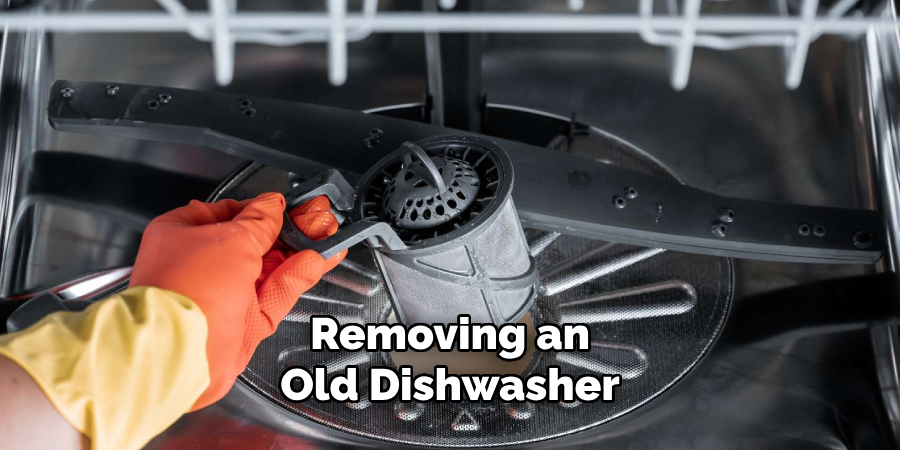
3. Locate the Filter in the Bottom of the Dishwasher
Once the racks are out of the way, you can locate the dishwasher filter. Most dishwashers have a filter located at the bottom of the appliance under the spray arm or near the drain area. Depending on the make and model of your dishwasher, there may be a central filter or multiple filters. The filter is often a circular or cylindrical component, and it may be housed in a compartment that is designed to trap food debris and grease. Understanding the location of the filter is key to successfully removing it.
4. Remove the Lower Spray Arm (If Necessary)
In some dishwashers, the lower spray arm may block access to the filter. If this is the case in your dishwasher, you will need to remove the spray arm to proceed. To do this, locate the screws or clips that secure the spray arm to the bottom of the appliance. Using a screwdriver or pliers, carefully unscrew or unclip the spray arm, and then lift it out of place. Once the spray arm is removed, you will have full access to the filter and can proceed with the removal process.
5. Unscrew or Twist the Filter to Detach It
Once you can clearly see the filter, you’ll need to detach it from the appliance. Some dishwasher filters are designed to be simply twisted or pulled out, while others may require you to unscrew them. If your dishwasher has a twist-and-lock style filter, gently
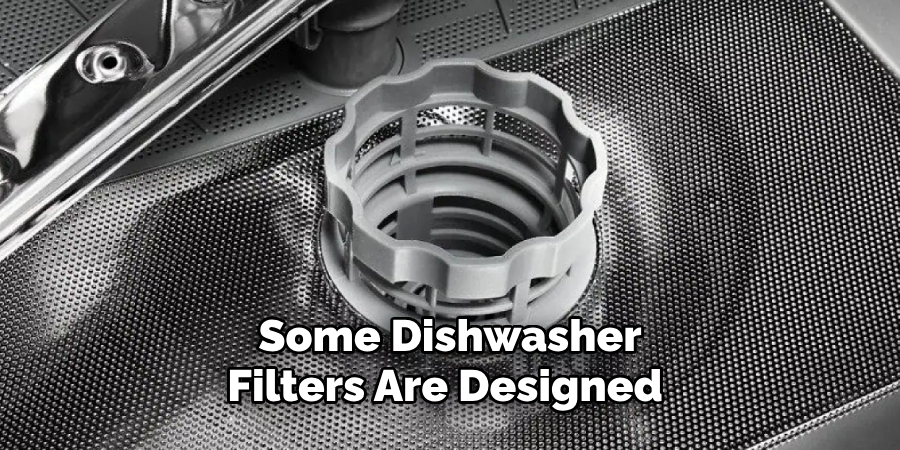
rotate it counterclockwise to unlock it, and then lift it out of the compartment. For filters that are secured with screws, use a screwdriver to remove the screws that hold the filter in place. Be sure to keep the screws in a safe place in case you need them for the installation of a new filter.
6. Inspect the Filter for Damage
Before discarding the old filter, take a moment to inspect it for any damage or wear. Filters can wear out over time due to the accumulation of debris or because they become brittle with age. If your filter is cracked, warped, or has holes, it is time to replace it. Additionally, check for any clogs or buildup of grease, soap scum, or food particles that may be affecting its functionality. If the filter is clogged but not yet damaged, cleaning it thoroughly might be an option, but if it is beyond cleaning, you will need to replace it with a new one.
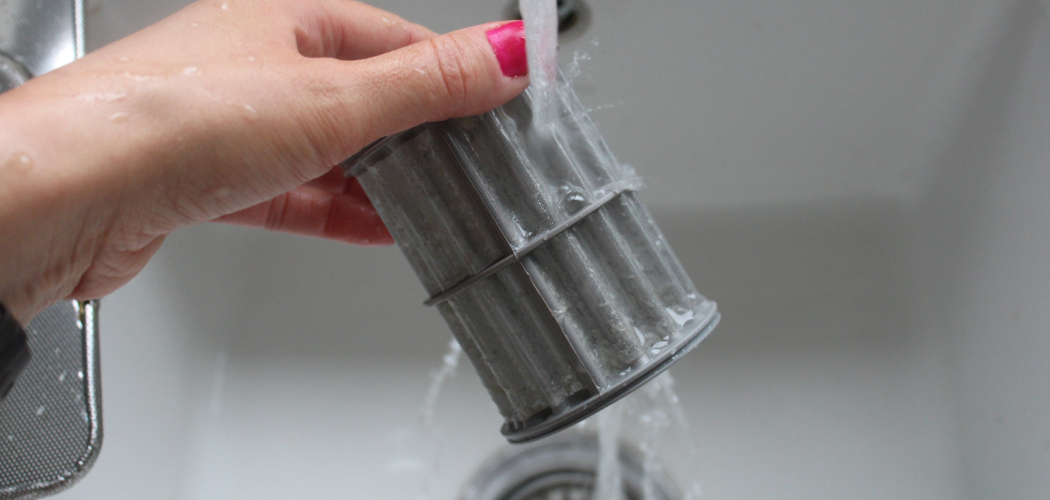
7. Clean the Filter Area
After you have removed the old filter, it is essential to clean the area where the filter was housed. Over time, food particles, soap scum, and debris can accumulate in the filter compartment, affecting the dishwasher’s ability to clean properly. Use a soft cloth or sponge to wipe down the filter area and remove any debris. You may also want to use a mild dish soap solution or a white vinegar solution to clean the area more thoroughly. Be sure to remove any sticky residue or grease that may have built up around the compartment.
8. Check for Clogs in the Drain System
While you have access to the filter area, it’s a good idea to check for clogs in the drain system. A clogged drain can cause water to back up in the dishwasher and interfere with its ability to drain properly. Inspect the drain hose and drain pump for any visible
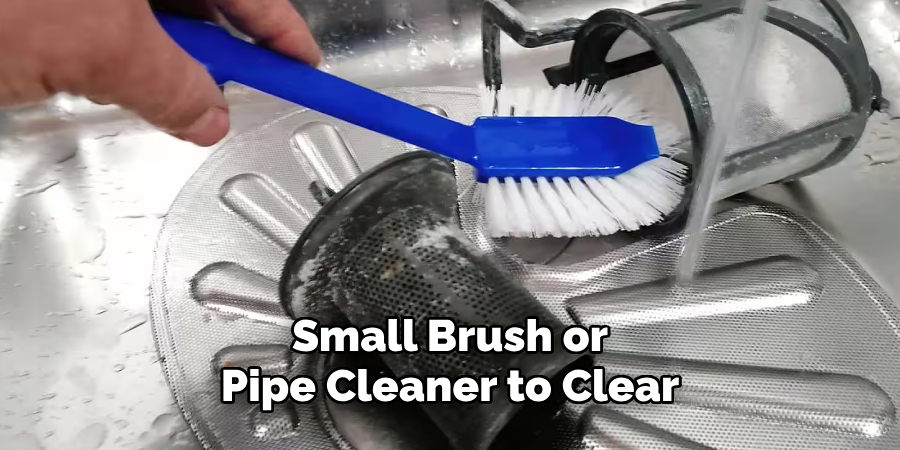
obstructions. If you see any debris, remove it carefully. You can also use a small brush or pipe cleaner to clear any hard-to-reach areas. Ensuring that the drain system is free from clogs will help prevent future drainage issues and keep your dishwasher running smoothly.
9. Install the New Filter
Once you have removed the old filter and cleaned the area, you can proceed with installing the new filter. First, ensure that the new filter is the correct size and model for your dishwasher. Most manufacturers recommend using OEM (original equipment manufacturer) filters for the best performance. Insert the new filter into the compartment, ensuring that it is properly aligned. If the filter is a twist-and-lock style, rotate it clockwise until it is secure. For filters that are held in place by screws, tighten the screws with a screwdriver to ensure the filter is securely fastened.
10. Reassemble the Dishwasher and Test It
After installing the new filter, you can begin reassembling the dishwasher. Start by replacing the lower spray arm, if you had removed it earlier. Slide the dish rack back into place, ensuring that it sits properly in the appliance. Once the dishwasher is reassembled, it is time to test the appliance. Turn on the water supply and power, and run a short cycle to ensure that the filter is properly installed and the dishwasher is functioning correctly. Listen for any unusual sounds, such as water draining improperly, and check the dishwasher for any leaks or issues.
Things to Consider When Replacing a Dishwasher Filter
When replacing your dishwasher filter, there are several factors to keep in mind to ensure a smooth process and optimal results. First, always refer to your dishwasher’s user manual for specific instructions and recommendations, as the design and mechanisms can vary widely between different models.

Using the correct type of filter compatible with your dishwasher is crucial for maintaining performance and avoiding potential damage. It’s also important to handle all parts, including the filter and spray arm, with care to prevent accidental breakage. Finally, consider performing regular maintenance on your dishwasher, such as cleaning the filter and drain system every few months, to prolong the appliance’s lifespan and ensure consistent cleaning results.
Conclusion
Removing an old dishwasher filter and replacing it with a new one is an important task for maintaining your dishwasher’s performance. By following these ten steps—turning off the power and water supply, locating the filter, removing it, cleaning the area, and installing the new filter—you can ensure your dishwasher continues to run efficiently and effectively. Regularly replacing the dishwasher filter will help improve cleaning performance, prevent clogs, and extend the lifespan of your appliance. Additionally, by inspecting and cleaning the filter area, you can address any underlying issues with the drain system and avoid more costly repairs down the road. So, there you have it – a quick and easy guide on how to remove old dishwasher filter.
Professional Focus
Angela Ervin, a former interior designer turned blogger, specializes in kitchen design and renovations. Through her website, she blends her passion for cooking with design expertise, sharing practical and creative ideas. Known for balancing functionality and beauty, Angela’s insightful content has made her a trusted voice in home design and lifestyle.
About the Author
Angela Ervin, an experienced interior designer and blogger, combines her passion for kitchen renovations with storytelling. Living in Petersburg with her family, she enjoys cooking and testing her projects firsthand. Known for her humor and relatable style, Angela shares creative, functional design insights through her content, making her a trusted voice in home design.
Education History
University: Virginia Commonwealth University
Degree: Bachelor of Fine Arts (BFA) in Interior Design
- Angela’s education at VCU focused on mastering core interior design principles, including spatial planning, color theory, materials selection, and sustainable design practices.
- She gained hands-on experience through studio projects and collaborative design exercises, which honed her ability to create functional and aesthetically pleasing environments.
- Her coursework also emphasized problem-solving and practical applications of design, preparing her for real-world projects like her self-directed kitchen renovations.
- The program’s strong foundation in both technical skills and creative expression shaped Angela’s ability to seamlessly integrate form and function in her work.