
Damaged or peeling laminate can make a countertop look worn and outdated, but repairing it is often simpler than replacing the entire surface. With the right tools and a little time, you can restore your countertop’s appearance and functionality without the need for professional help. This guide will walk you through the steps of how to repair countertop laminate, helping to bring new life to your kitchen or bathroom space.
Why Repairing Laminate Yourself
Repairing laminate countertops yourself can save you both time and money compared to hiring a professional or replacing the entire countertop. DIY repairs allow you to address specific problem areas without needing extensive tools or materials, making it a cost-effective solution. Additionally, taking on this project yourself gives you the flexibility to work at your own pace and customize the repair to your preferences. It’s also a rewarding experience to see your efforts restore the functionality and appearance of your countertop, adding years to its lifespan while transforming your space. With a bit of patience and effort, you can achieve professional-looking results on your own.
Tools and Materials Needed
Before starting your laminate countertop repair, gather the necessary tools and materials to ensure a smooth and efficient process. Here’s what you’ll need:
- Contact Cement or Laminate Adhesive – For reattaching loose or peeling laminate securely.
- Putty Knife or Plastic Scraper – To help lift loose laminate and apply adhesives.
- Hot Iron or Heat Gun – Useful for softening adhesive and loosening old laminate.
- Clamps or Heavy Objects – To hold reattached laminate firmly in place while the adhesive dries.
- Utility Knife – For trimming excess laminate or damaged areas cleanly.
- Sandpaper (Medium and Fine Grit) – To smooth edges and surface areas for better adhesion.
- Cleaning Supplies – Such as mild detergent, water, and a clean cloth to prepare the countertop surface.
- Replacement Laminate Sheet or Laminate Patch (if needed) – For repairing larger damaged sections.
Having these tools and materials on hand will make the repair process more manageable and help you achieve a polished result.
10 Steps on How to Repair Countertop Laminate
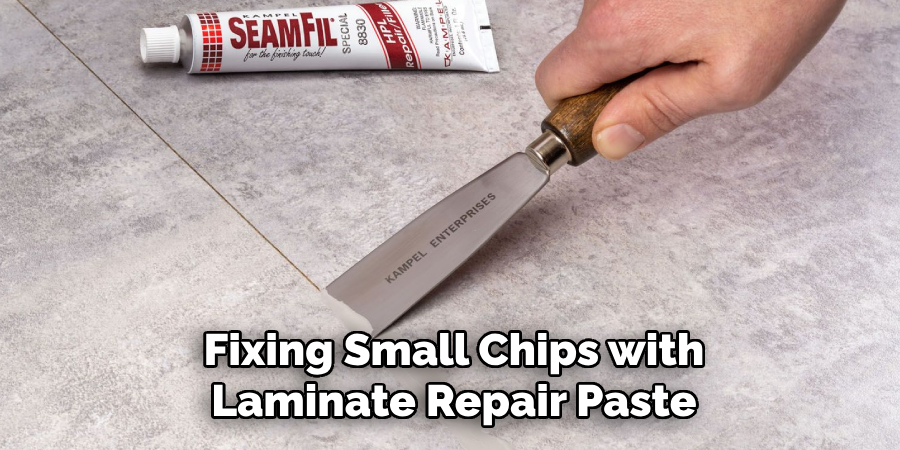
1. Fixing Small Chips with Laminate Repair Paste
Small chips in laminate countertops can be easily repaired using laminate repair paste or putty. Choose a color that closely matches your countertop and apply the paste into the chipped area using a putty knife. Smooth it out and let it dry according to the manufacturer’s instructions. Once dry, gently sand the area for a seamless finish and apply a protective sealant to blend the repair with the rest of the countertop.
2. Repairing Scratches with a Laminate Repair Marker
Scratches can diminish the appearance of a laminate countertop but are relatively easy to fix. Use a laminate repair marker or a colored wax crayon that matches your surface. Simply fill in the scratched area and wipe away any excess. If the scratches are deeper, applying multiple layers may be necessary. For additional protection, finish with a clear laminate sealant.
3. Fixing Peeling Edges with Contact Cement
Over time, laminate edges may start to peel away from the countertop base. To reattach them, carefully lift the peeling section and apply a thin layer of contact cement to both the laminate and the substrate. Press the laminate back into place firmly and use a roller or heavy object to secure it. Wipe away any excess adhesive and allow it to dry completely before use.
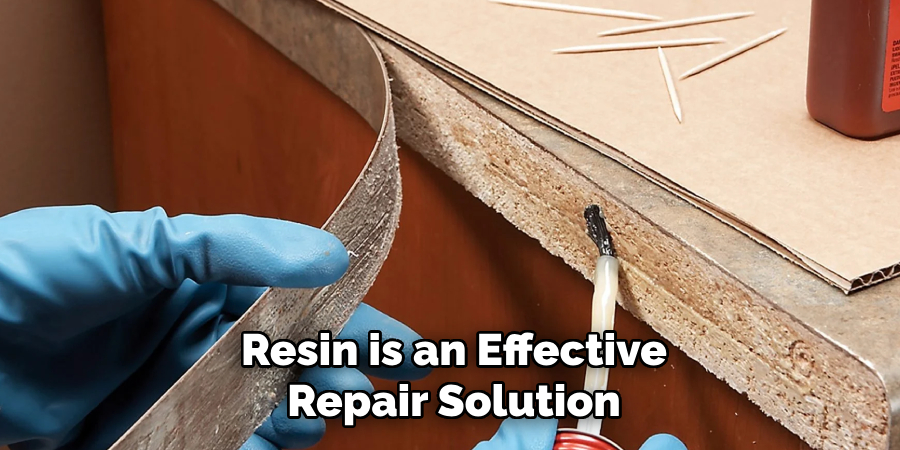
4. Patching Large Chips with Epoxy Resin
For larger chips or missing laminate sections, epoxy resin is an effective repair solution. Mix a two-part epoxy resin according to the package instructions and apply it to the damaged area using a putty knife. Smooth out the surface and let it cure for several hours. Once hardened, sand it lightly and apply paint or a laminate repair paste for color matching.
5. Filling Gaps with Color-Matched Caulk
Gaps or seams in laminate countertops can collect dirt and moisture, leading to further damage. Use a color-matched caulk to fill in these gaps. Apply a small bead of caulk along the seam and smooth it with a damp finger or caulking tool. Let it dry thoroughly before using the countertop. This method helps prevent water from seeping into the seams and causing further separation.
6. Replacing a Burned Laminate Section
Burn marks from hot pans or appliances can be unsightly and difficult to remove. To fix a burned section, cut out the damaged area with a utility knife. Obtain a matching laminate sheet and cut a replacement piece slightly larger than the hole. Apply contact cement to both the replacement piece and the countertop base, press the new piece into place, and smooth out any bubbles. Trim excess laminate and blend the edges with sandpaper.
7. Repairing Water-Damaged Laminate with Wood Filler
If water has seeped under the laminate, causing the particleboard substrate to swell, you’ll need to address the damage before reattaching the laminate. First, dry out the area thoroughly. Remove the swollen section and fill the void with wood filler. Allow it to dry completely, then sand it smooth before gluing the laminate back down with contact cement.
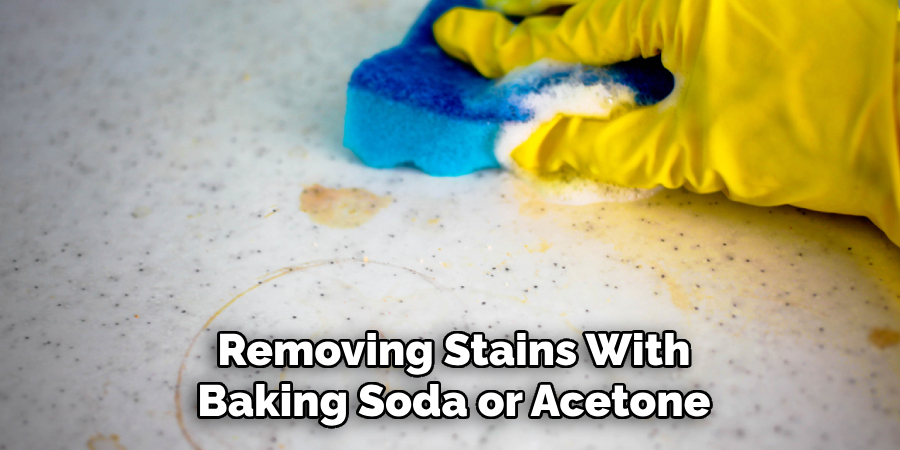
8. Removing Stains with Baking Soda or Acetone
Stains from coffee, wine, or other spills can be difficult to remove from laminate surfaces. To tackle stubborn stains, make a paste using baking soda and water, apply it to the stain, and let it sit for a few minutes before scrubbing gently with a soft cloth. For ink or dye stains, use a small amount of acetone (nail polish remover) on a cotton ball and rub gently. Be cautious with harsh chemicals, as they may dull the laminate finish.
9. Reinforcing Loose Seams with Heat and Pressure
Seams in laminate countertops may begin to lift over time. To fix this, apply gentle heat using a clothes iron on a low setting, placed over a cloth. The heat softens the adhesive, allowing you to press the laminate back into place. Use a roller or a heavy object to hold the laminate down until it cools and bonds again. If necessary, reapply contact cement before pressing the laminate down.
10. Applying a Fresh Laminate Layer for a Complete Refresh
If your laminate countertop has extensive damage, resurfacing it with a new laminate sheet may be the best option. Start by thoroughly cleaning and sanding the existing surface. Cut the new laminate sheet to size and apply contact cement to both the old countertop and the new laminate. Carefully press the new laminate into place, smoothing out air bubbles with a roller. Trim the edges and finish with a file for a professional look.
Troubleshooting Common Issues
Even with proper repair techniques, some challenges may arise during the process. Below are common issues you might encounter and tips on how to address them:
Air Bubbles Under Laminate
If you notice air bubbles forming under the laminate after reapplication, use a needle or pin to puncture the bubble and release the trapped air. Apply gentle heat with an iron over a cloth and press the area firmly with a roller to ensure the adhesive bonds completely.
Mismatched Color Repairs
If the repair paste, marker, or replacement laminate does not match perfectly, try blending colors by layering different shades or using a touch-up pen to refine the match. Testing the color on a scrap piece of laminate before applying it to your countertop can help avoid mismatches.
Peeling After Repair
Should the laminate peel again after being reattached, check if the contact cement or adhesive was applied evenly and allowed to set properly before pressing it in place. Reapply a fresh coat of adhesive and ensure sufficient drying time while using clamps or a heavy object for added pressure.
Visible Seams or Joints
If seams or joints remain noticeable after repair, use color-matched caulk or a laminate seam filler to blend them into the rest of the surface. Ensure the product is properly smoothed and dried for a seamless finish.

Stubborn Stains or Dull Spots
If stains persist or areas appear dull after cleaning, try reapplying a laminate polish or sealant to restore the surface’s shine. Always test any cleaning solution or polish in an inconspicuous area to prevent damage.
Addressing these common issues promptly will help maintain the appearance and durability of your laminate countertop, keeping it in excellent condition for years to come.
Conclusion
Maintaining and repairing laminate countertops is a cost-effective way to keep your kitchen or workspace looking pristine and functional. By addressing damage such as chips, burns, stains, or loose seams promptly, you can extend the lifespan of your countertops and avoid the need for costly replacements. With the right tools, techniques, and a little patience, even heavily damaged countertops can be revitalized to look nearly new. Regular care and timely repairs ensure your laminate surfaces remain durable, aesthetically pleasing, and a reliable part of your home for years to come. Now that you know how to repair countertop laminate, try it yourself today and feel good about completing such a big DIY job!.
Professional Focus
Angela Ervin, a former interior designer turned blogger, specializes in kitchen design and renovations. Through her website, she blends her passion for cooking with design expertise, sharing practical and creative ideas. Known for balancing functionality and beauty, Angela’s insightful content has made her a trusted voice in home design and lifestyle.
About the Author
Angela Ervin, an experienced interior designer and blogger, combines her passion for kitchen renovations with storytelling. Living in Petersburg with her family, she enjoys cooking and testing her projects firsthand. Known for her humor and relatable style, Angela shares creative, functional design insights through her content, making her a trusted voice in home design.
Education History
University: Virginia Commonwealth University
Degree: Bachelor of Fine Arts (BFA) in Interior Design
- Angela’s education at VCU focused on mastering core interior design principles, including spatial planning, color theory, materials selection, and sustainable design practices.
- She gained hands-on experience through studio projects and collaborative design exercises, which honed her ability to create functional and aesthetically pleasing environments.
- Her coursework also emphasized problem-solving and practical applications of design, preparing her for real-world projects like her self-directed kitchen renovations.
- The program’s strong foundation in both technical skills and creative expression shaped Angela’s ability to seamlessly integrate form and function in her work.