
Replacing a dishwasher air gap is a straightforward process that helps ensure your dishwasher operates efficiently and prevents dirty water from backing up into the appliance. The air gap acts as a safety device, maintaining proper water flow and protecting your home’s plumbing system.
This guide on how to replace dishwasher air gap will walk you through the steps to replace a dishwasher air gap, saving time and avoiding costly professional repairs.
Why Replace a Dishwasher Air Gap?
The dishwasher air gap operates by creating an opening between the drain line of your dishwasher and the sink. This allows air to enter the dishwasher’s drain hose, preventing any backflow of dirty water into your dishwasher. Over time, the air gap can become clogged with debris or malfunction, causing issues such as slow drainage or foul odors.
Replacing the air gap can help prevent these problems and ensure your dishwasher runs smoothly. Additionally, some local building codes require regular replacement of the air gap to maintain proper plumbing standards.
Tools and Materials Needed
Before starting the replacement process, make sure you have the necessary tools and materials on hand:
Screwdriver:
You will need a Phillips or flathead screwdriver to remove the old air gap and install the new one.
New Dishwasher Air Gap:
Purchase a new air gap that is compatible with your specific dishwasher model. This can usually be found at home improvement stores or online.
Plumber’s Putty:
Plumber’s putty is a soft, moldable substance used to create watertight seals around plumbing fixtures. You will need this to secure the new air gap.
8 Step-by-step Guides on How to Replace Dishwasher Air Gap
Step 1: Shut Off Water Supply
Before beginning the replacement process, ensure that the water supply to the dishwasher is turned off. Locate the water supply valve, which is typically found under the sink, and turn it clockwise to close it. Shutting off the water supply will prevent any accidental leaks or spills during the replacement procedure and make the process safer.

It is also a good idea to unplug the dishwasher from the electrical outlet to avoid any potential shocks.
Step 2: Remove the Old Air Gap
Locate the old air gap on your sink or countertop, typically near the faucet. Gently twist the air gap cap counterclockwise to remove it. Underneath, you will see the body of the air gap secured by a nut. Use your hands or a wrench to loosen and remove the nut that holds the air gap in place.
Once the nut is removed, carefully pull the old air gap out from the hole in the sink or countertop. Be cautious and check if any debris or buildup is present around the opening, and clean it thoroughly to ensure a proper fit for the new air gap.
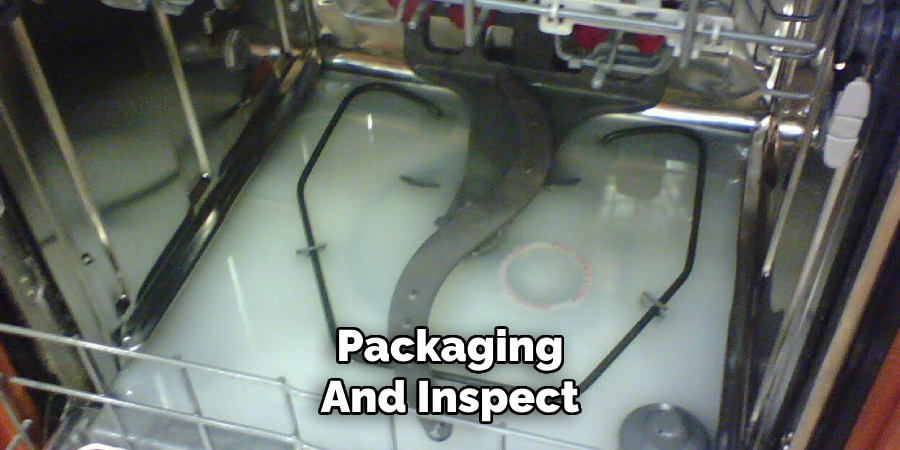
Step 3: Prepare New Air Gap
Take the new dishwasher air gap out of its packaging and inspect it to ensure that all components are included and undamaged. Apply a small amount of plumber’s putty around the base of the air gap, where it will sit on the sink or countertop. This will create a watertight seal and prevent leaks. Make sure the putty is evenly distributed for the best results.
Check the manufacturer’s instructions for any additional preparation steps specific to your air gap model. Ensuring the new air gap is ready will help streamline the installation process and prevent issues during the next steps.
Step 4: Install New Air Gap
Place the new air gap into the hole on your sink or countertop. Make sure it sits securely and evenly, with the body of the air gap facing towards you. Apply gentle pressure to press it down into the plumber’s putty.
Once in place, use a wrench or your hands to tighten the nut that holds the air gap in place. Do not overtighten as this can cause damage to the air gap or sink.
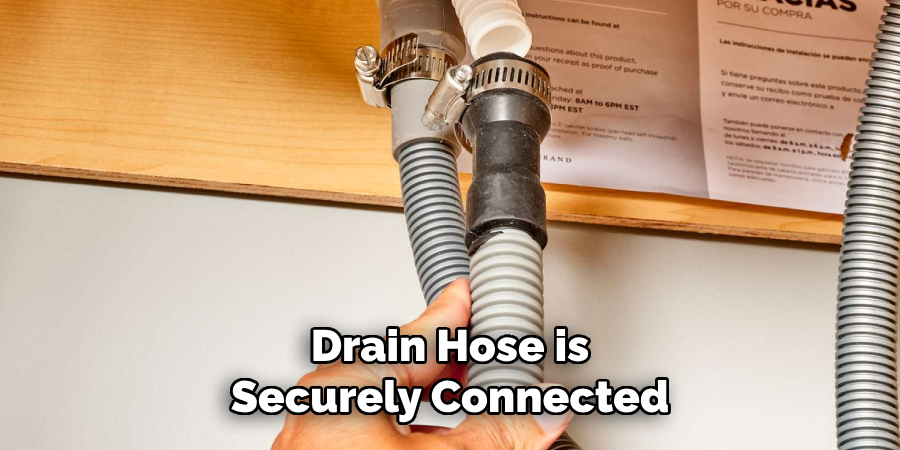
Step 5: Connect Drain Hose
Next, locate the dishwasher’s drain hose and connect it to the top of the new air gap. This will create an opening for air to enter, preventing any backflow of water into the dishwasher. Secure the hose in place with a clamp or zip tie to ensure it does not disconnect during use.
You can also use this opportunity to check the condition of the drain hose and replace it if needed.
Step 6: Reattach the Air Gap Cap
Once the drain hose is securely connected, take the air gap cap and align it with the top of the new air gap. Gently twist the cap clockwise to secure it in place. Make sure the cap is tightened enough to stay firmly attached, but avoid overtightening, as this could damage the cap or the air gap itself.
After reattaching the cap, double-check that everything is properly aligned and secured. This step completes the visible portion of the air gap replacement and helps ensure that the unit functions correctly.
Step 7: Turn the Water Supply Back On
Once the new air gap is installed and secure, it’s time to turn the water supply back on. Locate the water supply valve under your sink and turn it counterclockwise to open it. Run a quick test of your dishwasher to ensure that there are no leaks or issues with drainage.
If you notice any problems, make sure all connections are secure and that there is no debris blocking the drain hose. If issues persist, consult a professional for assistance.
Step 8: Plug Dishwasher Back In
If everything appears to be functioning correctly, plug your dishwasher back into its electrical outlet. You can now run a full cycle to test the new air gap and ensure it is working correctly. If you encounter any problems, refer to the manufacturer’s instructions or seek professional help.
Following these steps on how to replace dishwasher air gap to replace your dishwasher air gap will help ensure the proper functioning of your appliance and maintain a safe, hygienic kitchen environment. Regular maintenance and replacement of essential components such as the air gap, can also prolong the lifespan of your dishwasher and prevent costly repairs in the future.
Additional Tips for Maintaining Your Dishwasher
- Run hot water in your sink before starting the dishwasher to ensure that your dishwasher uses hot water from the beginning.
- Scrape excess food off dishes before loading them into the dishwasher to prevent clogs and buildup in the drain hose.
- Use a dishwasher cleaner once a month to remove any mineral deposits or residue that may affect the performance of your appliance.
- Regularly check and clean the filter in your dishwasher to improve its efficiency and prevent odors.
- Avoid overcrowding your dishwasher, as this can lead to poor cleaning results and potential damage to the appliance.
- If you notice any unusual noises or issues with your dishwasher, address them promptly to avoid further damage or safety hazards. With proper maintenance and care, your dishwasher can continue to efficiently clean your dishes and make everyday life easier. So don’t forget to include it in your regular household maintenance routine!
Frequently Asked Questions
Q1: Can I Install an Air Gap Myself Without Professional Help?
A: Yes, with the right tools and instructions, it is possible to replace your dishwasher air gap yourself. However, if you are unsure or uncomfortable with the process, it is always best to seek professional help to ensure a safe and proper installation.
Q2: How Often Should I Replace My Dishwasher Air Gap?
A: It is recommended to replace your dishwasher air gap every 5-10 years, depending on usage and maintenance. Regularly checking for any signs of wear or damage can also help determine when replacement is necessary.
Q3: Why Do I Need an Air Gap For My Dishwasher?
A: An air gap serves as a preventative measure against the potential backflow of dirty water into your dishwasher. It allows air to

enter the drain hose and create a barrier between your dishwasher and the sewer system, helping to maintain a clean and hygienic kitchen environment.
Q4: Can I Replace My Air Gap With a High Loop or Dishwasher Air Gap Alternative?
A: While it is possible to use a high loop or alternative method, an air gap is the most recommended solution for preventing backflow and ensuring proper drainage. Check with your local plumbing codes to determine if these alternatives are acceptable in your area. Remember to always follow proper safety precautions when performing any maintenance or repair tasks on appliances. And don’t hesitate to seek professional help if needed. Your dishwasher will thank you for it!
Conclusion
Maintaining your dishwasher and its components, such as the air gap, is essential for ensuring the appliance runs safely and efficiently. By following the outlined steps on how to replace dishwasher air gap, you can confidently replace your dishwasher air gap and prevent potential issues like backflow and drainage problems. Regular care, including cleaning, periodic inspections, and timely replacements, will not only enhance your dishwasher’s performance but also prolong its lifespan.
A well-maintained dishwasher contributes to a cleaner, more hygienic kitchen, making your daily routines simpler and more convenient. With these tips and proper upkeep, you can enjoy the reliable performance of your dishwasher for years to come.
Professional Focus
Angela Ervin, a former interior designer turned blogger, specializes in kitchen design and renovations. Through her website, she blends her passion for cooking with design expertise, sharing practical and creative ideas. Known for balancing functionality and beauty, Angela’s insightful content has made her a trusted voice in home design and lifestyle.
About the Author
Angela Ervin, an experienced interior designer and blogger, combines her passion for kitchen renovations with storytelling. Living in Petersburg with her family, she enjoys cooking and testing her projects firsthand. Known for her humor and relatable style, Angela shares creative, functional design insights through her content, making her a trusted voice in home design.
Education History
University: Virginia Commonwealth University
Degree: Bachelor of Fine Arts (BFA) in Interior Design
- Angela’s education at VCU focused on mastering core interior design principles, including spatial planning, color theory, materials selection, and sustainable design practices.
- She gained hands-on experience through studio projects and collaborative design exercises, which honed her ability to create functional and aesthetically pleasing environments.
- Her coursework also emphasized problem-solving and practical applications of design, preparing her for real-world projects like her self-directed kitchen renovations.
- The program’s strong foundation in both technical skills and creative expression shaped Angela’s ability to seamlessly integrate form and function in her work.