
When your oven door isn’t closing properly or feels loose, it may be due to a misaligned or faulty hinge. Resetting the oven door hinge is a simple process that can restore functionality and ensure your oven operates efficiently.
This guide on how to reset oven door hinge will walk you through the steps to safely and effectively reset the hinge, saving you time and money on repairs.
Why Reset the Oven Door Hinge?
Before we dive into the steps for resetting your oven door hinge, it’s important to understand why this may be necessary. Over time, constant use of the oven can cause wear and tear on the hinges, causing them to become misaligned or loose. This can result in an uneven or unreliable seal of the oven door, which can impact its efficiency and performance.
In addition, resetting the oven door hinge can also prevent potential safety hazards. A loose or misaligned hinge can cause the heavy oven door to fall unexpectedly, posing a risk of injury to anyone nearby. It’s best to address any issues with your oven door hinge as soon as you notice them in order to prevent any accidents.
Tools Needed
Before you begin the process of resetting your oven door hinge, make sure you have the following tools on hand:
- Screwdriver (Phillips or Flathead Depending on Your Oven)
- Pliers
- Towel or Cloth for Protecting the Oven’s Surface
- Optional: Lubricant Spray for Easing Movement of the Hinge
9 Steps on How to Reset Oven Door Hinge
Step 1: Prepare Your Oven
Before resetting the oven door hinge, ensure that your oven is completely turned off and has cooled down to avoid any risk of burns. Disconnect the oven from the power supply by unplugging it or switching off the circuit breaker to ensure your safety during the process.
Open the oven door fully and place a towel or cloth over the surface where the door makes contact with the oven body to protect it from scratches or damage while you work. Proper preparation will make the process smoother and safer.
Step 2: Locate the Hinge
With the oven door fully open, carefully inspect both sides of the door to locate the hinges. Typically, the hinges are situated where the bottom edge of the door connects to the oven body.
Take note of any covers or screws that may be securing the hinge in place, as these may need to be removed later. Familiarizing yourself with the precise location and condition of the hinges will ensure a smoother reset process.
Step 3: Remove Oven Door
To reset the oven door hinge, you will first need to remove the door from the oven. Begin by identifying the locking mechanism on each hinge, which may require releasing a hinge lever or pin depending on your oven model. Carefully lift or slide the locking mechanism to disengage the hinge from the oven body.
Once the hinges are unlocked, gently close the oven door to an angle where it is partially open, typically around 45 degrees. At this angle, you should be able to lift the door upward and remove it from the oven. Use caution during this step, as oven doors can be heavy. Set the door aside on a flat, padded surface to prevent any damage while you continue the process.
Step 4: Inspect the Hinges
With the oven door safely removed and placed on a flat, padded surface, take a close look at the hinges to identify any visible signs of damage, wear, or misalignment. Check for bent metal, loose screws, or accumulated debris that may be affecting the hinge’s functionality.
If you notice any dirt or grime, gently clean the hinges using a cloth or a small brush to remove obstructions. Inspect the hinge slots on the oven body as well to ensure they are free of damage or debris. If you find any damaged parts, you may need to replace them rather than resetting the hinge. This thorough inspection will help ensure the success of the reset process.
Step 5: Loosen Screws or Covers (If Necessary)
Some oven models may have screws or covers securing the hinges in place. If this is the case, use the appropriate screwdriver to carefully loosen and remove these components. Keep track of any screws or small parts by placing them in a safe location to avoid losing them.
Removing these covers or screws will give you better access to the hinge mechanism, making it easier to adjust or reset the hinge. Be sure to handle all components gently to prevent damage to the oven door or hinge assembly.
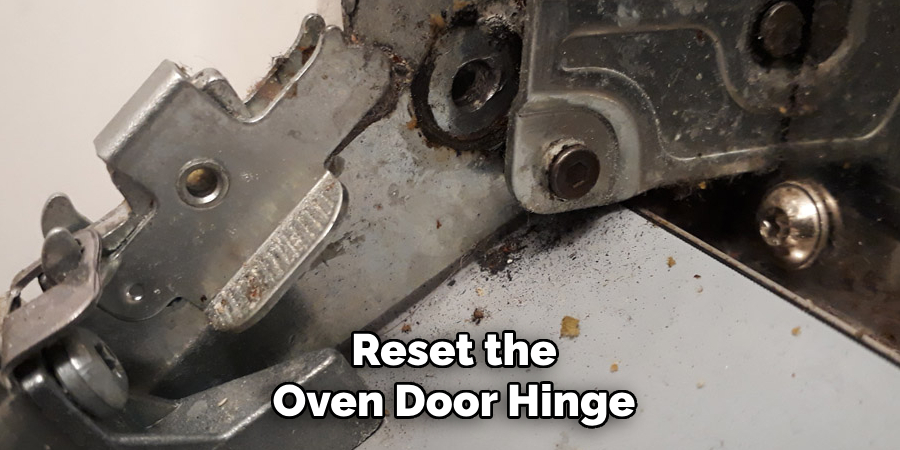
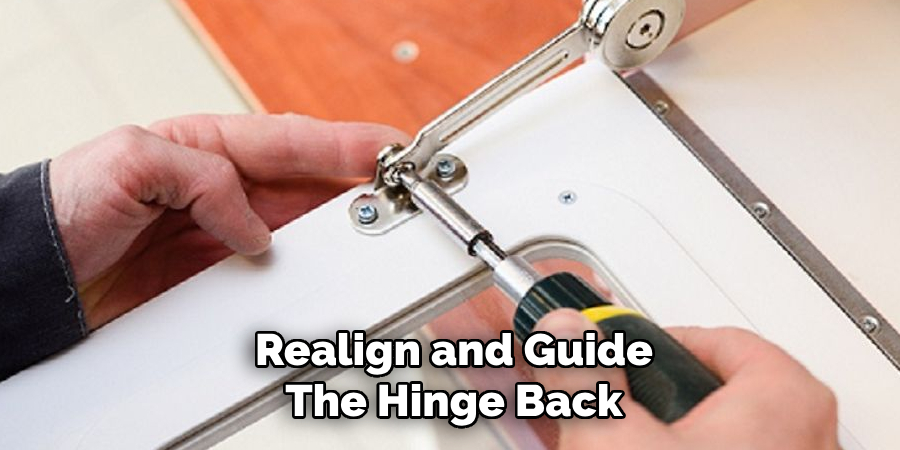
Step 6: Reset the Hinges
To reset the hinges, you will need to close them until they are fully engaged. You can do this manually by using your hands or pliers to realign and guide the hinge back into its original position. If the hinge is too stiff, you can use a lubricant spray to make it easier to move. Ensure that both hinges are aligned in the same position before proceeding.
Once the hinges are properly reset, use pliers to tighten any screws or covers that were removed earlier. This will secure the hinges in place and prevent them from shifting out of alignment again.
Step 7: Reattach Oven Door
Take your oven door and align it back onto the hinges. Once you have the door in position, gently lower it onto the hinge slots on the oven body. Make sure that both hinges are securely engaged with the locking mechanism to prevent the door from falling.
With one hand holding the door securely, use your other hand to lock each hinge back into place by sliding or pushing the locking mechanism into its original position. This will secure both hinges and keep them in place while you work on reattaching any covers or screws that were previously removed.
Step 8: Test Door Movement
Once you have reattached all necessary components, carefully open and close the oven door to ensure it is moving smoothly and evenly. If you notice any stiffness or misalignment, you may need to readjust the hinges and repeat the process.
If everything seems to be in working order, close the oven door completely and lock it into place. Reconnect your oven’s power supply and turn it on to test its functionality. If the door opens and closes smoothly without any issues, then you have successfully reset your oven door hinge.
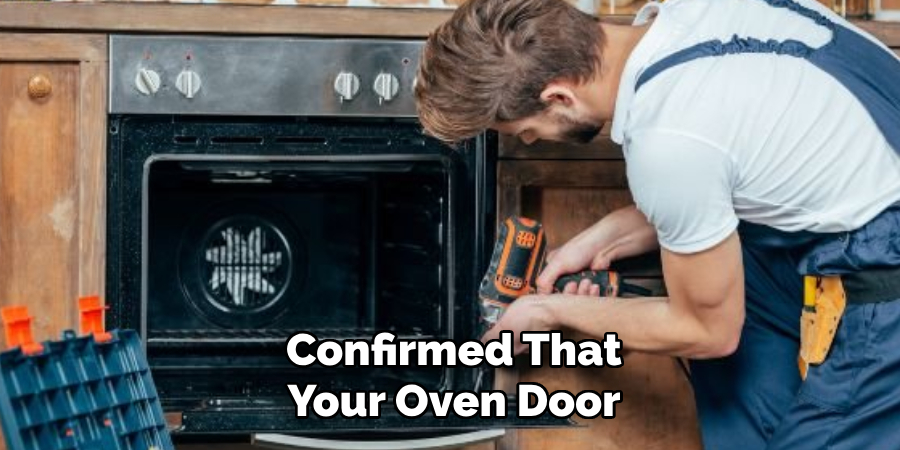
Step 9: Clean Up
Once you have confirmed that your oven door is properly aligned and functioning correctly, take a moment to clean up any debris or tools used during the process. Wipe down the exterior of the oven as well as the inside of the door to remove any grease or grime that may have accumulated.
Finally, dispose of any trash or used materials, and return your oven to its regular use. Remember to always take proper precautions when working with any electrical appliance and seek professional help if you are unsure about performing the reset process yourself.
Following these steps on how to reset oven door hinge will help you safely and effectively reset your oven door hinge, ensuring the smooth operation of your appliance.
Troubleshooting Tips
- If your oven door is still not closing properly after resetting the hinges, double-check for any debris or obstructions that may be preventing it from closing fully.
- Consider checking and adjusting the level of your oven to ensure it is sitting evenly on all four corners. Uneven floors can cause doors to shift out of alignment over time.
- If you are uncomfortable working with electrical appliances, or if you encounter any damaged parts during the process, seek professional help to avoid injury or further damage to your appliance.
- Regularly cleaning and maintaining your oven door and hinges can prevent future issues with alignment and functionality.
- If you are unsure about how to reset the hinges on a specific oven model, refer to the manufacturer’s instructions or contact their customer service for assistance.
- If your oven is still under warranty, it may be best to seek professional help from the manufacturer rather than attempting to reset the hinges yourself.
- In some cases, a loose or damaged door gasket may cause issues with the oven door closing properly. If you suspect this to be the case, check and replace the gasket if necessary.
- Always prioritize safety when working with any electrical appliance. Make sure to disconnect it from power before attempting any repairs or maintenance. Remember to use caution and follow proper safety guidelines throughout the entire process.
Frequently Asked Questions
Q: What if My Oven Door Doesn’t Open at All?
A: If your oven door is completely stuck and won’t open, it may be due to a faulty latch or lock. In this case, you may need to call a professional technician to inspect and repair the issue.
Q: Can I Just Adjust the Hinges Instead of Resetting Them?
A: In some cases, minor adjustments may be all that is needed to fix a misaligned oven door. Try loosening and repositioning the hinges before attempting to reset them completely.
Q: How Often Should I Check and Reset My Oven Door Hinges?
A: It is recommended to check your oven door hinges at least once a year for any signs of damage or misalignment. However, if you notice issues with your oven door opening or closing smoothly, it may be necessary to reset the hinges more frequently. As always, refer to your oven’s user manual for specific maintenance recommendations. Keeping your oven door hinges in good condition will ensure the safe and efficient use of your appliance.
Conclusion
Resetting your oven door hinge is a simple process that can save you time and money by avoiding unnecessary repairs or replacements. With proper preparation, inspection, and realignment, you can ensure that your oven door will continue to function smoothly for years to come.
Remember to always handle all equipment and components with caution, and seek professional help if you encounter any difficulties during the reset process. By following these steps on how to reset oven door hinge, you can keep your oven in top shape and avoid any potential issues with its door hinge. Happy cooking!
Professional Focus
Angela Ervin, a former interior designer turned blogger, specializes in kitchen design and renovations. Through her website, she blends her passion for cooking with design expertise, sharing practical and creative ideas. Known for balancing functionality and beauty, Angela’s insightful content has made her a trusted voice in home design and lifestyle.
About the Author
Angela Ervin, an experienced interior designer and blogger, combines her passion for kitchen renovations with storytelling. Living in Petersburg with her family, she enjoys cooking and testing her projects firsthand. Known for her humor and relatable style, Angela shares creative, functional design insights through her content, making her a trusted voice in home design.
Education History
University: Virginia Commonwealth University
Degree: Bachelor of Fine Arts (BFA) in Interior Design
- Angela’s education at VCU focused on mastering core interior design principles, including spatial planning, color theory, materials selection, and sustainable design practices.
- She gained hands-on experience through studio projects and collaborative design exercises, which honed her ability to create functional and aesthetically pleasing environments.
- Her coursework also emphasized problem-solving and practical applications of design, preparing her for real-world projects like her self-directed kitchen renovations.
- The program’s strong foundation in both technical skills and creative expression shaped Angela’s ability to seamlessly integrate form and function in her work.