
Sanding a concrete countertop is essential for achieving a smooth, polished, professional finish. This process involves removing rough spots and imperfections, evening out the surface, and preparing it for sealing or further finishing. A well-sanded countertop looks beautiful and enhances its durability, making it more resistant to wear and tear over time.
Whether you are working on a newly poured countertop or refreshing an older one, understanding how to sand a concrete countertop is crucial to achieving the desired result.
This article will provide a comprehensive step-by-step guide on how to sand a concrete countertop, covering the required tools, effective techniques, and important safety precautions to ensure the best outcome. Whether you’re a DIY enthusiast or a professional, this guide will equip you with everything you need to know to complete the task successfully.
Tools and Materials Needed
Before starting the sanding process, assembling the right tools and materials is essential to achieve a smooth and professional finish. Here are the items you’ll need:
Essential Tools
- Orbital Sander Or Wet Polisher: These are the primary tools for sanding and polishing large, flat surfaces efficiently.
- Diamond Sanding Pads: Available in grit levels ranging from coarse (50) to fine (800 or higher), these pads are designed for concrete surfaces. They allow a gradual refinement of the countertop’s finish.
- Hand Sanding Block: Perfect for reaching edges, corners, and other tricky spots that a machine cannot easily handle.
Materials
- Water: Required for wet sanding to minimize dust and keep the surface cool.
- Concrete sealer: Used at the end of the process to protect and enhance the surface.
- Microfiber Cloths Or Rags: Essential for cleaning the surface between sanding stages and during the sealing process.
Protective Gear
- Safety Goggles: To protect your eyes from dust, debris, or splashes from wet sanding.
- Gloves: To protect your hands during the process.
- Dust Mask: Especially important if you are dry sanding to prevent inhaling harmful particles.
Having these tools and materials readily available will ensure a more efficient and safe sanding process.
Choosing Between Wet and Dry Sanding
Wet Sanding

Wet sanding is an effective method that significantly reduces the amount of dust created by the sanding process. This technique involves using water as a lubricant, which not only keeps the surface cool but also helps extend the life of the sanding pads. The result is a smoother and more refined finish, making it a preferred choice for finer, more detailed work. To perform wet sanding, a wet polisher or sandpaper suitable for wet use and a constant and adequate water supply are required.
Dry Sanding
On the other hand, dry sanding generates more dust, but it is a highly convenient option as it can be done with a standard orbital sander. Since it does not require water, dry sanding can be quicker to set up and perform in certain situations. However, proper dust management is essential—working in a well-ventilated area or using dust extraction tools to minimize health risks is recommended.
When to Use Each Method
When deciding between wet and dry sanding, consider the task at hand. Wet sanding is ideal for early stages using coarse grits, as it minimizes dust and ensures smoother results. Conversely, dry sanding is better suited for final polishing stages with finer grits for convenience and precision.
Preparing the Concrete Countertop
Proper preparation is key to achieving a smooth and professional finish when sanding a concrete countertop. Following these steps will ensure the surface is ready for sanding while minimizing potential issues during the process.
Step 1: Cleaning the Surface
Begin by thoroughly cleaning the countertop to remove any debris, dust, or stains. Use a mild soap and water solution with a soft sponge or cloth to avoid damaging the surface. Rinse the countertop with clean water and wipe it dry. Allow it to air-dry completely before proceeding to the next step. Sanding a wet surface can lead to uneven results and potential damage.
Step 2: Inspecting for Cracks or Imperfections

Once the surface is clean and dry, scrutinize it for cracks, small holes, or surface imperfections. Use a concrete patch or filler to repair these areas, ensuring they are level with the main surface. After applying the repairs, allow sufficient time for everything to dry fully, as attempting to sand over wet or improperly cured patches can disrupt your sanding process and result in an uneven finish.
Step 3: Protecting Surrounding Areas
Cover any nearby appliances, cabinets, or walls with plastic sheets or painter’s tape to prevent dust and debris from spreading. This will safeguard these surfaces from potential staining or damage. Additionally, ensure the area is well ventilated, especially if you plan to use dry sanding methods, to maintain a safe working environment. Proper protection and preparation ensure a streamlined sanding process with minimal disruptions.
How to Sand a Concrete Countertop: Step-by-Step Guide
Step 1: Start with Coarse Grit (50-100 Grit)
Begin by attaching a coarse diamond pad to your sander, typically 50-100 grit. This step is essential for removing rough patches, uneven textures, or any residual imperfections on the surface. Start sanding methodically, keeping the sander moving steadily to avoid creating low spots or gouges. Consistency during this phase forms a solid foundation for smoother results in the subsequent steps.
Step 2: Move to Medium Grit (200-400 Grit)
Switch to a medium grit pad (200-400 grit) to refine the surface further. At this stage, the goal is to achieve an even, more precise finish by smoothing out scratches or marks left by the coarse grit. If you’re adopting the wet sanding technique, spray a light mist of water onto the surface as you sand. The water helps reduce dust and acts as a lubricant, enhancing the effectiveness of the sanding process. Remember to work in small sections and monitor your progress consistently.
Step 3: Finish with Fine Grit (800+ Grit)
Use a fine grit pad (800 grit or higher) for the final pass to achieve a polished and smooth finish. This step demands careful attention to avoid over-sanding or applying excessive pressure, which might damage the surface. Maintain even, light movements across the area to ensure a uniform appearance. The fine grit enhances the surface’s shine and prepares it for sealing or further treatment.
Hand Sanding for Edges and Corners
Hand sanding is the most effective method for achieving a professional and clean finish when working on edges and corners. Using a hand sanding block, attach fine-grit sandpaper (such as 800 grit or higher) to smooth these tricky areas carefully. The sanding block provides better control and precision, especially when power tools are too aggressive or difficult to maneuver.
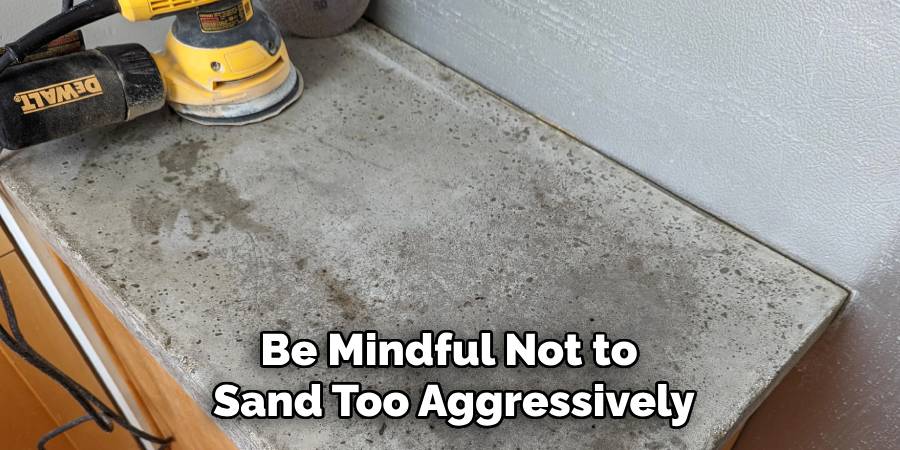
Sand in gentle circular motions, ensuring that the edges blend seamlessly with the rest of the surface. This technique helps maintain the integrity of the material while creating a consistent texture across the entire surface. Be mindful not to sand too aggressively, as this can lead to uneven results or damage along the edges.
After sanding, inspect the area closely for any uneven spots or rough patches. If such areas are detected, re-sand them lightly until they match the surrounding surface. Remember, patience and consistency are key in this step to ensure your project’s final finish is smooth and flawless. Properly hand-sanding the edges and corners will give your work a professional touch, setting the stage for sealing or additional treatment.
Sealing and Finishing the Countertop
Applying a Concrete Sealer
Choose a high-quality sealer to enhance your concrete countertop’s durability and water resistance. A penetrating sealer protects the surface from moisture, stains, and wear while maintaining a natural look. Alternatively, a topical sealer adds a protective layer and can be used for a glossy finish. Apply the sealer evenly using a clean microfiber cloth or roller, working in smooth, consistent motions to avoid streaks. Be sure to follow the manufacturer’s instructions for application and coverage.
Buffing for Extra Shine
Consider buffing the sealed countertop surface with a polishing pad to achieve a high-gloss finish. This step enhances the countertop’s aesthetic appeal and provides an additional layer of protection. Use a slow and steady buffing motion to ensure a uniform shine across the entire surface.
Allowing Proper Curing Time
Patience is essential when letting the sealer cure. Allow sufficient time for the countertop to dry and cure entirely as per the sealer’s instructions, usually between 24 to 72 hours. Avoid placing heavy items or exposing the surface to water during this period. Proper curing ensures a durable and long-lasting finish, ready for years of use.
Maintenance Tips After Sanding
Cleaning Routine
Keeping your countertop clean is essential for maintaining its appearance and durability. Use a mild soap and water solution for regular cleaning, and avoid harsh chemicals or abrasive cleaners that could damage the surface or break down the sealer. A soft, non-abrasive cloth or sponge works best for wiping down the surface.
Reapplying Sealer Periodically
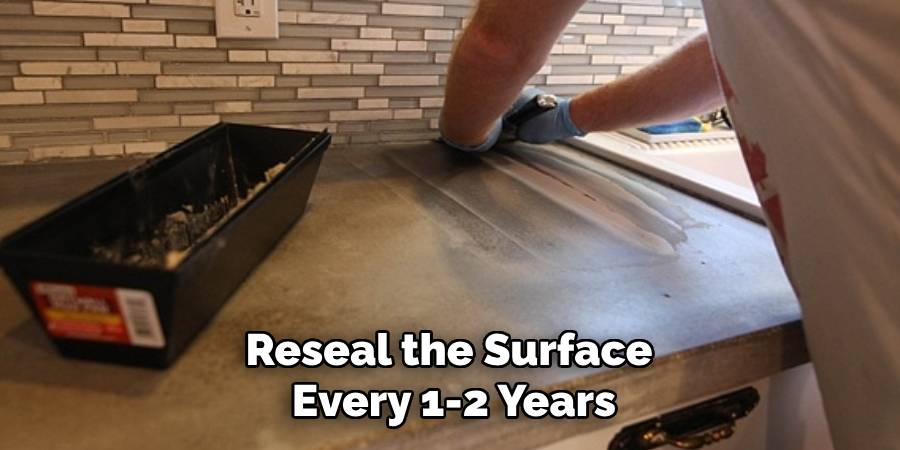
To ensure your countertop remains protected and retains its glossy finish, it’s recommended to reseal the surface every 1-2 years. Over time, normal wear and tear can diminish the effectiveness of the original sealer, so periodic resealing will help maintain its integrity. Follow the manufacturer’s instructions for reapplication to achieve the best results.
Avoiding Scratches and Damage
Prevent damage by always using cutting boards when preparing food and avoiding direct contact between sharp objects and the countertop. Additionally, refrain from dragging heavy or sharp items across the surface to reduce the risk of scratching or chipping. With these preventative measures, you can enjoy a pristine countertop for many years.
Conclusion
Sanding is a crucial step in achieving a smooth, durable countertop surface, and understanding how to sand a concrete countertop ensures a professional-quality finish. Whether you choose the wet or dry sanding method, each has its advantages and can be selected based on your specific needs and tools available. Proper sealing after sanding is essential to protect the surface and enhance its longevity, preserving the countertop’s appearance and functionality over time. Finally, take your time during each step of the process—precision and patience are key to creating a stunning, long-lasting countertop you’ll be proud of.
Professional Focus
Angela Ervin, a former interior designer turned blogger, specializes in kitchen design and renovations. Through her website, she blends her passion for cooking with design expertise, sharing practical and creative ideas. Known for balancing functionality and beauty, Angela’s insightful content has made her a trusted voice in home design and lifestyle.
About the Author
Angela Ervin, an experienced interior designer and blogger, combines her passion for kitchen renovations with storytelling. Living in Petersburg with her family, she enjoys cooking and testing her projects firsthand. Known for her humor and relatable style, Angela shares creative, functional design insights through her content, making her a trusted voice in home design.
Education History
University: Virginia Commonwealth University
Degree: Bachelor of Fine Arts (BFA) in Interior Design
- Angela’s education at VCU focused on mastering core interior design principles, including spatial planning, color theory, materials selection, and sustainable design practices.
- She gained hands-on experience through studio projects and collaborative design exercises, which honed her ability to create functional and aesthetically pleasing environments.
- Her coursework also emphasized problem-solving and practical applications of design, preparing her for real-world projects like her self-directed kitchen renovations.
- The program’s strong foundation in both technical skills and creative expression shaped Angela’s ability to seamlessly integrate form and function in her work.