
Setting the correct time on an Electrolux oven is essential for ensuring accurate cooking results and properly using its timer-based features. Whether you’re baking a delicious cake or preparing a meal with precise timing, having the time correctly set allows the timer and delay-start functions to work seamlessly.
For some Electrolux oven models, setting the time is a prerequisite before the oven can operate, making it an important initial step after setup or a power outage. This article provides a comprehensive step-by-step guide on how to set the time on Electrolux oven models, covering both manual and digital configurations. Following these instructions will ensure your oven operates efficiently while keeping your cooking schedule organized and stress-free.
Understanding Electrolux Oven Time Settings
Electrolux ovens are designed with user-friendly time-setting features, which vary depending on the type of oven model you own. Broadly, Electrolux ovens can be categorized into two main types based on their time-setting mechanisms:
- Analog (knob-based) Models: These ovens utilize dials to set the time. Adjusting the clock typically involves turning a dedicated knob until the desired time is displayed. This straightforward approach is common in older or more basic models.
- Digital Models: These ovens feature touch controls or buttons for time adjustment. The process often includes pressing a combination of buttons, such as a “Clock” or “Timer” button, followed by using “+” and “-” keys or a touchscreen interface to set the correct time. Digital models are more advanced and offer precise control.
There are specific scenarios when you may need to reset the time on your Electrolux oven. For example, the clock may reset after a power outage and require adjustment before the oven can fully function. Similarly, changes for daylight saving time or after first-time oven installation necessitate resetting the clock. Understanding the time-setting process is essential to maintain usability and accuracy, ensuring your Electrolux oven continues to perform optimally.
How to Set the Time on Electrolux Oven: On a Digital Electrolux Oven
Setting the time on a digital Electrolux oven is simple and ensures your appliance operates effectively. Follow the step-by-step guide below to adjust the clock on your oven:
Step 1: Ensure the Oven Is Plugged in And Powered On
Before beginning, make sure your oven is connected to a power source and switched on. A functional power supply is necessary to adjust the time.
Step 2: Press the “clock” or “settings” Button
Locate and press the “Clock” or “Settings” button on your oven’s control panel. The specific button may vary depending on your oven model. This action prepares the oven for adjustments.
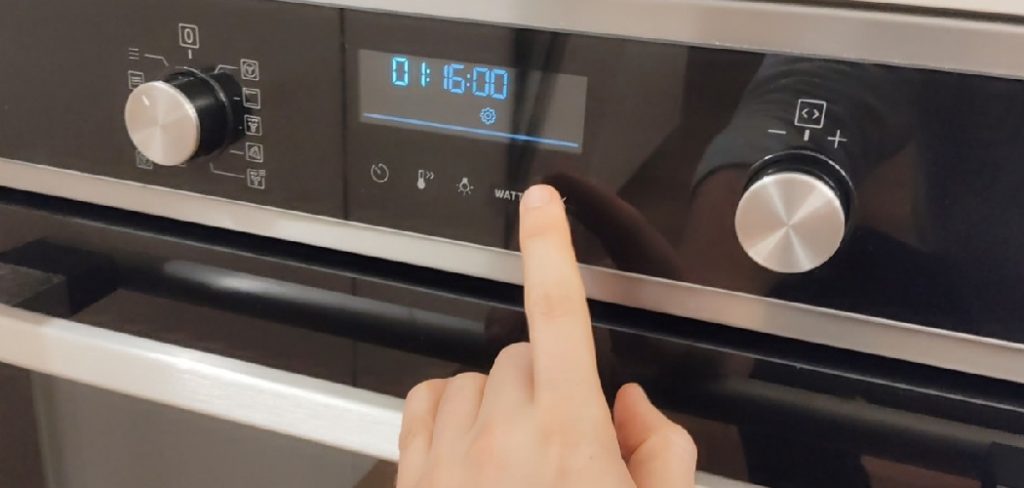
Step 3: Use the “+” or “-” Buttons (or Touch Controls) to Adjust the Hours
Once the clock or settings mode is activated, use the “+” and “-” buttons or touch controls to adjust the hour setting. Keep scrolling until the correct hour is displayed.
Step 4: Press the “clock” or “ok” Button to Confirm
After setting the desired hour, press the “Clock” or “OK” button to save your selection. This locks the hour setting into place.
Step 5: Adjust the Minutes Using the Same Method
Now, adjust the minutes using the same “+” or “-” buttons or touch controls. Carefully scroll until the correct minute setting is displayed on the screen.
Step 6: Finalize the Setting
To finalize the time, press “Start” if required by your model, or wait a few seconds for the oven to automatically confirm the adjusted time. The display should now show the newly set time.
By following these steps, you ensure your Electrolux oven’s clock is accurately set, keeping your cooking and baking routines on track.
How to Set the Time on Electrolux Oven: On an Analog Electrolux Oven
Step 1: Locate the Time-Setting Dial or Knob
Begin by identifying the time-setting dial or knob on your Electrolux oven. This is typically found on the front control panel and may be labeled with a clock icon.
Step 2: Turn the Knob Clockwise or Counterclockwise to Adjust the Time
Using your hand, gently turn the knob in the appropriate direction—clockwise to move the time forward or counterclockwise to move it backward. Continue turning until the clock reflects the desired time.
Step 3: Align the Time Correctly with The Oven’s Clock Markings
While adjusting the knob, ensure you are accurately aligning the time with the clock markings on the oven’s display. Care to match the hour and minute placements precisely for accurate timekeeping.
Step 4: Release the Knob to Lock the Time in Place
Once the correct time is displayed and aligned, release the knob. The time will automatically lock into place, and your oven’s clock should now be set and ready for use.
By following these simple steps, you can ensure that your analog Electrolux oven’s clock is properly synchronized, keeping your cooking schedule running smoothly.
Common Issues and Troubleshooting
Even with a well-functioning Electrolux oven, occasional issues may arise while setting or maintaining the clock. Here are some common problems and their potential solutions:
Clock Won’t Set
If the clock isn’t setting, first check if the oven is in standby mode. Some ovens require being in standby for adjustments to be made. Also, ensure there hasn’t been a power interruption. Verify the oven is plugged in securely and receiving power. If the issue persists, consult the oven’s user manual for specific instructions or contact customer support.
Time Keeps Resetting
A clock that frequently resets itself might indicate a faulty power connection or an internal hardware issue. Check the power cord for damage and ensure the outlet functions correctly. If the problem continues, you may need to have the oven inspected by an authorized technician.
Buttons Not Responding
Non-responsive buttons can sometimes be resolved with a soft reset. To do this, unplug the oven from the power source and wait
for a few minutes before plugging it back in. This process can help refresh the system. If the buttons still do not respond, inspect for physical damage or seek technical assistance.
Flashing Time Display
A flashing time display often occurs after a power outage. To fix this, simply manually reset the clock by following the above steps. If the flashing persists, ensure the power supply is stable, as intermittent power disruptions can cause this issue.
How to Set Timer Functions on an Electrolux Oven
Setting the timer functions on your Electrolux oven is straightforward and adds convenience to your cooking process.
Setting a Cooking Timer
Press the “Timer” button on the control panel to set a cooking timer. Adjust the desired cooking time using the “+” and “-” controls. Once the correct time is set, confirm by pressing the “Start” or “OK” button. The timer will count down, and the oven will notify you when the set time has elapsed.
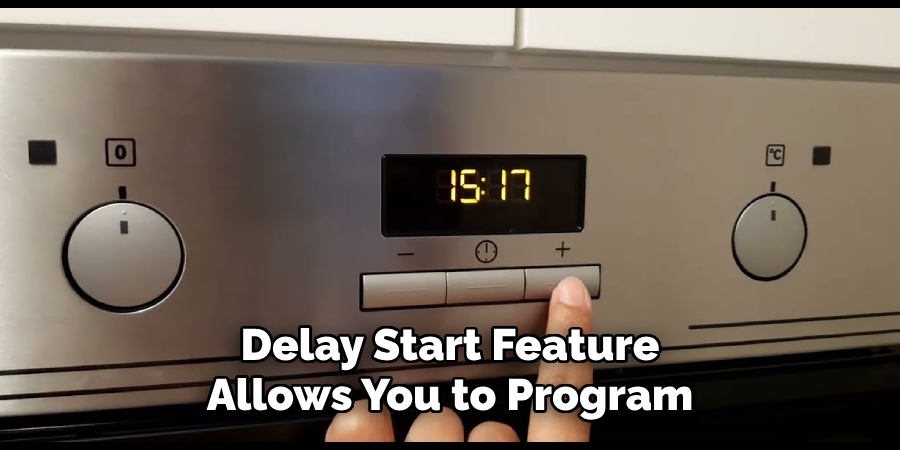
Using Delay Start
The delay start feature allows you to program the oven to begin cooking at a later time. First, ensure the oven clock is set correctly.
Then, input both the desired start time and the end time for cooking. The oven will automatically handle the process, ensuring your meal is ready exactly when you need it.
Using the Countdown Timer
The countdown timer functions as a standalone feature, independent of the oven’s cooking modes. This is useful for setting cooking reminders or timing non-oven tasks in the kitchen. Simply press the “Timer” button, adjust the countdown duration using the “+” and “-” buttons, and confirm with “Start” or “OK.” The oven will alert you when the timer reaches zero.
Additional Features Related to Time Settings
Electrolux ovens offer several advanced features to enhance convenience and flexibility when managing time settings. Many models allow users to switch between the 24-hour and 12-hour time formats, catering to regional preferences or individual comfort. Additionally, some smart ovens have an auto-adjust feature for daylight saving time, ensuring that the clock remains accurate without manual input. This saves users time and ensures seamless transitions during seasonal changes. For added reliability, advanced models feature power outage memory. This capability retains time settings even after a brief power interruption, removing the need for readjustment and maintaining your schedule effortlessly. These features demonstrate Electrolux’s commitment to delivering smarter functionality that is tailored to modern households’ diverse needs.
Conclusion
Setting the time on an Electrolux oven is straightforward, whether using digital or analog controls. Regularly checking and adjusting the time ensures your cooking schedules remain accurate and hassle-free. Features like power outage memory and auto-adjust for daylight saving time further simplify time management. If you experience any challenges or need further guidance on how to set the time on Electrolux oven, refer to the user manual or reach out to Electrolux customer support. With the combination of user-friendly features and reliable assistance, maintaining an optimal cooking experience has never been easier.
Professional Focus
Angela Ervin, a former interior designer turned blogger, specializes in kitchen design and renovations. Through her website, she blends her passion for cooking with design expertise, sharing practical and creative ideas. Known for balancing functionality and beauty, Angela’s insightful content has made her a trusted voice in home design and lifestyle.
About the Author
Angela Ervin, an experienced interior designer and blogger, combines her passion for kitchen renovations with storytelling. Living in Petersburg with her family, she enjoys cooking and testing her projects firsthand. Known for her humor and relatable style, Angela shares creative, functional design insights through her content, making her a trusted voice in home design.
Education History
University: Virginia Commonwealth University
Degree: Bachelor of Fine Arts (BFA) in Interior Design
- Angela’s education at VCU focused on mastering core interior design principles, including spatial planning, color theory, materials selection, and sustainable design practices.
- She gained hands-on experience through studio projects and collaborative design exercises, which honed her ability to create functional and aesthetically pleasing environments.
- Her coursework also emphasized problem-solving and practical applications of design, preparing her for real-world projects like her self-directed kitchen renovations.
- The program’s strong foundation in both technical skills and creative expression shaped Angela’s ability to seamlessly integrate form and function in her work.