
GE ovens often come equipped with a convenient steam clean function, designed to tackle light food stains and residue quickly and effectively. This feature offers a chemical-free alternative, using only water to loosen grime and making cleanup simpler and safer for you and your kitchen. Steam cleaning requires significantly less time and energy than traditional self-cleaning cycles, which can take hours to complete. By incorporating regular steam cleaning, you can help maintain your oven’s condition, extending its lifespan and ensuring it remains in optimal working order.

This article provides a comprehensive guide on how to steam clean a GE oven, from preparing the unit to completing the process efficiently. Whether you’re new to this feature or looking to maximize the benefits of steam cleaning, we’ll walk you through each step. With consistent use, you’ll enjoy a cleaner oven with minimal effort, while avoiding the use of harsh chemicals.
Understanding the Steam Clean Feature
What Is Steam Cleaning?
Steam cleaning is a convenient and eco-friendly process that combines heat and water to loosen grime, food debris, and light stains within your oven. This method does not rely on harsh chemicals, making it safer for your home and more environmentally friendly. This method softens residues by generating steam from a small amount of water, simplifying the cleaning process.
Differences Between Steam Cleaning and Self-Cleaning
Understanding the key distinctions between steam cleaning and the traditional self-cleaning cycle is important.
- Steam Cleaning operates at a lower temperature and is designed for quick, mild cleaning sessions. This method typically takes less than an hour and does not produce strong odors, offering a more user-friendly and time-effective alternative for everyday maintenance.
- Self-Cleaning, however, requires a high-temperature cycle to burn off tough residue and grease. While effective for heavy-duty cleaning, it can take several hours and may emit strong odors or smoke, which might not suit all users.
When to Use Steam Clean
Steam cleaning is best suited for addressing minor spills, stains, and routine maintenance to keep your oven in top shape. For tougher, baked-on grease and residue,
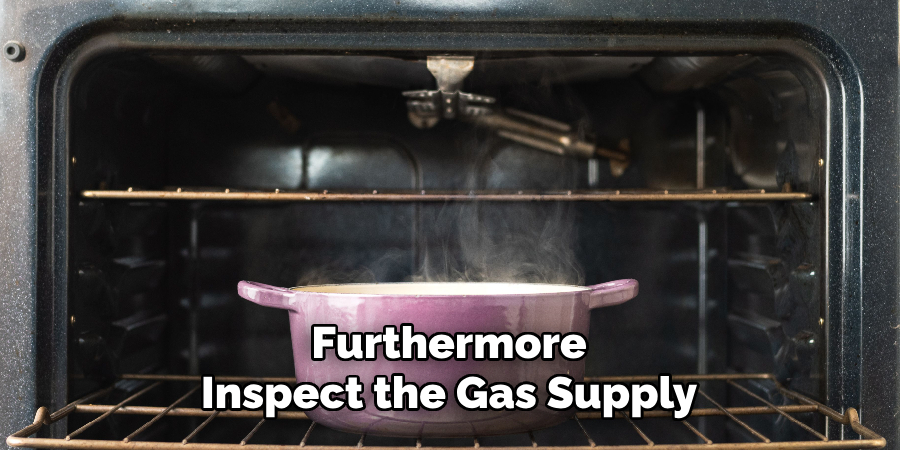
consider the self-cleaning feature instead, as steam cleaning is not designed for heavy-duty tasks. Removing all oven racks and accessories from the interior is important. The use of steam cleaning after light usage ensures that messes don’t accumulate, promoting easier upkeep over time.
Preparing the GE Oven for Steam Cleaning
Emptying the Oven
Before starting the steam cleaning process, removing all oven racks and accessories from the interior is important. Leaving items inside may obstruct cleaning, damage accessories, or interfere with steam distribution. Additionally, inspect the oven for any aluminum foil or trays and ensure they are removed.
Wiping Off Loose Debris
To maximize the effectiveness of steam cleaning, take a damp cloth and wipe away any large food particles, crumbs, or residue inside the oven. This quick step helps prevent excessive buildup that the steam cleaning process may not fully dissolve, ensuring a more thorough clean.
Checking the Oven Door Seal
Finally, inspect the oven door seal to make sure it is intact and the door closes securely. A proper seal is essential for trapping steam inside the oven during the cleaning cycle.
Any gaps or damage to the seal may reduce steam efficiency, leading to less effective cleaning results. Addressing these preliminary steps ensures the steam cleaning process is as efficient and successful as possible, leaving your oven refreshed and ready for continued use.
How to Steam Clean a GE Oven: Running the Steam Clean Cycle
Adding Water to the Oven
Before starting the steam clean cycle, pour the recommended amount of water, typically about 1 cup, into the bottom of the oven. Be sure to check your oven’s user manual for precise instructions, as the required water amount may vary by model. This water is the key element in generating steam to loosen dirt and residue effectively.
Selecting the Steam Clean Function
Locate the Steam Clean button on the control panel of your oven. Once selected, you may need to confirm your choice or make adjustments depending on your oven’s settings.
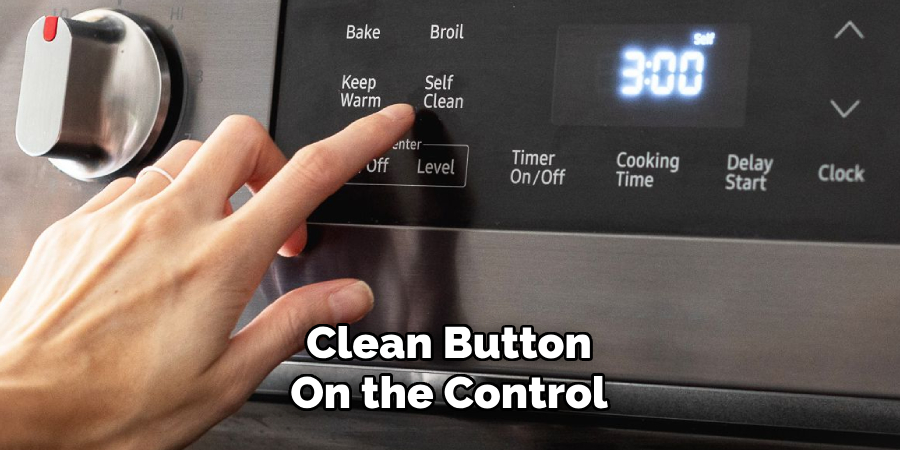
After confirmation, press the Start button to begin the cycle. This straightforward process initiates the steam cleaning function and prepares your oven for a thorough yet gentle cleaning.
Steam Cleaning Process
During the steam clean cycle, the oven will heat up to a temperature that creates steam. This steam works by loosening baked-on food residue and grime, making it easier to remove. The steam clean cycle typically lasts between 20 to 30 minutes, depending on your oven model. Make sure to avoid opening the oven door during this time to maintain the efficiency of the steam process.
What to Expect During the Cycle
While the cycle progresses, you may notice mild steam and warmth emanating from the oven. Unlike traditional high-heat cleaning methods, there should be no strong odors or excessive heat, making this process much gentler and more convenient. This ensures a safer and more efficient way to clean your oven with minimal stress or disruption.
Post-Cleaning Steps: Wiping and Drying
Opening the Oven Door Safely
Once the steam clean cycle is complete, allowing the oven to cool before opening the door is essential. Handling a hot oven can be dangerous, so wait until it has reached a safe temperature. This ensures your safety and prevents potential damage to the appliance.
Removing Residual Moisture and Debris
After the oven has cooled, you can begin cleaning out the loosened grime and moisture accumulated during the steam clean cycle. Use a sponge or a soft cloth to wipe away the residue gently.
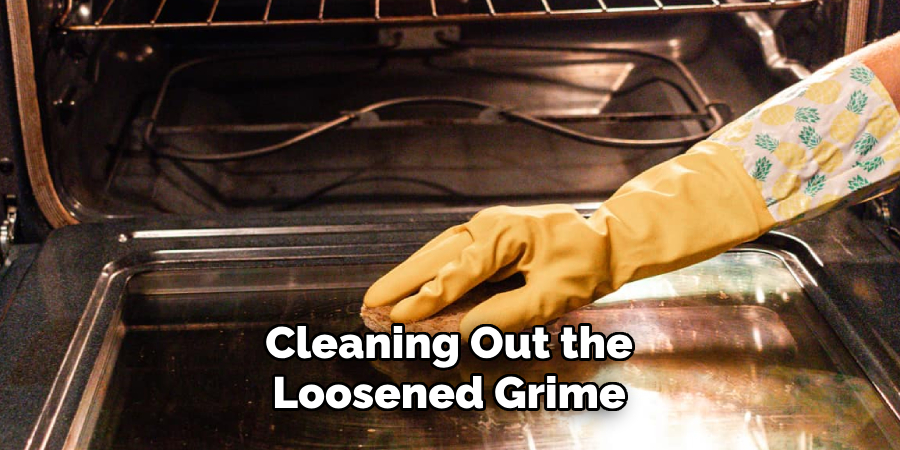
Focus on areas where food particles and debris may have gathered, thoroughly cleaning all surfaces. If stubborn spots are remaining, utilize a non-abrasive pad to gently scrub the area without causing scratches or damage to the interior lining of the oven.
Drying the Interior
To finish, leave the oven door slightly open to allow the interior to air-dry completely. Proper drying is important to prevent any moisture-related issues, such as mildew or lingering odors. This final step ensures your oven is fresh, clean, and ready to use for your next cooking session.
Cleaning the Oven Racks and Door Glass
Hand-Washing the Racks
Properly cleaning the oven racks is essential to maintain their usability and appearance. Begin by removing the racks from the oven and placing them in a large sink or bathtub filled with warm, soapy water. Allow the racks to soak for about 15 to 20 minutes to loosen any baked-on grease and food residue. Once soaked, use a sponge or a soft-bristled brush to gently scrub each rack, focusing on areas with stubborn buildup. Rinse thoroughly with clean water to remove any soap residue, then dry with a clean towel before reinserting the racks into the oven.
Cleaning the Oven Door Glass
The oven door glass requires gentle care to keep it clean and free from streaks or scratches. Prepare a cleaning mixture by combining equal parts white vinegar and water in a spray bottle. Spray this solution onto the glass and wipe it down using a microfiber cloth or a soft, lint-free towel for streak-free results. For tougher stains or grease spots, apply a small amount of baking soda to the damp cloth and gently scrub the affected areas. Avoid using abrasive cleaners or scrubbers, as they can scratch the glass. Once clean, polish the glass with a dry cloth to restore its shine.
Maintaining Your GE Oven for Long-Term Cleanliness
Regular Cleaning Schedule
It’s important to establish a regular cleaning routine to keep your GE oven in optimal condition. For light maintenance, use the steam clean function once a month. This quick and efficient method can help loosen minor grime and residue, making your oven easier to maintain over time.
Preventing Buildup
One of the best ways to avoid tough cleaning sessions is by preventing grease and food buildup from the start. Always wipe spills immediately after cooking to prevent stains from settling.
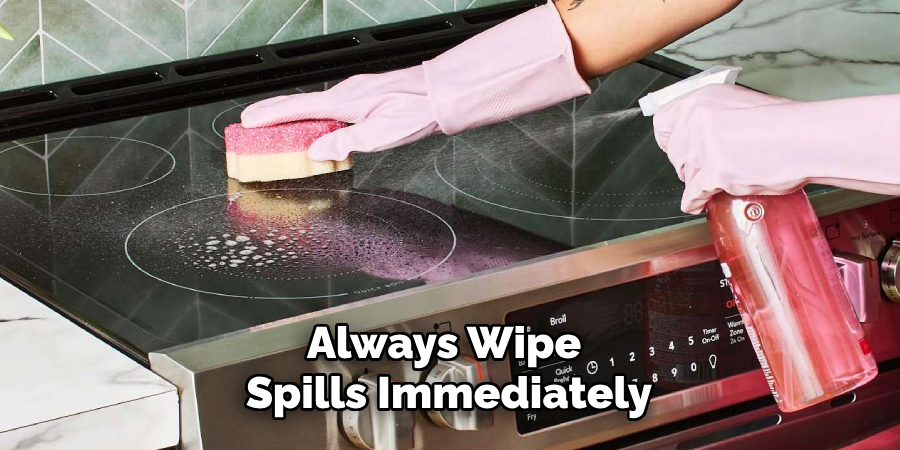
Additionally, consider using oven liners or placing baking trays beneath dishes to catch any drips or spills during cooking. This simple step can drastically reduce cleaning time and help protect the interior surfaces of your oven.
Deep Cleaning When Necessary
A more thorough cleaning approach is required when your oven experiences heavy grease buildup or stubborn stains. For such situations, consider using the self-cleaning mode if your oven is equipped with this feature. Alternatively, you can create a paste by mixing baking soda with water. Apply the paste to problematic areas, allow it to sit for several hours or overnight, and wipe it off with a damp cloth. These methods effectively restore your oven’s cleanliness and functionality, ensuring it continues to perform at its best for years to come.
When to Use Other Cleaning Methods
If steam cleaning does not successfully remove stubborn stains, try applying a mixture of baking soda and water. Spread the paste over the affected areas and leave it overnight for optimal results. For tackling strong grease or burnt food residue, activate your oven’s self-cleaning mode, ensuring proper ventilation to avoid fumes. If unpleasant odors persist after cleaning, consider steam cleaning with a vinegar-water solution to enhance freshness. These alternative methods provide practical solutions for maintaining a spotless and odor-free oven, even in challenging cleaning situations.
Conclusion
Steam cleaning a GE oven is an easy, effective, and chemical-free way to remove light food stains, making it a convenient choice for everyday maintenance. Regularly using this function helps prevent major buildup, ensuring your oven stays clean and operates efficiently. To keep your appliance looking and functioning like new, incorporate steam cleaning into your routine and address spills promptly. If you’re wondering how to steam clean a GE oven, simply follow its user-friendly instructions. By staying consistent with maintenance, you’ll enjoy a healthier cooking environment and prolong the life of your oven with minimal effort.
Professional Focus
Angela Ervin, a former interior designer turned blogger, specializes in kitchen design and renovations. Through her website, she blends her passion for cooking with design expertise, sharing practical and creative ideas. Known for balancing functionality and beauty, Angela’s insightful content has made her a trusted voice in home design and lifestyle.
About the Author
Angela Ervin, an experienced interior designer and blogger, combines her passion for kitchen renovations with storytelling. Living in Petersburg with her family, she enjoys cooking and testing her projects firsthand. Known for her humor and relatable style, Angela shares creative, functional design insights through her content, making her a trusted voice in home design.
Education History
University: Virginia Commonwealth University
Degree: Bachelor of Fine Arts (BFA) in Interior Design
- Angela’s education at VCU focused on mastering core interior design principles, including spatial planning, color theory, materials selection, and sustainable design practices.
- She gained hands-on experience through studio projects and collaborative design exercises, which honed her ability to create functional and aesthetically pleasing environments.
- Her coursework also emphasized problem-solving and practical applications of design, preparing her for real-world projects like her self-directed kitchen renovations.
- The program’s strong foundation in both technical skills and creative expression shaped Angela’s ability to seamlessly integrate form and function in her work.