
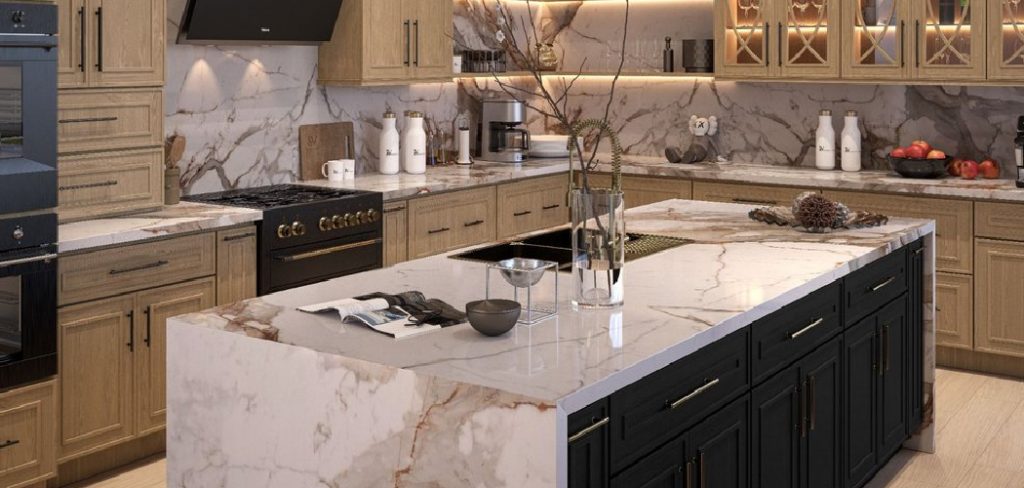
Are you looking to upgrade your kitchen or bathroom? Granite countertops are a popular choice for their durability and aesthetics.
Removing granite countertops may seem daunting, especially considering their weight and durability, but with the right tools and a step-by-step approach, it can be done safely and efficiently. Whether you’re renovating your kitchen or replacing an outdated countertop, understanding the proper techniques is essential to avoid damage to the surrounding cabinets, walls, or plumbing fixtures.
This guide on how to take off granite countertops will walk you through the process, ensuring your granite countertops are removed with minimal hassle and maximum care. Before getting started, it’s important to gather all necessary tools and take necessary precautions for a successful project.
What Are the Causes of Taking Off Granite Countertops?
There are several reasons why you may need to remove your granite countertops. Some common causes include:
- Renovations or Remodels: If you’re upgrading your kitchen or bathroom, removing old countertops is necessary.
- Damage: Over time, granite countertops can chip, crack, or stain, making them unsightly and potentially hazardous.
- Replacements: Perhaps you’ve simply outgrown the style or color of your current countertop and want to upgrade to a new one.
- Water Damage: In rare cases, water damage can occur underneath a granite countertop, causing mold or instability.
No matter the reason for removal, it’s essential to approach the process with caution to avoid any unnecessary damage.
What Will You Need?
Before attempting to remove your granite countertops, gather the following tools:
- Safety Gear: It’s essential to protect yourself during this process. Wear safety goggles, gloves, and a dust mask to avoid injury.
- Crowbar or Pry Bar: This tool will pry the countertop away from the cabinetry and walls.
- Utility Knife: Use a utility knife to cut through any caulking or adhesive holding the countertop in place.
- Putty Knife: A putty knife can also help remove any remaining adhesive or caulk after cutting it with a utility knife.
- Screwdriver: In some cases, screws may have been used to secure the countertop to the cabinets. A screwdriver will be necessary to remove them.
- Support Braces: If your countertops have an overhang, it’s essential to provide support when removing them to avoid any potential accidents or damage.
- Pliers: Pliers may be necessary if any nails or staples secure the countertop.
- Hammer: A hammer may also come in handy for removing any stubborn adhesive or caulk.
Once you have all the necessary tools, it’s time to get started on removing your granite countertops.
8 Easy Steps on How to Take Off Granite Countertops
Step 1: Clear the Area
Start by thoroughly clearing the work area to ensure a safe and efficient process. Remove all items from the countertop, such as kitchen appliances, utensils, and decorative pieces, to avoid accidental damage during removal. Clear out the cabinets underneath the countertop as well, as you will likely need access to the underside of the granite.
Turn off and disconnect any plumbing connections, including the sink and faucet, if applicable. This prevents potential water damage and ensures that nothing obstructs your work. Cover nearby surfaces, appliances, and floors with protective sheets or drop cloths to guard against scratches, debris, or dust during the removal process. These preparatory steps will make the entire project more organized and safer for everyone involved.
Step 2: Locate and Remove Screws or Fasteners
Inspect the underside of the granite countertop to locate any screws, brackets, or fasteners securing it to the cabinets. These components are typically used to hold the countertop firmly in place. Use a screwdriver or drill to carefully remove each screw or fastener carefully, ensuring not to damage the granite or the cabinets.

Keep all removed hardware in a safe place for potential reuse or proper disposal. If adhesive or caulking is present alongside the fasteners, note it as it will need to be addressed in the next step. Taking your time during this stage can help prevent unnecessary damage and make the removal process smoother.
Step 3: Break the Seal of Adhesive or Caulking
Once all fasteners have been removed, check for any adhesive or caulking that may still be holding the granite countertop in place. Using a utility knife or a similar tool, carefully cut along the edge where the countertop meets the cabinets or backsplash. Be gentle to avoid scratching the granite or the surrounding surfaces.
For particularly stubborn adhesive, a pry bar or putty knife may be used to loosen the bond, applying steady and controlled pressure slowly. Always work in small sections to minimize the risk of chipping the granite or damaging the cabinets. Ensuring the adhesive or caulking is fully separated is a crucial step before attempting to lift the countertop.
Step 4: Lift and Remove the Granite Countertop
You are ready to lift the granite countertop with the adhesive fully separated and all fasteners removed. Enlist the help of at least one other person, as granite is heavy and can be fragile if not handled properly. Start by gently lifting one edge of the countertop to test if it moves freely.
If there is any resistance, double-check for remaining adhesive or fasteners. Once it is free, carefully lift and carry the countertop to a safe location for storage or disposal. Avoid tilting the countertop too much or putting excessive pressure on narrow sections, which could cause it to crack. Proper handling during this step is essential to prevent damage to the granite and ensure safety.
Step 5: Clean the Area

After successfully removing the granite countertop, take time to thoroughly clean the exposed area. Use a putty knife or scraper to remove any leftover adhesive or caulking from the cabinets or walls. Be careful not to damage the surfaces underneath. Vacuum up dust, debris, and small particles to ensure the area is clear and ready for any next steps, such as installing a new countertop or making other renovations. A clean, prepared surface will make subsequent work more efficient and precise.
Step 6: Inspect and Repair Cabinets
Before proceeding with the installation of a new countertop, inspect the cabinets for any signs of damage or wear. Look for loose screws, cracks, or structural weaknesses that may need attention. Tighten any hardware, reinforce joints if necessary, and ensure the cabinet tops are level and sturdy.
This is also an excellent opportunity to assess whether any modifications are needed to support the weight of the new countertop. Addressing these issues now will help ensure a smooth and stable installation process.
Step 7: Measure and Cut the Countertop
Accurate measurements are crucial for a proper fit when installing a new countertop. Use a tape measure to determine the precise dimensions of the area, including any cutouts needed for sinks, appliances, or fixtures. Double-check your measurements to avoid errors.
Once measured, mark the countertop carefully and use appropriate tools, such as a circular saw, to make clean and precise cuts. Always wear safety equipment and follow the manufacturer’s instructions for cutting. Properly preparing and cutting the countertop will ensure a seamless fit and a professional appearance.
Step 8: Dry Fit the Countertop
Before securing the countertop, perform a dry fit to ensure it aligns correctly with the cabinets and surrounding surfaces. Place the countertop on the cabinets and check its positioning, making sure all cutouts for sinks or appliances are accurate and that the edges align seamlessly with walls or adjacent countertops.
Adjust as needed and make note of any areas that may require slight trimming or sanding. This step lets you identify and resolve potential issues early, ensuring a smooth and flawless installation process.
By following these steps, you can safely and successfully remove a granite countertop without damaging it or the surrounding areas.
5 Things You Should Avoid
- Using Excessive Force: Avoid applying excessive force when removing granite countertops, as it can cause cracks or chips in the material, making it unusable or difficult to repurpose.
- Skipping Safety Measures: Never skip safety precautions like wearing gloves, safety goggles, and sturdy footwear. Granite is heavy and sharp edges can cause injuries if mishandled.
- Neglecting to Disconnect Utilities: Be sure to disconnect plumbing, electrical fixtures, and other utilities connected to the countertop. Failure to do so can result in damaging connections or accidents.
- Ignoring Proper Tools: Avoid using improper tools such as hammers or cheap pry bars that might damage the cabinetry or the granite itself. Always use the right equipment for the job.
- Rushing the Process: Removing granite countertops requires patience and attention to detail. Rushing can lead to accidental damage to the surrounding areas, such as cabinets, walls, or backsplash.
Once the countertop is successfully removed, it’s important to dispose of the granite properly. Instead of throwing it away, consider repurposing it for other projects or donating it to someone in need.

Conclusion
How to take off granite countertops can be a manageable task if approached with careful planning and adherence to proper techniques.
By avoiding common mistakes—such as skipping safety measures, neglecting to disconnect utilities, or using the wrong tools—you can minimize the risk of damage to the granite, adjacent surfaces, and yourself. Always prioritize safety and patience throughout the process, using the correct equipment and methods to ensure a successful removal.
With attention to detail and thorough preparation, your granite countertops can be safely removed, leaving the workspace ready for its next transformation.
Professional Focus
Angela Ervin, a former interior designer turned blogger, specializes in kitchen design and renovations. Through her website, she blends her passion for cooking with design expertise, sharing practical and creative ideas. Known for balancing functionality and beauty, Angela’s insightful content has made her a trusted voice in home design and lifestyle.
About the Author
Angela Ervin, an experienced interior designer and blogger, combines her passion for kitchen renovations with storytelling. Living in Petersburg with her family, she enjoys cooking and testing her projects firsthand. Known for her humor and relatable style, Angela shares creative, functional design insights through her content, making her a trusted voice in home design.
Education History
University: Virginia Commonwealth University
Degree: Bachelor of Fine Arts (BFA) in Interior Design
- Angela’s education at VCU focused on mastering core interior design principles, including spatial planning, color theory, materials selection, and sustainable design practices.
- She gained hands-on experience through studio projects and collaborative design exercises, which honed her ability to create functional and aesthetically pleasing environments.
- Her coursework also emphasized problem-solving and practical applications of design, preparing her for real-world projects like her self-directed kitchen renovations.
- The program’s strong foundation in both technical skills and creative expression shaped Angela’s ability to seamlessly integrate form and function in her work.