
Removing a built-in dishwasher might seem like a daunting task, but it can be straightforward with the right tools and guidance. Whether you’re replacing an old appliance or simply making repairs, carefully following a step-by-step process will help you avoid any damage to your kitchen or plumbing.
This guide on how to take out a built in dishwasher will walk you through the necessary preparations and steps to safely and efficiently take out a built-in dishwasher.
Why Remove a Built-in Dishwasher?
Before we dive into the steps, let’s briefly discuss why you might need to remove a built-in dishwasher. There are several reasons why you may want to take out your dishwasher:
- Replacing an old or malfunctioning dishwasher with a new one
- Making repairs to the existing dishwasher
- Renovating your kitchen and need to temporarily remove the dishwasher
Whatever your reason may be, it’s important to properly remove the dishwasher to avoid any damage to your kitchen or plumbing. Let’s get started!
Tools and Materials You Will Need
Before starting the removal process, gather all the necessary tools and materials to make the job easier. Here are some essential items you will need:
Adjustable Pliers
These will come in handy for disconnecting water supply lines and electrical wires.
Screwdriver
You’ll need a Phillips or flathead screwdriver to remove any screws holding the dishwasher in place.
Wrench
A wrench may be necessary to loosen any bolts securing the dishwasher.
Putty Knife
This tool will help pry off any caulk or adhesive securing the dishwasher to your countertop.
Bucket and Towels
Have these on hand to catch any water that may spill during the removal process.
8 Step-by-step Guides on How to Take Out a Built in Dishwasher
Step 1: Turn off Power and Water Supply
Safety should always come first when working with appliances. Begin by turning off the power to the dishwasher. Locate your home’s circuit breaker panel and switch off the breaker that controls the dishwasher. Once the power is off, confirm there is no electricity going to the appliance by attempting to turn it on.
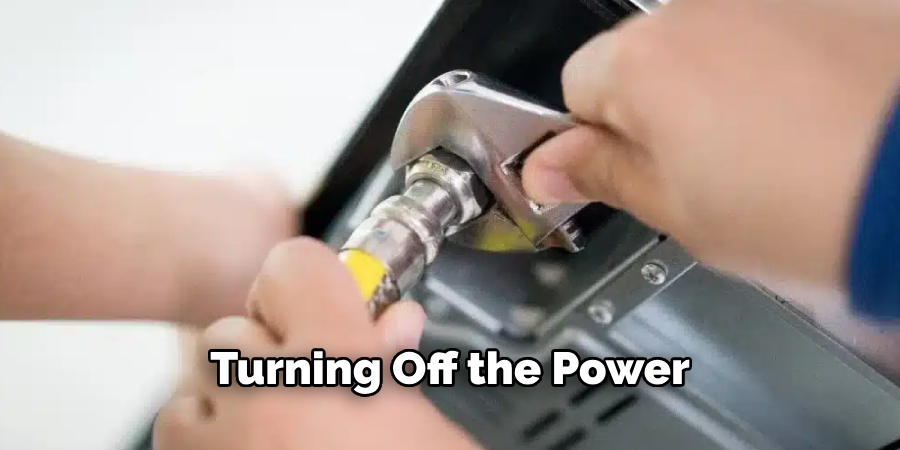
Next, turn off the water supply to the dishwasher. You should find the water shut-off valve under the sink or near the dishwasher. Twist the valve clockwise to ensure the water is fully turned off before proceeding. By completing this step, you minimize the risk of electrical shocks and water leaks during the removal process.
Step 2: Disconnect the Water Supply Line
After turning off the water supply, locate the water supply line connected to the dishwasher. This is usually a flexible hose or tube running from the dishwasher to the shut-off valve under the sink. Place a bucket or towels beneath the connection point to catch any remaining water that might spill out.
Using adjustable pliers or a wrench, carefully loosen the nut securing the water supply line to the dishwasher. Once loosened, gently pull the line away from the dishwasher’s inlet valve. Allow any trapped water to drain into the bucket or towels before proceeding. Double-check that the water supply line is completely disconnected before moving on to the next step.
Step 3: Disconnect the Drain Hose
The drain hose is typically located near the back of the dishwasher and runs to your kitchen sink’s plumbing system. Similar to the water supply line, place a bucket or towels under the connection point to capture any excess water as you disconnect it.

Using adjustable pliers, loosen the clamp securing the drain hose to the dishwasher’s drain pump. Once loose, carefully pull out the hose from its connection point and let any remaining water drain into your bucket.
Step 4: Remove Screws Securing Dishwasher in Place
With the water supply and drain hose now disconnected, the next step is to remove the screws that secure the dishwasher to the surrounding cabinetry or countertop. Open the dishwasher door fully, and look for screws along the top edge that attach the dishwasher to the underside of the countertop. These are typically Phillips-head screws, so use a Phillips screwdriver to carefully unscrew them.
Once the screws are removed, check the sides of the dishwasher for any additional screws that might be anchoring it to the cabinets. If present, use the appropriate screwdriver to remove these as well. Store the screws safely in a small container so that they can be easily accessed later if needed. Removing all securing screws ensures the dishwasher is free to slide out in the following steps.
Step 5: Disconnect the Power Supply
With all screws removed, it’s time to disconnect the power supply. If your dishwasher is hardwired to an electrical circuit, you will need to call a licensed electrician for this step. However, if your dishwasher plugs into an outlet, simply unplug it from the nearest socket. Once disconnected, carefully tuck the power cord out of the way to avoid any tripping hazards.
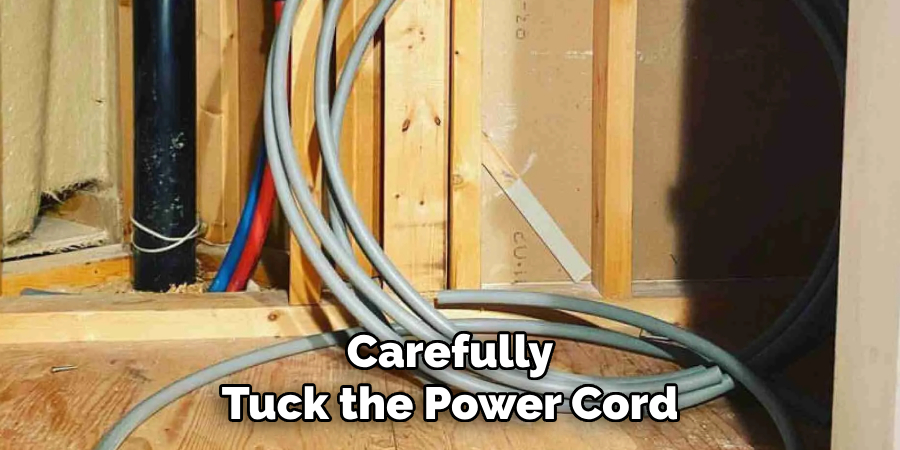
It’s crucial to ensure the power supply is completely disconnected before proceeding with the removal process.
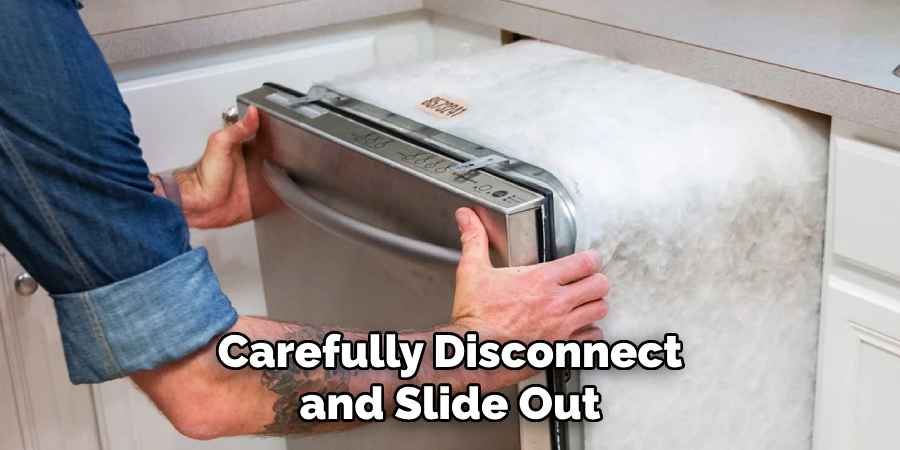
Step 6: Slide Out the Dishwasher
With all connections and securing screws now removed, it’s time to gently slide out the dishwasher from its space. Slowly pull it out towards you, ensuring there are no remaining connections holding it in place.
If you encounter any resistance, double-check that all screws and connections have been fully removed before continuing to pull it out. Once fully removed, set the dishwasher down on a soft surface to avoid any scratches or damage.
Step 7: Remove Any Adhesives or Caulk
Once the dishwasher has been slid out, inspect the surrounding area for any adhesives or caulk that may have been used to secure it in place. This is especially common around the edges where the dishwasher meets the countertop or cabinetry. Using a putty knife, gently scrape away any caulk or adhesive material. Be careful not to damage the countertop or surrounding surfaces while doing so.
If needed, soften stubborn caulk with a hairdryer or a heat gun on a low setting to make it easier to remove. Once all adhesives or caulk have been cleared, wipe down the area with a damp cloth to remove any residue. This prepares the space for either reinstalling a new dishwasher or completing your renovation task.
Step 8: Clean and Store the Dishwasher
Now that your dishwasher has been successfully removed, it’s essential to clean it before storing it away. Wipe down the exterior and interior of the appliance with a mild soap solution to remove any dirt or grime. Pay extra attention to areas around the door seals and gasket where mold or residue may have accumulated. Once clean, let the dishwasher dry completely before storing it in a safe location.
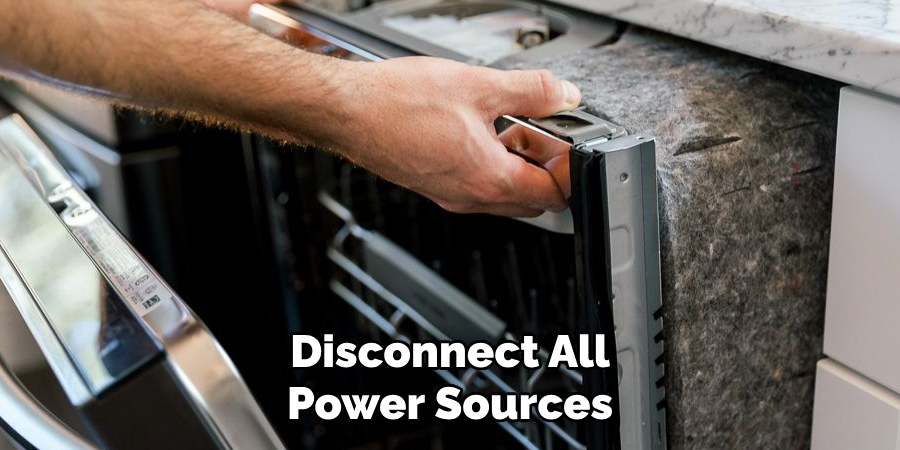
Following these steps on how to take out a built in dishwasher will ensure a safe and successful removal of your dishwasher. As always, be sure c or seek professional help if you encounter any difficulties during this process. Remember to also dispose of your old dishwasher responsibly, either by recycling it or scheduling a pick-up with your local waste management service. And if you’re planning on installing a new dishwasher, make sure to turd off the water supply and disconnect all power sources before beginning the installation process. Happy renovating!
Additional Tips for Dishwasher Removal
- Before starting the removal process, always make sure to unplug the dishwasher and turn off the water supply for safety purposes.
- It’s a good idea to have another person assist you during the removal process to help with lifting and maneuvering the dishwasher.
- If there is still standing water in your dishwasher after disconnecting the drain hose, use a wet/dry vacuum or towels to remove it before sliding out the appliance.
- Keep all screws and small parts in a safe container while removing them from the dishwasher. This will prevent any loss or confusion when it comes time to reinstall them.
- To prevent damage to your floors, place protective cardboard or thin boards underneath the dishwasher when sliding it out of its space.
- If your dishwasher is attached to a garbage disposal unit, make sure to disconnect the hose connecting them before attempting to remove the dishwasher. Doing so will prevent any potential damage to the disposal unit.
- If you plan on replacing your old dishwasher with a new one, consider donating it if it’s still in good working condition. This can help reduce waste and benefit those in need of a dishwasher.
- Always follow proper safety precautions and refer to professional help or manufacturer instructions if needed during the removal process.
Frequently Asked Questions
Q: Can I Remove a Built-in Dishwasher by Myself?
A: For safety purposes, it is recommended that another person assist you during the removal process. However, if necessary, one person can carefully disconnect and slide out the dishwasher.
Q: How Do I Know if My Dishwasher is Hardwired or Plugged in?
A: If your dishwasher has a power supply cord with a plug, it is plugged into an outlet. If there is no plug visible, your dishwasher is most likely hardwired to an electrical circuit.
Q: Can I Reuse the Same Dishwasher for a Different Space or Kitchen?
A: Yes, as long as the new space or kitchen has the appropriate connections and dimensions for the dishwasher. However, it’s recommended that a professional check is performed and any necessary adapters or modifications are installed before use.
Q: What Should I Do With My Old Dishwasher After Removal?
A: You can either recycle it or schedule a pick-up with your local waste management service. Some retailers also offer trade-in programs for old appliances when purchasing a new one.
Conclusion
Removing a built-in dishwasher may seem like a daunting task, but by following these simple steps on how to take out a built in dishwasher and safety precautions, you can successfully remove your dishwasher without any complications. Remember to always unplug the power supply and turn off the water before starting the removal process, and seek professional help if needed.
Don’t forget to properly dispose of your old dishwasher and consider donating it if it’s still in good working condition. And lastly, have fun with your kitchen renovation project! Enjoy your newly opened space and the opportunity to upgrade to a new dishwasher if desired. Happy renovating!
Professional Focus
Angela Ervin, a former interior designer turned blogger, specializes in kitchen design and renovations. Through her website, she blends her passion for cooking with design expertise, sharing practical and creative ideas. Known for balancing functionality and beauty, Angela’s insightful content has made her a trusted voice in home design and lifestyle.
About the Author
Angela Ervin, an experienced interior designer and blogger, combines her passion for kitchen renovations with storytelling. Living in Petersburg with her family, she enjoys cooking and testing her projects firsthand. Known for her humor and relatable style, Angela shares creative, functional design insights through her content, making her a trusted voice in home design.
Education History
University: Virginia Commonwealth University
Degree: Bachelor of Fine Arts (BFA) in Interior Design
- Angela’s education at VCU focused on mastering core interior design principles, including spatial planning, color theory, materials selection, and sustainable design practices.
- She gained hands-on experience through studio projects and collaborative design exercises, which honed her ability to create functional and aesthetically pleasing environments.
- Her coursework also emphasized problem-solving and practical applications of design, preparing her for real-world projects like her self-directed kitchen renovations.
- The program’s strong foundation in both technical skills and creative expression shaped Angela’s ability to seamlessly integrate form and function in her work.