
Are you looking for ways to reduce your carbon footprint and live a more sustainable lifestyle? One simple way you can do that is by using a countertop compost bin.
Composting is an excellent way to reduce food waste and create nutrient-rich soil for your plants. A countertop compost bin makes the process convenient and accessible, allowing you to collect food scraps and organic waste in your kitchen. Properly using a compost bin can efficiently manage waste while contributing to a healthier environment. Composting can also save you money on fertilizer and reduce the need for chemical fertilizers, making it a win-win situation.
This guide on how to use a countertop compost bin will walk you through the steps needed to set up, maintain, and make the most of your countertop compost bin.
What Are the Benefits of Using a Countertop Compost Bin?
Before we dive into how to use a countertop compost bin, let’s first discuss its benefits. Here are some reasons why you should consider using one:
- Convenience: A countertop compost bin makes collecting food scraps and organic waste easier without having to take multiple trips to an outdoor compost pile.
- Reduced Food Waste: Composting allows you to divert food waste from landfills, where they release harmful methane gas as they decompose.
- Nutrient-rich Soil: The end-product of composting is nutrient-rich soil that can be used in your garden or potted plants, helping them grow healthier and stronger.
These are only a few benefits of using a countertop compost bin. Now, let’s get into the nitty-gritty of how to use one.
What Will You Need?
To get started with using a countertop compost bin, you will need the following items:
- A Countertop Compost Bin: You can find these at most home stores or online. They come in various sizes and materials, such as stainless steel, ceramic, or bamboo.
- Biodegradable Liners: These are optional but can make cleaning your compost bin easier.
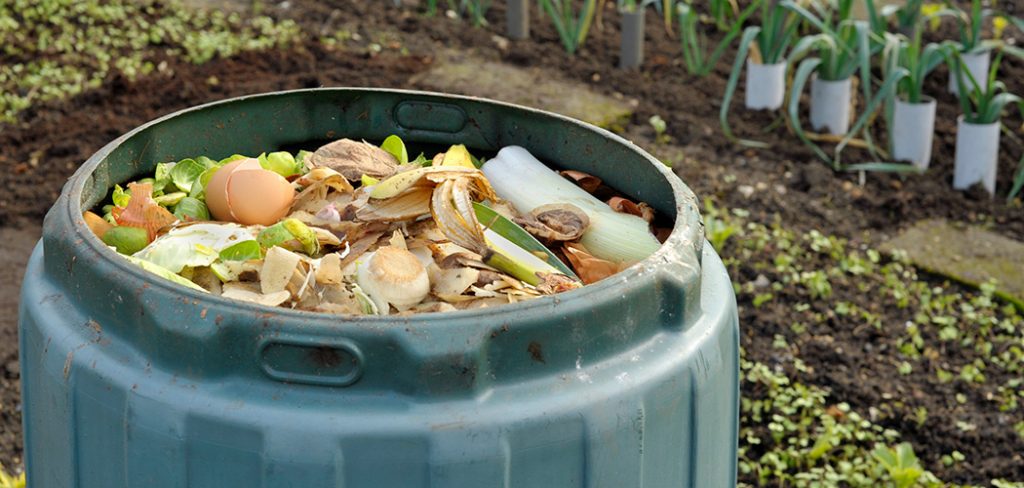
- Food Scraps and Organic Waste: These include fruit and vegetable peels, eggshells, coffee grounds, tea bags, and more.
Once you have these items, you’re all set to start composting.
8 Easy Steps on How to Use a Countertop Compost Bin
Step 1. Choose a Spot for Your Compost Bin:

Find a convenient and accessible location in your kitchen where your compost bin can be easily used and maintained. Ideally, place it on your countertop near your cooking or food prep area, making disposing of scraps effortless. Ensure the spot is ventilated and away from direct sunlight, as excessive heat may cause unpleasant odors. If counter space is limited, you can opt to place it under the sink or in a nearby cupboard, as long as it remains within easy reach.
Step 2. Line Your Compost Bin (Optional):
If you use biodegradable liners, place one in your compost bin before adding any waste. These liners help reduce mess and make emptying the bin much more manageable. Be sure to select liners specifically designed for composting, as traditional plastic bags are not compostable and can interfere with the process. Liners are optional but can be particularly useful for managing moisture and odor.
Step 3. Add Compostable Materials:
Start adding compostable materials to your bin. Focus on including a mix of “green” materials, such as fruit and vegetable scraps, coffee grounds, and eggshells, and “brown” materials, like shredded paper, dried leaves, or cardboard. Maintaining a balance between green and brown materials helps regulate moisture levels and promotes proper decomposition. Avoid adding meat, dairy, or oily foods, as these can attract pests and create odors. Chop larger scraps into smaller pieces to speed up the composting process.
Step 4. Turn and Aerate the Compost:
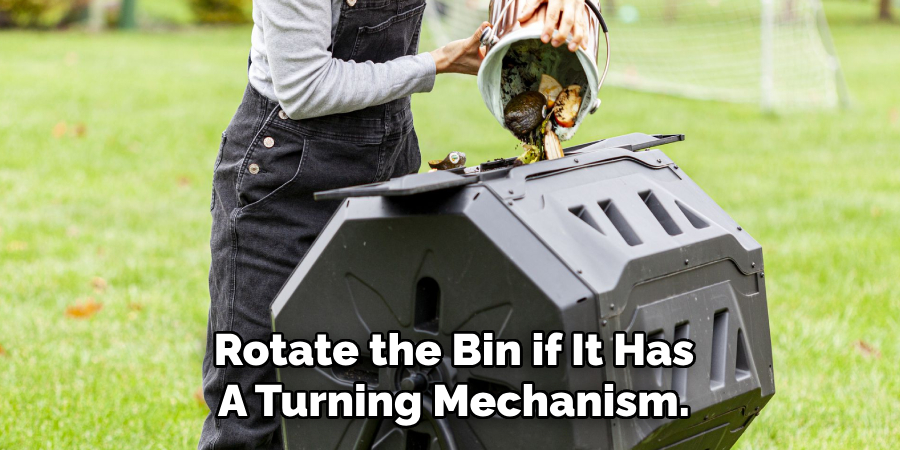
Regularly turn and aerate the materials in your bin to ensure that your compost breaks down efficiently. Use a garden fork, compost aerator, or rotate the bin if it has a turning mechanism. This process introduces oxygen into the pile, aiding the decomposition process and preventing unpleasant odors caused by anaerobic conditions. Aim to turn the compost at least once every one to two weeks, or more frequently if the pile starts to compact or smell.
Step 5. Monitor and Maintain Your Compost:
Keep an eye on your compost to ensure it is breaking down properly. The pile should feel warm to the touch in the center, which indicates active decomposition. If it becomes too dry, add water to achieve a consistency similar to a damp sponge, conversely, if the pile is too wet, mix in more brown materials like shredded newspaper or dried leaves to absorb excess moisture. Regularly checking and maintaining the balance of green and brown materials will help your compost break down efficiently and prevent unpleasant odors or pests.
Step 6. Harvest Your Finished Compost:
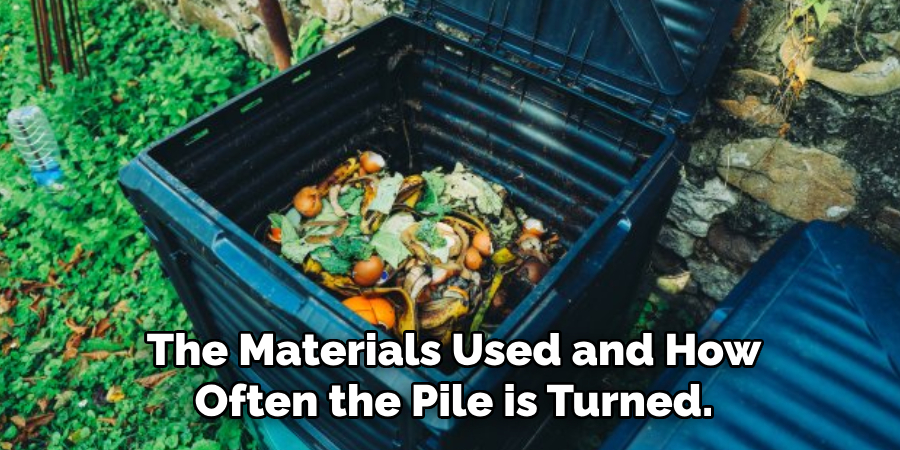
Once your compost has turned dark, crumbly, and has an earthy smell, it’s ready to use. This process can take anywhere from two months to a year, depending on the materials used and how often the pile is turned. To harvest, screen the compost through a mesh or pick out any large, undecomposed pieces to return to the pile for continued breakdown. Use your finished compost to enrich garden soil, nourish potted plants, or as a natural mulch for landscaping projects. Your homemade compost is now a nutrient-rich addition to promote healthy plant growth.
Step 7. Troubleshooting Common Composting Issues:
Even with proper maintenance, composting can occasionally encounter challenges. For instance, if your compost pile emits a foul odor, it may be too wet or lacking in oxygen—turning the pile and adding more brown materials like dried leaves can resolve this issue. If the pile isn’t heating up, ensure there’s an adequate balance of green nitrogen-rich materials, such as fruit scraps, and brown carbon-rich materials. Another common problem is pests; to prevent this, always bury food scraps beneath a layer of other compostable materials and avoid adding meat, oils, or dairy products. Regularly monitoring and adjusting your pile will help keep it on track toward producing high-quality compost.
Step 8. Keep Your Compost Bin Clean:
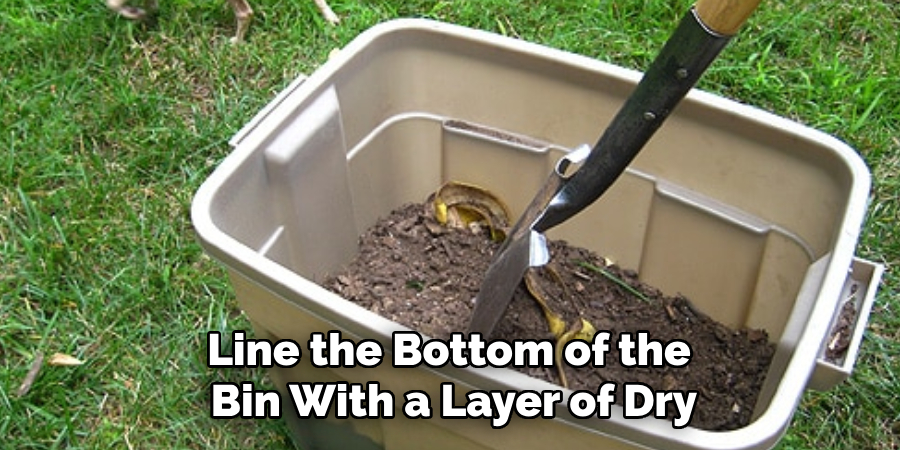
Maintaining a clean compost bin is essential to prevent unwanted odors, pests, and the buildup of harmful bacteria. Start by thoroughly cleaning your bin at least once every few months, using water and mild soap or vinegar to remove any residue or buildup. Rinse it well and allow it to dry completely before adding new materials. To make ongoing maintenance easier, line the bottom of the bin with a layer of dry, absorbent material like shredded newspaper or straw, which will help catch excess moisture and reduce mess. Additionally, be mindful of what you add to your compost bin—stick to approved kitchen and garden waste, and avoid anything that might decay improperly or compromise the quality of your compost.
By following these simple steps, using a countertop compost bin in your kitchen can be an effortless and rewarding way to reduce waste and create nutrient-rich soil for your plants.
5 Things You Should Avoid
- Adding Non-Compostable Items: Avoid putting plastic, glass, or metal into your compost bin. These materials cannot break down biologically, contaminate your compost, or even damage your bin.
- Including Meat, Dairy, or Greasy Foods: Meat, dairy, and oily or greasy residues can attract pests and create unpleasant odors. They are best left out of your countertop compost bin to ensure the process stays clean and efficient.
- Ignoring Moisture Levels: Too much moisture can cause your compost to become soggy and smell foul, whereas too little humidity can prevent proper decomposition. Balancing wet and dry materials is key to effective composting.
- Overloading the Bin: Filling your bin beyond its capacity can lead to poor airflow, slowing the decomposition process and causing odor buildup. Empty your bin into an outdoor pile or collection service regularly.
- Neglecting Regular Cleaning: Your countertop compost bin can become a breeding ground for harmful bacteria and unpleasant smells without proper cleaning. Make it a habit to clean your bin thoroughly on a consistent schedule.
How Often Do You Empty a Countertop Compost Bin?
The frequency of emptying your countertop compost bin depends on the bin size and how much waste your household produces.
Generally, it is recommended to empty the bin every one to two weeks or when it becomes full. This will prevent any odors or pests from developing and keep the decomposition process running smoothly. If your compost is not breaking down effectively or producing an unpleasant smell, consider emptying it more frequently or adjusting your composting methods.
Regular monitoring and maintenance are key to successful composting. So, incorporate this task into your routine for optimal results!
Conclusion
How to use a countertop compost bin is a simple and effective way to reduce household waste while contributing to a more sustainable lifestyle.
By selecting the right bin, maintaining proper composting habits, and consistently emptying and cleaning the bin, you can ensure an efficient and odor-free composting experience. Remember to compost the right items, monitor the decomposition process, and address any issues promptly.
With a little effort and routine care, your countertop compost bin can become invaluable in managing kitchen waste and enriching your garden soil. Start composting today and make a positive impact on the environment!
Professional Focus
Angela Ervin, a former interior designer turned blogger, specializes in kitchen design and renovations. Through her website, she blends her passion for cooking with design expertise, sharing practical and creative ideas. Known for balancing functionality and beauty, Angela’s insightful content has made her a trusted voice in home design and lifestyle.
About the Author
Angela Ervin, an experienced interior designer and blogger, combines her passion for kitchen renovations with storytelling. Living in Petersburg with her family, she enjoys cooking and testing her projects firsthand. Known for her humor and relatable style, Angela shares creative, functional design insights through her content, making her a trusted voice in home design.
Education History
University: Virginia Commonwealth University
Degree: Bachelor of Fine Arts (BFA) in Interior Design
- Angela’s education at VCU focused on mastering core interior design principles, including spatial planning, color theory, materials selection, and sustainable design practices.
- She gained hands-on experience through studio projects and collaborative design exercises, which honed her ability to create functional and aesthetically pleasing environments.
- Her coursework also emphasized problem-solving and practical applications of design, preparing her for real-world projects like her self-directed kitchen renovations.
- The program’s strong foundation in both technical skills and creative expression shaped Angela’s ability to seamlessly integrate form and function in her work.