
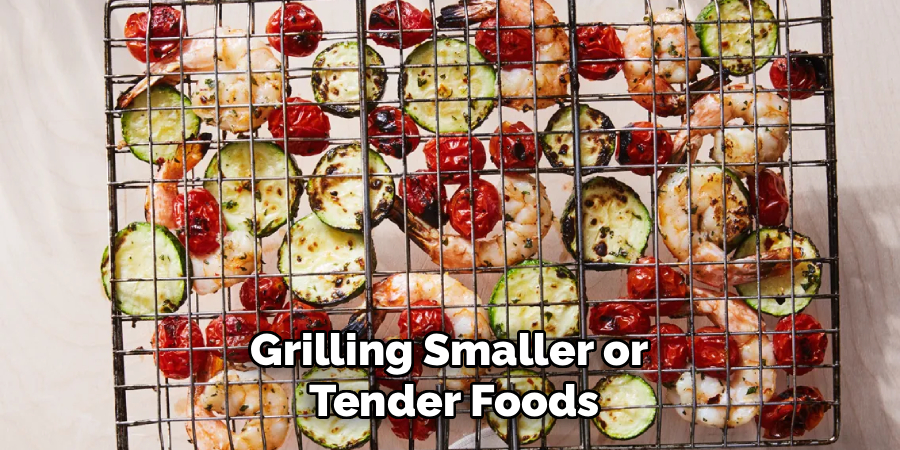
If you’re stepping into the world of grilling, you may find yourself wondering how to cook smaller or more delicate foods without losing them to the flames. A grill basket is the perfect solution. But how to use a grill basket effectively? This versatile tool not only simplifies grilling but also ensures your food cooks evenly and retains its natural flavor. Whether it’s vegetables, seafood, or small cuts of meat, a grill basket offers precision cooking with minimal effort. By the end of this guide, you’ll master proper techniques for using a grill basket and unlock a whole new level of grilling joy.
To get started, first preheat your grill along with the empty grill basket. Preheating helps prevent food from sticking and ensures even cooking. While the grill basket is heating, lightly coat it with a high smoke-point oil to further reduce sticking. Cut your ingredients into uniform pieces, as this promotes consistent cooking and prevents smaller items from slipping through the basket’s mesh. Place the prepared food into the grill basket, ensuring not to overcrowd it, which could hinder air circulation and lead to uneven results.
Why Use a Grill Basket
A grill basket is a game changer for anyone who loves grilling but struggles with foods that are prone to falling apart or slipping through the grates. Picture perfectly roasted cherry tomatoes, tender asparagus, or flavorful shrimp skewers—all cooked evenly and without sticking to your grill. Here’s why using a grill basket is worth considering:
Prevents Food Waste: Small foods like cut vegetables or seafood can easily fall into the fire. A grill basket keeps everything secure.
Even Cooking: The perforated design of grill baskets ensures consistent heat distribution, which gives your food that ideal charred texture.
Saves Time and Effort: No more flipping individual pieces one by one—just toss, turn, and grill!
Versatility: You can use it not only on grills but also over open campfires or in your oven.
Easy Cleanup: Many grill baskets feature nonstick coatings, making cleanup a breeze.
The right technique will help you enjoy all these benefits, and that’s exactly what we’ll cover.
10 Step-by-Step Guide on How to Use a Grill Basket
Mastering the use of a grill basket is easy when you follow these steps. Below is a clear, beginner-friendly guide to help you make the most of this mighty grilling tool.
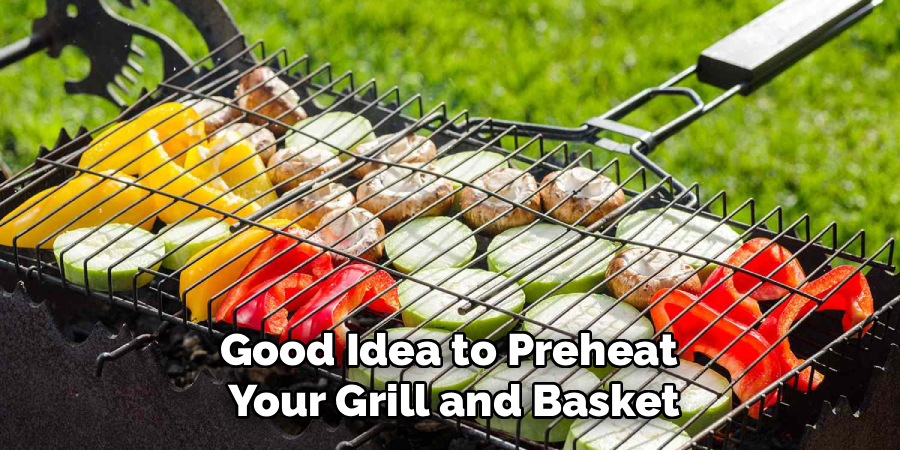
Step 1: Preheat Your Grill Basket
Before you start adding food, it’s a good idea to preheat your grill and basket. Set your grill to medium-high heat and place the basket over the grates for about 5 minutes. This allows the basket to heat up, ensuring that your food cooks evenly and doesn’t stick to the surface.
Step 2: Prepare Your Ingredients
Chop your vegetables, marinate your proteins, or oil your seafood as needed. For best results, cut your ingredients into uniform sizes to ensure everything cooks evenly. For instance, dice zucchini into similarly sized chunks, or peel shrimp so they grill to perfection.
Step 3: Apply Cooking Oil
To prevent food from sticking during grilling, lightly coat your grill basket with cooking oil before adding your ingredients. Use a heat-safe spray or dip a paper towel in oil and rub it over the surface. This step is especially helpful if you’re making sticky foods like marinated chicken.
Step 4: Load the Basket
Now it’s time to transfer your prepared ingredients into the grill basket. Avoid overcrowding, as doing so can lead to uneven cooking. Instead, spread the food in a single, even layer. For thicker cuts of veggies or meat, leave some space between pieces to allow heat to circulate.
Step 5: Place Basket on the Grill
Position your loaded basket on the grill. If you’re grilling delicate items, use an indirect heat zone to avoid burning the food. Close the grill lid to maintain consistent heat and monitor your food as it cooks.
Step 6: Toss or Stir Frequently
Depending on what you’re grilling, you’ll want to toss or shake the basket every few minutes. Use long-handled tongs or a spatula to stir the food, ensuring all sides are exposed to the heat for even cooking.
Step 7: Monitor Cooking Time
Grilling smaller or tender foods often takes less time than you expect. Keep an eye on them and adjust cooking durations based on individual preferences. For example, zucchini chunks might only need 10 minutes, while shrimp cooks in 3–5 minutes.
Step 8: Remove the Basket Carefully
Once your food is fully cooked, use oven mitts or heat-resistant gloves to remove the basket from the grill. Be cautious—it will be extremely hot. Transfer the contents to a serving bowl or plate.
Step 9: Season and Serve
This is the fun part! Sprinkle your favorite seasonings or a squeeze of lemon on your grilled items before serving. The grill basket locks in delicious, smoky flavors, so all that’s left is to enjoy your creation.
Step 10: Clean the Basket
After the meal, don’t forget to clean your grill basket. Allow it to cool completely, then soak it in warm, soapy water. A quick scrub with a soft-bristle brush will remove any stuck-on food easily. Proper care prolongs the life of your grill basket and keeps it ready for your next BBQ adventure.
Grill Basket Recipe Ideas
Looking for inspiration for your grill basket? Here are some delicious recipe ideas to get you started:
Mediterranean Veggie Mix
Combine zucchini, cherry tomatoes, bell peppers, red onion, and olives. Toss with olive oil, garlic, oregano, and a pinch of salt for a vibrant, flavorful side dish.
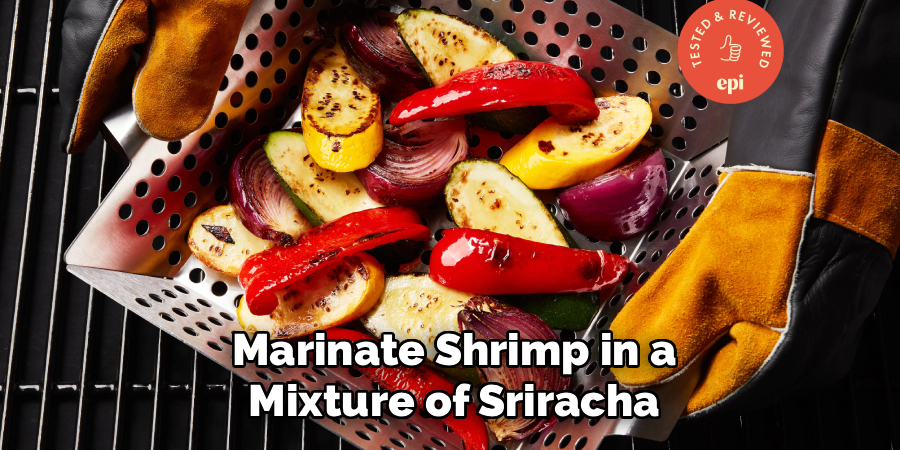
Spicy Shrimp and Veggies
Marinate shrimp in a mixture of sriracha, honey, lime juice, and soy sauce. Add pieces of corn, bell peppers, and snap peas to the basket for a perfect blend of heat and sweetness.
Grilled Breakfast Hash
Chop up baby potatoes, onions, bell peppers, and turkey sausage. Toss with olive oil, garlic powder, and paprika, and grill until crispy and tender.
Sweet and Savory Pineapple Mix
Combine chunks of pineapple, red onion, and bell peppers. Add a drizzle of teriyaki sauce for a sweet and tangy side or topping for grilled meat.
Herbed Mushrooms and Asparagus
Toss button mushrooms and asparagus with melted butter, minced garlic, and fresh thyme. Cook until tender and slightly charred for a simple yet elegant dish.
Experiment with these ideas or mix and match ingredients to create your own signature grilled basket masterpiece!
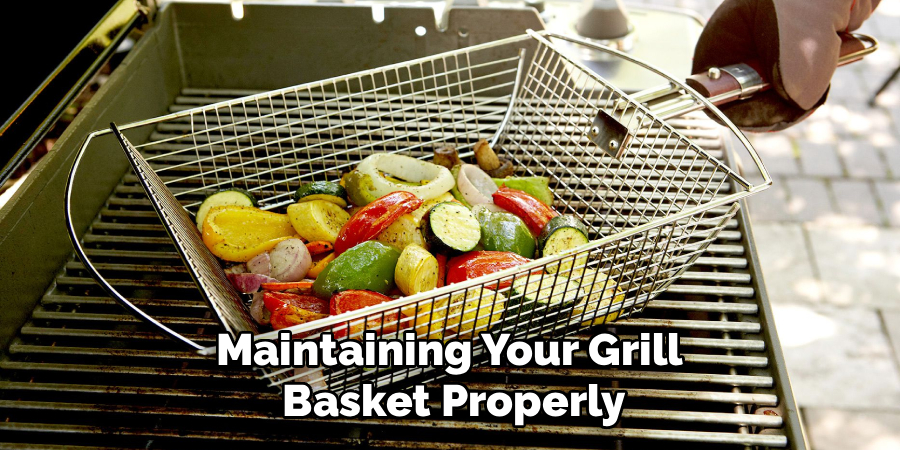
Grill Basket Cleaning Tips
To keep your grill basket in great condition and ensure the best cooking results, follow these simple cleaning tips:
Pre-soak Before Cleaning: After grilling, allow the basket to cool down slightly, then soak it in warm, soapy water to loosen any stuck-on food particles.
Use a Soft Brush or Sponge: Scrub the basket gently with a soft brush or non-abrasive sponge to avoid damaging the surface. Avoid steel wool, as it can scratch the finish.
Remove Tough Residue: For stubborn charred bits, create a paste with baking soda and water, apply it to the affected areas, and scrub gently.
Avoid Harsh Chemicals: Stick to mild dish soap and natural cleaners to protect both the material and your health.
Dry Thoroughly: Once clean, rinse off all soap, dry the basket completely with a towel, and store it in a dry place to prevent rust.
By maintaining your grill basket properly, you’ll extend its life and keep it ready for your next culinary adventure!
Frequently Asked Questions
1. Can I use a grill basket on any type of grill?
Yes, grill baskets are compatible with most grills, including gas, charcoal, and even electric models. Their design is versatile, and they can also be used over an open fire. Just ensure you follow the manufacturer’s temperature guidelines to avoid damage.
2. Do I need to oil the grill basket every time I use it?
Oiling the grill basket is highly recommended, especially when working with sticky or marinated foods. It minimizes sticking and makes cleanup easier. Even if the basket has a nonstick coating, a light layer of oil won’t hurt.
3. What foods can be cooked in a grill basket?
A grill basket is perfect for grilling vegetables like peppers, zucchinis, mushrooms, and onions, as well as smaller proteins like shrimp or cubed chicken. You can even use it for roasting nuts, toasting bread, or grilling delicate fish fillets.
4. How do I prevent my food from burning in the grill basket?
To prevent burning, avoid overcrowding the basket, use indirect heat for delicate items, and toss or stir your food regularly. You can also keep a spray bottle of water handy to manage flare-ups from marinades dripping onto the grill.
5. Can you put aluminum foil inside a grill basket?
Yes, lining a grill basket with aluminum foil is an option if you’re grilling foods that might release a lot of liquid or stick, like marinated tofu. However, keep in mind that foil may block some heat and reduce the desired charring effect.
Conclusion
Cooking with a grill basket adds convenience and versatility to your grill sessions, ensuring perfectly cooked dishes every time. Whether you’re grilling savory vegetables, tender seafood, or other delicate ingredients, this tool simplifies the process while enhancing flavors. Now that you know exactly how to use a grill basket, it’s time to put your newfound knowledge to the test. Grab your favorite ingredients, fire up the grill, and enjoy the satisfying results of your next culinary masterpiece!
Experimenting with different marinades and seasonings can elevate your grilling experience even further. From tangy citrus blends to smoky barbecue rubs, the right flavors can complement your ingredients and create an unforgettable meal. Don’t be afraid to mix and match spices to discover your signature grill basket recipe. The possibilities are as endless as your creativity!
Professional Focus
Angela Ervin, a former interior designer turned blogger, specializes in kitchen design and renovations. Through her website, she blends her passion for cooking with design expertise, sharing practical and creative ideas. Known for balancing functionality and beauty, Angela’s insightful content has made her a trusted voice in home design and lifestyle.
About the Author
Angela Ervin, an experienced interior designer and blogger, combines her passion for kitchen renovations with storytelling. Living in Petersburg with her family, she enjoys cooking and testing her projects firsthand. Known for her humor and relatable style, Angela shares creative, functional design insights through her content, making her a trusted voice in home design.
Education History
University: Virginia Commonwealth University
Degree: Bachelor of Fine Arts (BFA) in Interior Design
- Angela’s education at VCU focused on mastering core interior design principles, including spatial planning, color theory, materials selection, and sustainable design practices.
- She gained hands-on experience through studio projects and collaborative design exercises, which honed her ability to create functional and aesthetically pleasing environments.
- Her coursework also emphasized problem-solving and practical applications of design, preparing her for real-world projects like her self-directed kitchen renovations.
- The program’s strong foundation in both technical skills and creative expression shaped Angela’s ability to seamlessly integrate form and function in her work.