
Using a meat thermometer is essential for ensuring perfectly cooked meat, whether you’re preparing a juicy roast or a tender chicken.
It takes the guesswork out of cooking by providing an accurate internal temperature reading, helping you achieve the desired level of doneness while also ensuring food safety. A meat thermometer can be a handy tool in the kitchen, especially when used correctly in the oven.
This guide on how to use meat thermometer in oven will walk you through the steps to use a meat thermometer effectively and make your cooking process smoother.
Types of Meat Thermometers
There are several types of meat thermometers available, each suited for different cooking needs:
Digital Instant-Read Thermometers:
These thermometers provide a quick and accurate reading of the internal temperature of your meat. They are perfect for checking the doneness of thin cut meats like steaks, chicken breasts, and fish fillets.
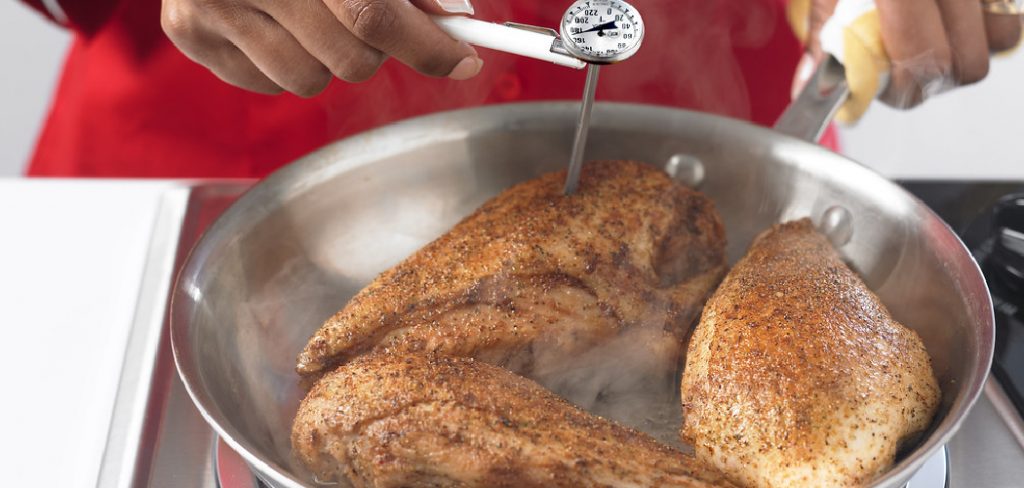
Dial Oven-Safe Thermometers:
These thermometers are designed to stay in the meat while it cooks in the oven. They have a dial display that shows the temperature, which can be read through the oven door without opening it.
Leave-In Probe Thermometers:
These thermometers come with a probe that is inserted into the meat and left in during cooking. The base unit stays outside of the oven and displays the temperature reading.
8 Step-by-step Guides on How to Use Meat Thermometer in Oven
Step 1: Choose Your Meat Thermometer
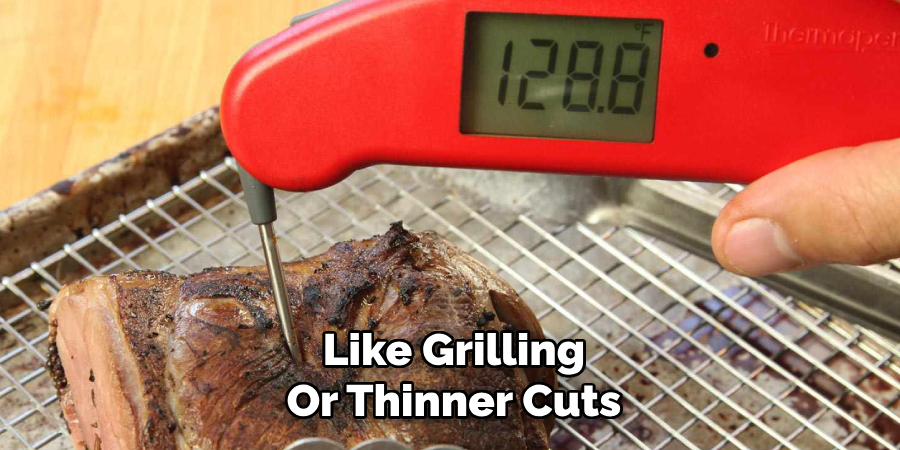
Select the type of meat thermometer best suited for your cooking needs. If you’re cooking large cuts of meat like roasts or whole poultry, a leave-in probe thermometer or a dial oven-safe thermometer may be ideal since they can remain in the meat throughout the cooking process.
For quicker tasks like grilling or thinner cuts, a digital instant-read thermometer will work well for fast and accurate readings. Make sure the thermometer you choose is designed to handle the temperatures you’ll be working with and fits comfortably with your cooking setup.
Step 2: Prepare Your Meat
Before inserting the meat thermometer, ensure that your meat is properly prepared for cooking. For accurate readings, pat the meat dry with paper towels to remove excess moisture, which can affect the temperature reading. If you’re seasoning your meat, do so before inserting the thermometer to avoid disturbing the placement later.
Make sure the meat is at room temperature for even cooking, especially for larger cuts like roasts or whole birds. Proper preparation sets the foundation for accurate temperature monitoring and helps you achieve perfectly cooked meat.
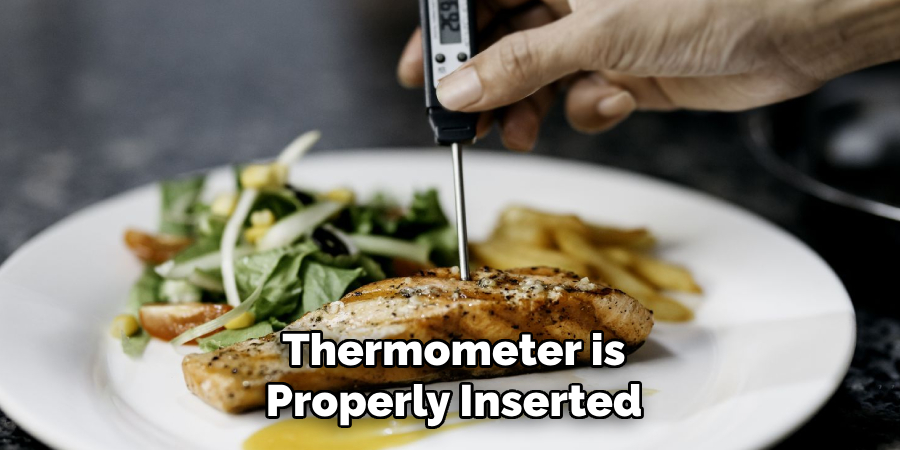
Step 3: Insert the Thermometer
Insert the thermometer into the thickest part of the meat, making sure it’s not touching any bones or fat. For whole birds and large roasts, make sure to insert the thermometer in multiple spots for accurate readings.
For instant-read thermometers, insert the probe at a 45-degree angle until it reaches the center of the thickest part of the meat. For dial oven-safe thermometers, insert them straight into the center of the thickest part.
Step 4: Place Your Meat in the Oven
Once the thermometer is properly inserted, carefully place your meat into the oven. Position it on a roasting rack or a baking sheet to allow proper airflow and even cooking. Ensure that the thermometer probe or dial is easily visible or accessible through the oven door if you’re using a leave-in thermometer.
Keep the oven door closed as much as possible to maintain a consistent temperature, which is critical for accurate cooking. Monitor the temperature reading periodically if needed, but avoid frequent interruptions to maintain optimal cooking conditions.
Step 5: Cook Your Meat
Follow your recipe for the recommended cooking time and temperature. Keep an eye on the thermometer reading throughout to ensure it’s in the ideal range for the type of meat you’re cooking. Refer to a food safety temperature chart for safe internal temperatures for different types of meat.
Baste or turn your meat as needed but avoid moving or turning it too often, which can affect the placement and accuracy of the thermometer. When using instant-read thermometers, insert them into a different spot each time you check the temperature to ensure an accurate average reading.
Step 6: Check Meat Doneness
When your meat is close to being done, use your thermometer to check the internal temperature for doneness.
Take multiple readings from different spots, especially if you’re cooking large cuts of meat. Refer to a safe minimum internal temperature chart or recipe guidelines to determine when your meat is cooked to your desired level of doneness.
Step 7: Remove Meat from Oven
Once your meat reaches the desired internal temperature, carefully remove it from the oven. Use oven mitts and handle with care, as both the meat and the thermometer will be hot.
If using a leave-in probe thermometer, ensure that it’s removed along with the meat. For dial oven-safe thermometers, make sure they are readjusted to zero before taking them out of the meat. For instant-read thermometers, clean and sanitize the probe before using it on other foods.
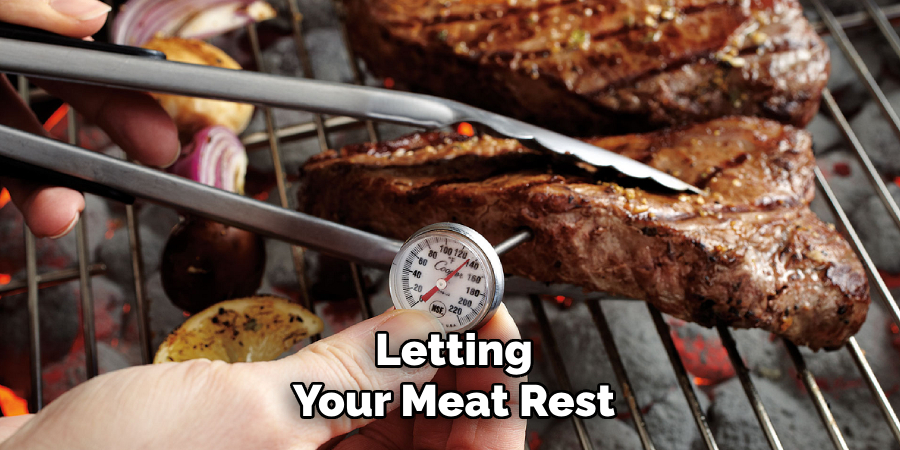
Step 8: Let Meat Rest
Letting your meat rest for a few minutes after cooking allows the juices to redistribute, resulting in a juicier and more flavorful dish. Use this time to finish any side dishes or prepare serving plates.
Avoid cutting into the meat immediately as it can cause the juices to escape, resulting in drier meat. After resting, use your thermometer one final time to ensure that your meat has reached its recommended safe internal temperature.
Following these simple steps on how to use meat thermometer in oven will help you make the most out of your meat thermometer in the oven and ensure perfectly cooked meats every time. Remember to always clean and sanitize your thermometer after each use to maintain food safety standards. Happy cooking!
Benefits of Using a Meat Thermometer in Oven
Not only does using a meat thermometer help you achieve perfectly cooked meat, but it also has other benefits such as:
Food Safety:
A meat thermometer helps you ensure that your meat is cooked to a safe internal temperature, reducing the risk of foodborne illnesses. This is especially important for meats like poultry, which can contain harmful bacteria if not cooked properly.
Consistency:
Using a meat thermometer allows you to consistently cook your meat to the desired level of doneness every time. This eliminates the guesswork and helps you avoid undercooked or overcooked meat.
Time-Saving:
With a meat thermometer, you can accurately monitor the temperature of your meat without repeatedly opening the oven door, saving time and maintaining consistent cooking conditions.
Versatility:
Meat thermometers can be used for various types of meats and cooking methods, making them a versatile tool in the kitchen. Some models even have programmable settings for different types of meat, making it easier to achieve perfectly cooked results.
Cost-Effective:
By preventing overcooked or undercooked meat, using a meat thermometer can save you money by avoiding wasted food and ingredients.
Frequently Asked Questions
Q: Can I Use a Meat Thermometer in the Oven for Other Types of Food Besides Meat?
A: Yes, you can also use a meat thermometer to monitor the temperature of foods like casseroles, bread, and cakes when baking in the oven.
Q: How Do I Know When My Meat is Done Cooking?
A: Refer to a safe minimum internal temperature chart or recipe guidelines for recommended cooking times and temperatures for different types of meat. Use your thermometer to check the internal temperature for doneness before removing it from the oven.
Q: Can I Leave the Thermometer in the Meat While It’s Cooking?
A: It depends on the type of thermometer you’re using. Instant-read thermometers should only be inserted briefly to take a reading, while leave-in probe thermometers can remain inside the meat during cooking as long as they are oven-safe.
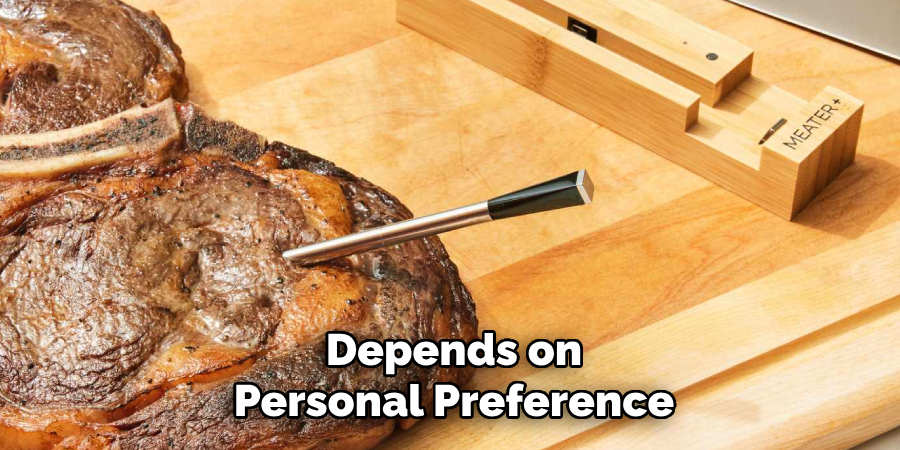
Q: What is the Best Type of Meat Thermometer to Use in the Oven?
A: It ultimately depends on personal preference, but some popular types include instant-read, leave-in probe, and dial oven-safe thermometers. Choose one that has a range of temperatures suitable for the types of meat you commonly cook.
Conclusion
Using a meat thermometer in the oven is an essential practice for achieving perfectly cooked and safe-to-eat meals. It takes the guesswork out of cooking and ensures that your meat is consistently cooked to the desired doneness while adhering to food safety standards.
Whether you’re a seasoned chef or a home cook, incorporating this tool into your kitchen routine not only enhances the quality of your dishes but also saves time and reduces food waste.
With its versatility and ease of use, a meat thermometer is a valuable investment for anyone who enjoys cooking. By following the steps on how to use meat thermometer in oven outlined above and properly maintaining your thermometer, you can confidently prepare delicious, restaurant-quality meals right at home.
You can check it out : restore oven
Professional Focus
Angela Ervin, a former interior designer turned blogger, specializes in kitchen design and renovations. Through her website, she blends her passion for cooking with design expertise, sharing practical and creative ideas. Known for balancing functionality and beauty, Angela’s insightful content has made her a trusted voice in home design and lifestyle.
About the Author
Angela Ervin, an experienced interior designer and blogger, combines her passion for kitchen renovations with storytelling. Living in Petersburg with her family, she enjoys cooking and testing her projects firsthand. Known for her humor and relatable style, Angela shares creative, functional design insights through her content, making her a trusted voice in home design.
Education History
University: Virginia Commonwealth University
Degree: Bachelor of Fine Arts (BFA) in Interior Design
- Angela’s education at VCU focused on mastering core interior design principles, including spatial planning, color theory, materials selection, and sustainable design practices.
- She gained hands-on experience through studio projects and collaborative design exercises, which honed her ability to create functional and aesthetically pleasing environments.
- Her coursework also emphasized problem-solving and practical applications of design, preparing her for real-world projects like her self-directed kitchen renovations.
- The program’s strong foundation in both technical skills and creative expression shaped Angela’s ability to seamlessly integrate form and function in her work.