
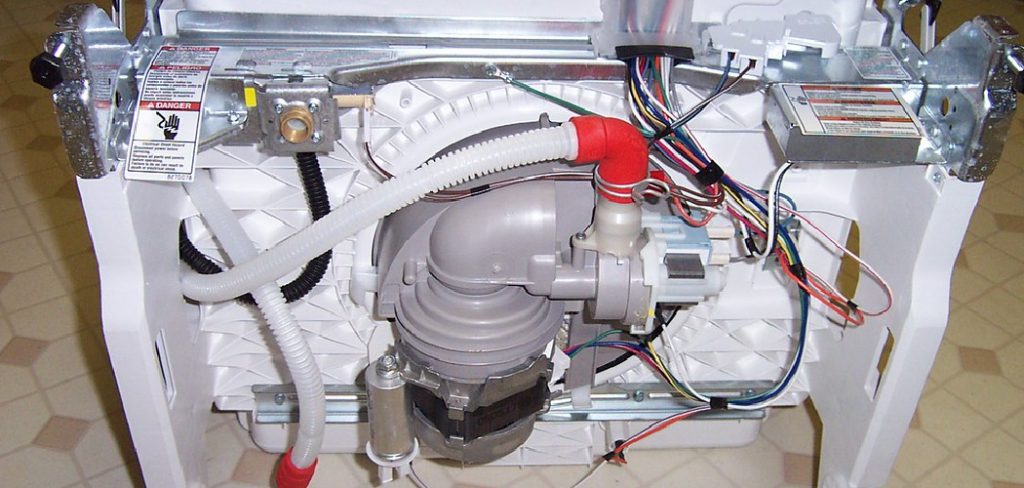
Installing a dishwasher involves connecting both the electrical wiring and the water supply to ensure it functions properly. While this may seem like a daunting task, with the right tools and a clear understanding of the steps involved, it can be a straightforward process. This guide will walk you through the basics of how to wire a dishwasher safely and efficiently, helping you complete the installation with confidence. Always remember to follow safety precautions and consult professional assistance if needed.
Why Proper Wiring is Crucial
Proper wiring is essential for the safe and reliable operation of your dishwasher. Incorrect wiring can lead to electrical hazards such as short circuits, power surges, or even fire risks. Additionally, improper connections may cause the appliance to malfunction, leading to potential damage to the dishwasher itself or your home’s electrical system. Ensuring that the wiring is correctly installed also helps in optimizing the performance and lifespan of your dishwasher, as it ensures a steady and sufficient power supply. By taking the time to wire your dishwasher properly, you can avoid costly repairs, ensure safety, and enjoy the convenience of a well-functioning appliance for years to come.
Understanding Dishwasher Electrical Requirements
Before wiring your dishwasher, it’s essential to understand its electrical requirements to ensure a safe and proper connection. Most dishwashers operate on a 120-volt electrical circuit, typically requiring a dedicated 15- or 20-amp circuit. Using a dedicated circuit prevents overloading other electrical systems in your home.
The wiring should include a ground connection to ensure safety and compliance with electrical codes. Additionally, some dishwashers may have specific plug-in or hardwire setups, so it’s crucial to check the manufacturer’s instructions for compatibility. Ensure that the power supply is turned off at the circuit breaker before you begin any wiring work to eliminate the risk of electric shock. Understanding these requirements beforehand will help streamline the installation process and ensure the dishwasher functions efficiently.
10 Methods How to Wire a Dishwasher
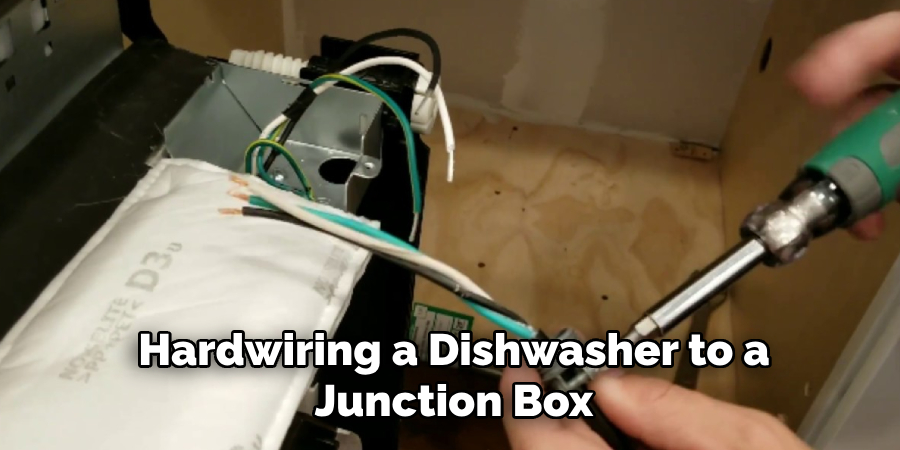
1. Hardwiring a Dishwasher to a Junction Box
One of the most common ways to wire a dishwasher is through hardwiring directly to a junction box. This method is often used in new home constructions or kitchen remodels. To start, turn off the power at the breaker box to avoid electrical hazards. Locate the electrical junction box under the sink or behind the dishwasher.
Strip about ½ inch of insulation from the dishwasher’s black (hot), white (neutral), and green (ground) wires. Connect these to the corresponding house wires using wire nuts: black to black, white to white, and green to the ground screw or copper wire. Secure the connections inside the junction box, then mount the box in a safe location.
2. Plugging a Dishwasher into a Dedicated Outlet
If your home has a designated outlet under the sink, you can simply connect your dishwasher using a power cord. Many dishwashers do not come with a plug, so you will need to purchase a compatible one. To install, first turn off the power. Remove the bottom panel of the dishwasher to access the wiring terminals.
Attach the hot (black), neutral (white), and ground wires from the cord to the corresponding terminals, securing them with wire nuts. Feed the cord through the strain relief clamp and tighten it. Plug the cord into the dedicated outlet and restore power to test the connection.
3. Using a Dishwasher Power Cord Kit
A dishwasher power cord kit includes a plug and pre-stripped wire ends, making installation easier. First, turn off the circuit breaker. Open the dishwasher’s lower access panel and locate the wiring terminals. Connect the black wire from the power cord to the black wire on the dishwasher, the white wire to the white wire, and the green ground wire to the ground screw. Secure with wire nuts and feed the cord through the strain relief clamp. Plug the cord into a designated outlet and turn the power back on to test.

4. Wiring to a Switch-Controlled Circuit
Some homeowners prefer to wire dishwashers to a wall switch for added control. To do this, turn off the power and access the dishwasher’s wiring terminals. Run a dedicated power line from the circuit breaker to the switch, then from the switch to the dishwasher. Connect the hot wire (black) to the switch’s terminal, then continue it to the dishwasher’s hot terminal. The neutral (white) and ground wires should run directly from the breaker to the dishwasher. Once complete, turn on the breaker and test the switch operation.
5. Connecting Through a Dual-Outlet Receptacle
If you have a garbage disposal sharing the same circuit as the dishwasher, a dual-outlet receptacle can be used. First, shut off power at the breaker. Install a dual-receptacle outlet under the sink. Connect the line wire from the breaker to the hot side of the receptacle. Attach the dishwasher plug to one outlet and the garbage disposal plug to the other. Ensure the receptacle is rated for the combined load to prevent circuit overloads.
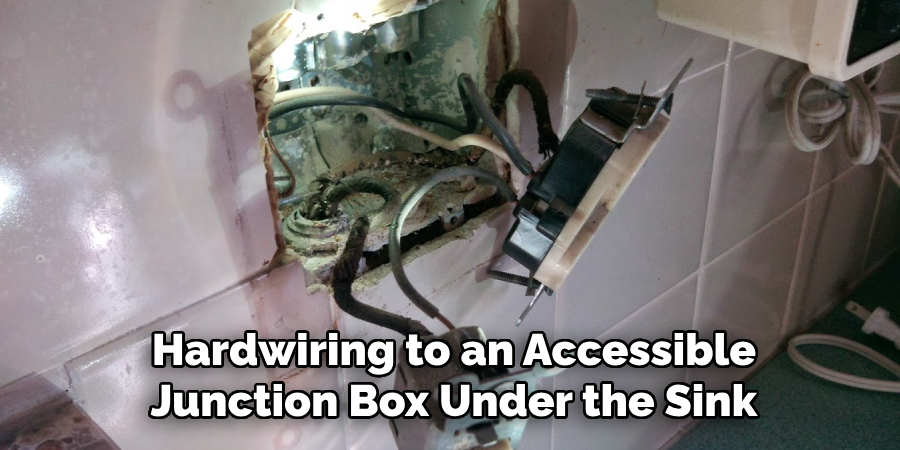
6. Hardwiring to an Accessible Junction Box Under the Sink
Some homes have a pre-installed junction box under the sink for hardwired appliances. To wire the dishwasher, first turn off power at the breaker. Run the dishwasher’s electrical cable through a conduit to the junction box. Inside the box, connect black to black, white to white, and green to the ground terminal. Secure all connections with wire nuts and tuck them inside the box before securing the cover.
7. Installing a GFCI Outlet for Dishwasher Safety
To meet modern electrical safety codes, many jurisdictions require dishwashers to be plugged into a GFCI (Ground Fault Circuit Interrupter) outlet. If your dishwasher is near a water source, install a GFCI outlet under the sink. Connect the black wire from the breaker panel to the brass screw on the outlet, the white wire to the silver screw, and the ground wire to the green screw. Plug the dishwasher into this outlet for enhanced safety.
8. Running a Dedicated Circuit for the Dishwasher
If your kitchen’s electrical panel allows, running a dedicated 15-amp or 20-amp circuit is ideal for a dishwasher. Turn off the main breaker and install a new circuit breaker. Run a 12/2 or 14/2 electrical wire from the panel to the dishwasher location. Inside the dishwasher’s junction box, connect the black wire to hot, the white to neutral, and the green to ground. This setup ensures that the dishwasher runs independently without overloading other kitchen circuits.

9. Connecting a Smart Dishwasher with Wi-Fi Controls
Modern dishwashers often come with smart features that require an additional low-voltage power source. To wire a smart dishwasher, follow standard hardwiring or plug-in methods, but also connect the unit’s control module to a 24V transformer if required. Ensure your home’s Wi-Fi and power supply meet the dishwasher’s specifications for seamless operation.
10. Installing a Timer-Controlled Power Supply
For energy efficiency, some homeowners prefer to connect the dishwasher to a timer switch. This method involves wiring a timer switch in line with the dishwasher’s power supply. First, turn off the power and install the timer switch between the breaker and the dishwasher wiring.
Connect the hot wire from the breaker to the timer’s input, and another hot wire from the timer’s output to the dishwasher. The neutral and ground wires should run directly from the breaker to the dishwasher. This setup allows the dishwasher to operate only during set time periods, reducing energy consumption.
Maintenance and Upkeep
Regular maintenance is essential to ensure your dishwasher operates efficiently and lasts for years. Begin by cleaning the filters and drain area monthly to prevent clogs caused by food residue. Use a damp cloth to wipe down the door seals and edges, as debris can accumulate and lead to poor sealing and leaks. Run a cleaning cycle with a dishwasher-safe cleaner or a mixture of vinegar and baking soda to remove mineral buildup and odors.
Check the spray arms periodically and remove any debris clogging the nozzles to ensure proper water flow. Inspect the hoses and connections for signs of damage or leaks, replacing them as needed. Finally, monitor the dishwasher’s performance and address unusual noises or prolonged cycles promptly to prevent larger issues from developing. Regular attention to these factors can extend the life and effectiveness of your appliance.
Conclusion
Wiring a dishwasher requires careful planning and attention to electrical codes. Whether you choose to hardwire, plug into an outlet, use a timer switch, or integrate smart technology, ensuring proper electrical connections is crucial for safe operation.
Always turn off power before starting, use the correct wire sizes, and consult local regulations or an electrician if needed. By selecting the appropriate method, you can ensure your dishwasher functions efficiently and safely for years to come. So, there you have it – a quick and easy guide on how to wire a dishwasher.
Professional Focus
Angela Ervin, a former interior designer turned blogger, specializes in kitchen design and renovations. Through her website, she blends her passion for cooking with design expertise, sharing practical and creative ideas. Known for balancing functionality and beauty, Angela’s insightful content has made her a trusted voice in home design and lifestyle.
About the Author
Angela Ervin, an experienced interior designer and blogger, combines her passion for kitchen renovations with storytelling. Living in Petersburg with her family, she enjoys cooking and testing her projects firsthand. Known for her humor and relatable style, Angela shares creative, functional design insights through her content, making her a trusted voice in home design.
Education History
University: Virginia Commonwealth University
Degree: Bachelor of Fine Arts (BFA) in Interior Design
- Angela’s education at VCU focused on mastering core interior design principles, including spatial planning, color theory, materials selection, and sustainable design practices.
- She gained hands-on experience through studio projects and collaborative design exercises, which honed her ability to create functional and aesthetically pleasing environments.
- Her coursework also emphasized problem-solving and practical applications of design, preparing her for real-world projects like her self-directed kitchen renovations.
- The program’s strong foundation in both technical skills and creative expression shaped Angela’s ability to seamlessly integrate form and function in her work.